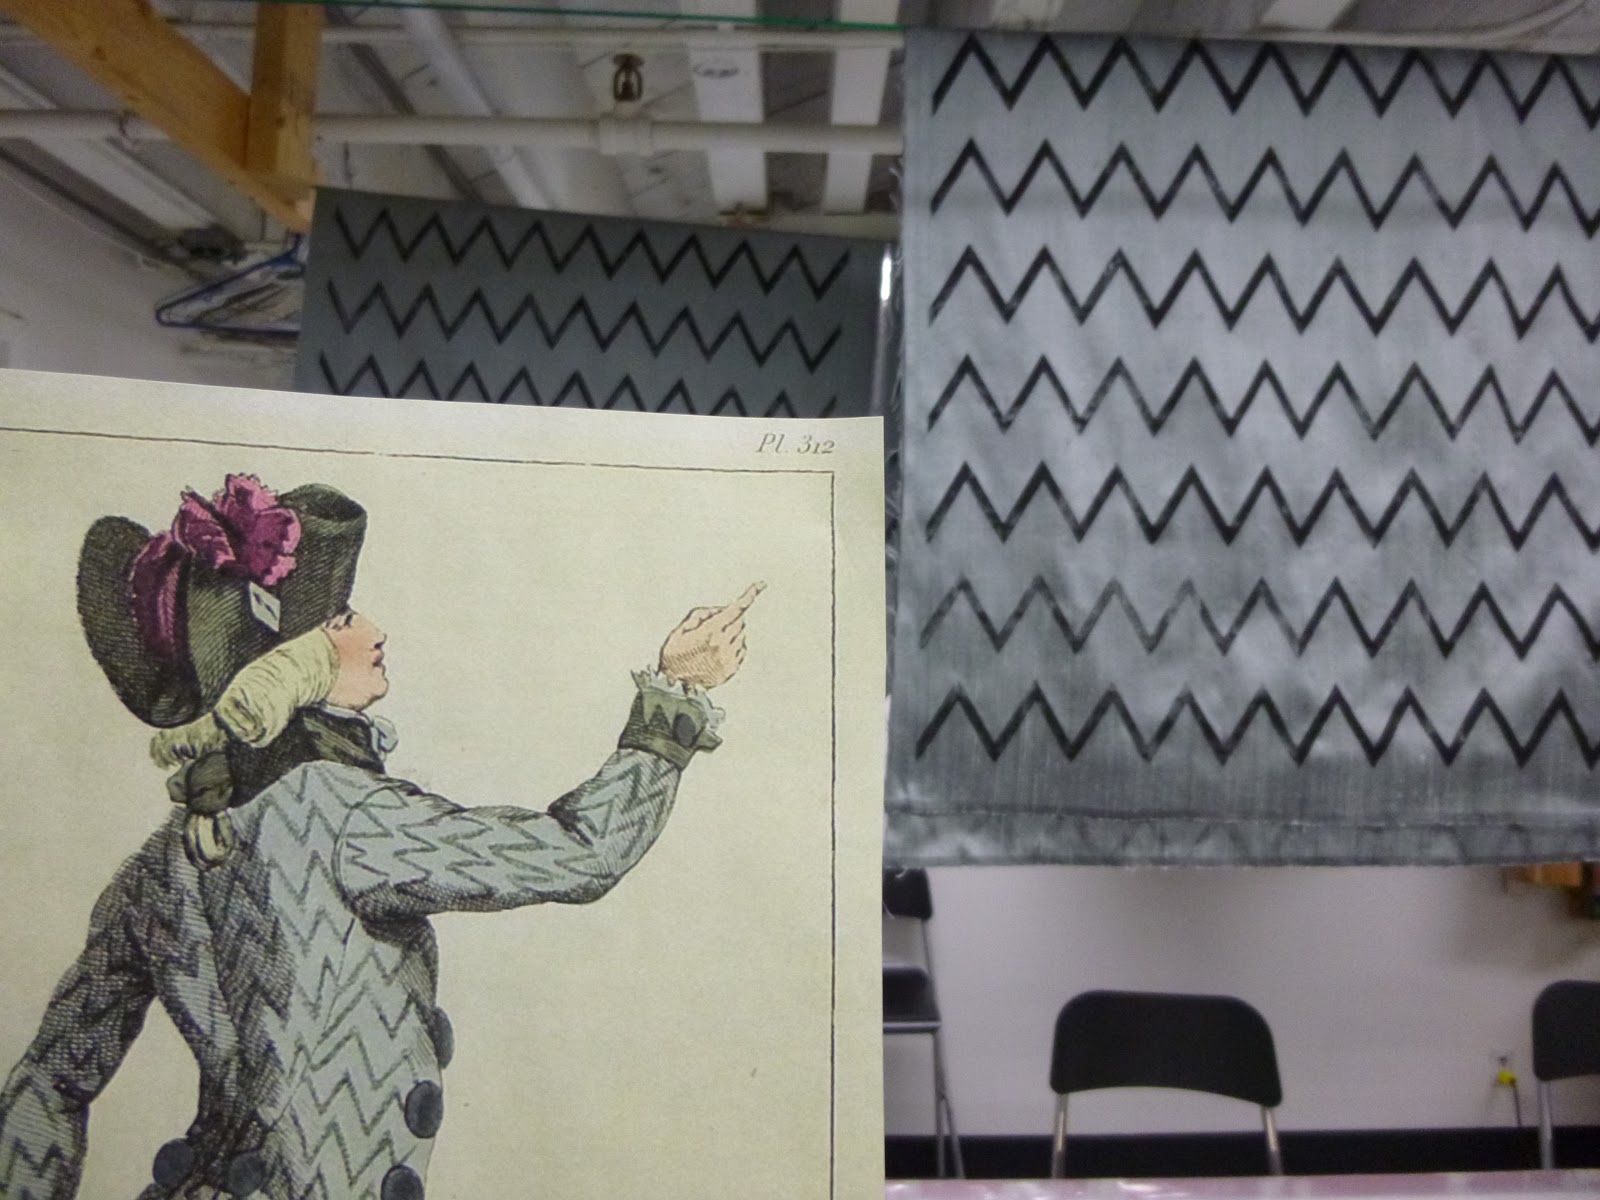
I don't know why it's called a zebra coat in the description. The zig-zag patterns remind me more of feathers on a grey bird, but I guess the staff at Galerie Des Modes had other ideas.
This coat is the final piece of the outfit from my favorite fashion plate. (Though I would like to make a coordinating black & burgundy waistcoat for it someday too.)
 |
"Young Officer in a Zebra Coat, calling someone to give an account of his services."
Galerie des Modes, 1789. Source |
I had a few meters of grey silk dupioni in my stash, which is unfortunately lumpy, but the perfect colour for the coat in the plate. I made a block by cutting zig-zags out of this sticky backed rubber sheet and sticking them on a scrap of wood. I figured out how much fabric my coat would need, and then printed it all with black Speedball fabric printing ink.
 |
Printing!
I measured out all the placement, and it lined up pretty darn well. |
In the end I think my measurements were a bit off, and the zig zags turned out slightly further apart than the ones in the inspiration picture, but oh well.
 |
| Fabric hanging up to dry. |
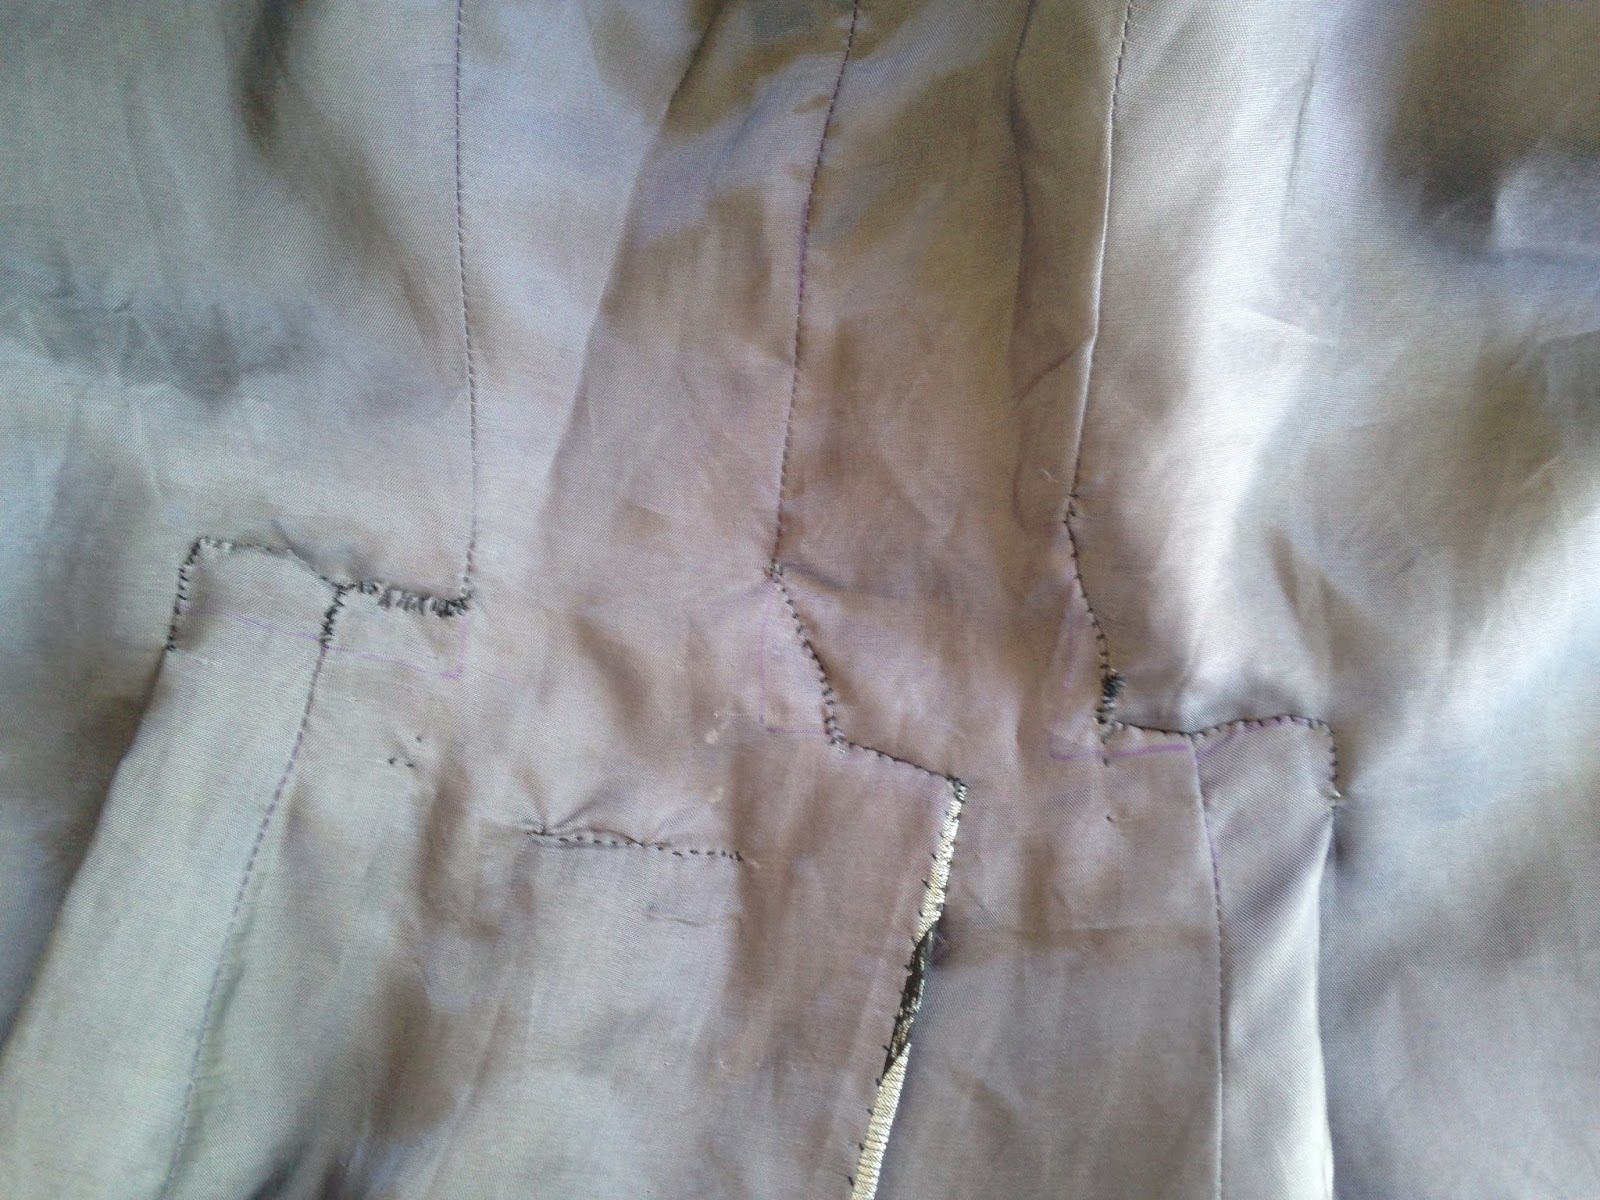
I used the same pattern that I cut my
first frock coat from, but with a few alterations. I added some width to the shoulders, made the collar a bit narrower, and added a second piece to it because the one in the plate looks like a 2 piece collar. The collar and cuffs are both black silk dupioni of a less lumpy variety.
 |
| There's an extra layer of interfacing along the front edge, which you can sort of see in this picture. |
I interfaced most of the front, and the top part of the back pieces. I interfaced the top of the sleeves too, which I was a bit unsure about, but I wanted the shoulder area to look nice and crisp without causing too much bulk at the elbow. I later ended up adding some bits of interfacing to the ends of the sleeve right where the cuff attaches.
All the major construction seams are machine sewn.
 |
| Definitely not historically accurate, but it's mostly just the look that I'm gong for with this coat. |
The cuffs ended up being pretty annoying to do. In the plate, it looks like it's just a rectangle stuck on the end of the sleeve, and left open at the seam. I haven't found a cuff like this on any extant coats, but went ahead and did it this way anyway. I hand stitched my zig-zaggy bands of grey dupioni onto black dupioni cuffs.
Then I carefully hand stitched them down to the sleeve, only to realize the sleeves were several centimeters longer than they should have been. I have no idea how this happened.
 |
| The attached cuff, and the blue line marking where the cuff is supposed to start. |
I picked them off and re-sewed them at the correct length. But I had already folded over the cuff ends and sewn them down to the end of the sleeve, and in my frustration I trimmed back all the layers there when I moved the cuff. Plus I realized that my zig-zaggy band had only a tiny bit of extra fabric on the end that folds under, which left me with next to no space to attach my sleeve lining. The lining should have been at least 2cm up from the cuff edge, but I had to put it 1mm away because I wasn't thinking ahead.
 |
Argh! Terrible mistake!
And re-doing this would have meant completely redoing the hand sewn zig zag strips. |
I found the collar was a bit longer than I wanted it, so I had to alter it too. It also didn't occur to me to add the second piece until the collar stand was already cut out and sewn.
 |
| A very poorly planned collar in progress. |
The whole coat is lined in rayon bemberg, which is another regrettable decision. It's so fine and slippery that it sags under the coat tails more than it should. The linen I lined my first coat in makes getting my arms into the sleeves difficult, but looks so much better in the main body.
(I also had to cut and sew the lining twice, because the first time around I had it hand stitched to the front edges before realizing that I hadn't washed it, and that any water would shrink it too much to be usable. I sprayed water on it to confirm this before removing it.)
On my first coat I did the back vent incorrectly. With this one I checked some extant examples, and found that the ends needed to be overlapped and stitched down flat, rather than both folded under. (Extant examples are
here,
here,
here, and
here.) I think I may have to make some alterations to my first coat.
I sewed the armhole of the lining to the seam, and then sewed the sleeve onto that, so it won't move around.
I also learned that I've been doing covered buttons incorrectly. All the covered buttons I'd done up till now had big bunched of frayed fabric behind them, but halfway through covering these I came across a post and a
video tutorial that showed how you're supposed to turn the edges under when you gather them up.
So I picked my 7 button covers off and re-did them, and covered the rest. (I'm also considering doing the same with my
embroidered waistcoat buttons. I can still use the same fabric coverings, so it wouldn't be too horrible.)
 |
| I was pleased with how much tighter the coverings were this way. |
I used 1.5 inch wooden discs I found
on etsy. Sites that sell discs specifically for button blanks don't have them that big, but I fortunately found plenty of other places selling "wooden discs for crafting". I got a package of 53 discs for fairly cheap, so I'm all set for my next few coats. No more sanding down slices of chair leg!
They were awkward to sew on, but they sit nice and close to the fabric. I think they might be easier to sew on if I used a curved needle.
Here is the finished coat, being worn with my
cocked hat,
pink breeches,
ill fitting dinosaur waistcoat, and
striped stockings.
I realized when looking at these photos that my hat looks rather bad from the back. The bottom shouldn't curve up like that. Next one will be better.
I didn't get the back seam 100% symmetrical, but the pocket flaps are lined up almost perfectly.
 |
| I'm guessing the artist didn't draw that plate from a real live model. |
I tried to copy the pose in the plate, but found it very awkward and unnatural. The coat also didn't sit the same way.
I finished this just in time for the Fashion Plate
HSM challenge, and already posted it in the facebook album. The facts:
What the item is: A frock coat
The Challenge: #7- Fashion plate
Fabric/Materials: Grey silk dupioni that I block printed myself, black
(and slightly finer and less slubby) dupioni, rayon bemberg lining.
Pattern: Drafted by me
Year: 1789
Notions: Interfacing, polyester thread, silk thread, 1.5" wooden disks.
How historically accurate is it? Maybe 50%? The materials are far from
ideal, and there's a lot of machine sewing. The look isn't too bad overall though.
Hours to complete: I do not know
First worn: July 31st, 2017
Total cost: somewhere around 30- 40 dollars Canadian, I think. I have all the figures written down somewhere..
My mother took these pictures with a cellphone, and I hope to get better photos of this outfit at some point.
I'm so pleased with how well the stockings match the hat trim!
I made plenty of mistakes on this coat, and had to re-do a lot of stuff, but I learned a few things, and overall I'm fairly happy with it.
I think I'd probably benefit from planning things out beforehand on paper and making checklists, because I seem to do an awful lot of things that I know better than to do.


