Pages

Monday, 3 September 2018

Early 18th century shirt #2

I finished this shirt over a month ago and I'm just posting it now, oh dear! (I did manage to submit it to the HSM album on time though.)
But it's extremely similar to my previous 18th century shirt, so there isn't much to say about it.
 At the beginning of this year I had grand plans to finish a coat for the "Sleeves" HSM challenge, but didn't get started in time, and I didn't want anything to do with coats in the disgustingly hot July weather anyways.
Since linen undergarments are something one can never have too much of, I made a second shirt for the 1730's suit I will have someday.

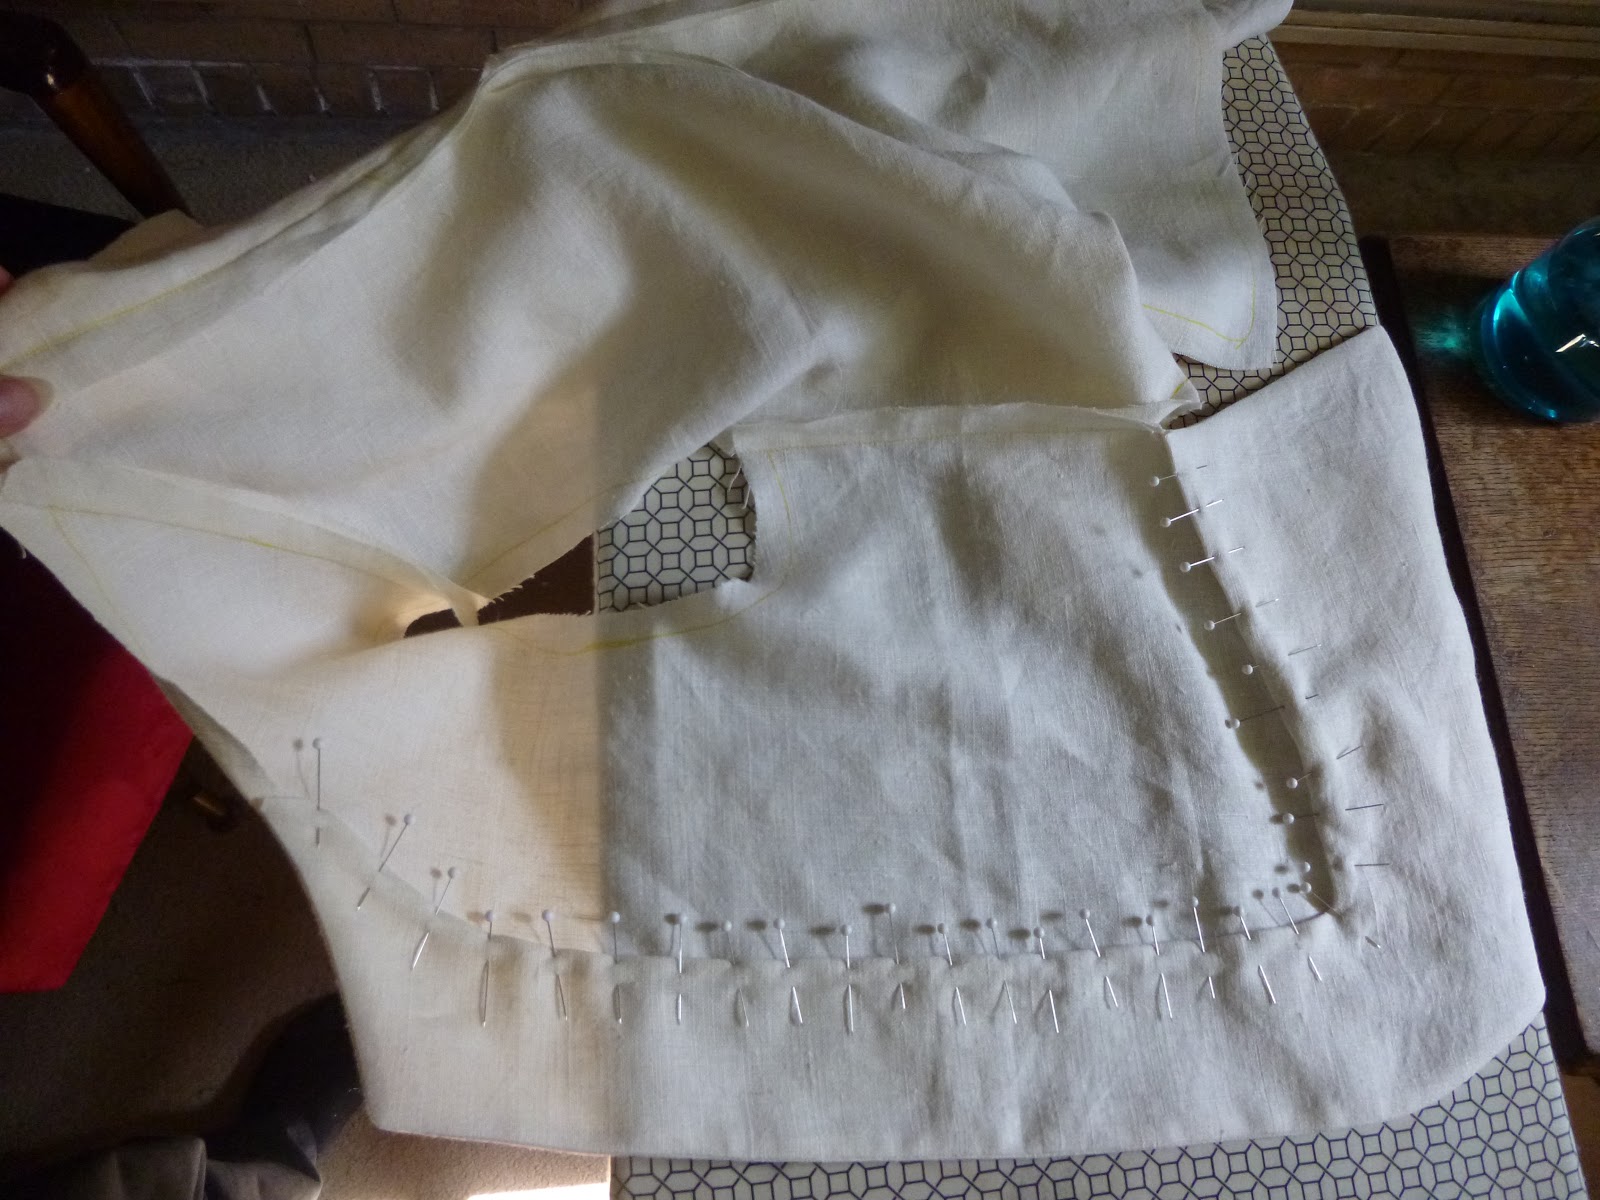
It's cut to exactly the same dimensions as my previous one, but in a coarser linen, and with different cuffs. There's also a lot more machine sewing in this one, and it doesn't currently have any lace ruffles, though I intend to add some.
The shirt fits the theme of the challenge because the sleeves are huge, but also because they represent a new thing I've learned about 18th century shirts.

I shared some pictures of my other shirt in an 18th century sewing group on facebook, and got some good constructive criticism about the cuffs. It seems that sleeve buttons were the way cuffs were fastened for most of the 18th century, and I had no idea! All the pictures I'd been looking at were of guys with big ruffles which were hiding the sleeve buttons, and it didn't occur to me to investigate the cuffs further!

(I'll still use the regular sort of button for my everyday shirts, because they're less of a hassle, but the 30's suit is going to be a Fancy outfit.)

I found some cheap plastic buttons at Fabricville that looked very similar to some extant 18th c. sleeve buttons, so I bought them and put them onto two large-ish metal jump rings which I bent and squashed into a more oval shape.
Ideally the cuff would be narrower, but with this coarse linen
I feared it would be even more wonky and lumpy.

Nowhere near as fine as the originals that inspired them, but at least they're very similar in shape and colour.
18th century sleeve buttons found at an archaeological dig.
(Source)

What the item is: A man's shirt
How it fits the challenge: This shirt is extremely similar to the one I made for the February challenge, but the main difference is in the sleeves. (See above.) The sleeves are also very large and noticeable, but I think the learning part is more important to the challenge.

Material: White plain weave linen.
Pattern: None, just a set of dimensions.
Year: Early to mid 18th century (though my end goal is for this to go with a 1730's suit)
Notions: Linen thread, cotton thread, silk thread, 2 bone button blanks. (and 2 small metal rings & 4 plastic buttons for the sleeve fastenings, though technically they are not part of the shirt)

How historically accurate is it? Maybe 75-80%? Most of the sewing is by machine, but otherwise the construction is pretty accurate. The sleeve buttons are cheap plastic, but aesthetically very similar to extant ones.

Hours to complete: 21:40 (This includes time spent hand hemming and applying some terrible lace, which I promptly removed because it was horribly itchy and cheap looking.)

First worn: I think it was on July 21st or 22nd, just to see how it fit.

Total cost: I forget where the linen came from, but I'm guessing less than $10 if the linen was given to me, but probably closer to $25 if I bought the linen. It's rather hard to tell plain white stash linens apart.


 Instead of a heart shaped reinforcement I did a little bar with buttonhole stitches across the bottom of the bosom slit. I was trying to make it look like this one, but for some reason I didn't look at the photo while I was doing it, so it could have turned out better. But it's nicely sturdy so far!
Black speck is cropped out of this one.
The buttons on the collar are the same sort of Dorset knob as on the previous shirt.
 Back when I took the photos of me wearing the shirt there wasn't really anything wrong with my little digital camera (Aside from it being picky about lighting, and generally unflattering in perspective), but a couple days ago a black speck appeared in the lens. I think it moved there when I dropped my camera, but I'm not sure how it got inside. Just like the long dust speck that has been in there for several months, I can't seem to shake it out of place, and it's definitely inside because it won't wipe off. The camera also seems to be getting gradually worse at focusing.

Perhaps I should get a better camera? I am uncertain, as the good ones are quite expensive, but it would be great to be able to get higher quality photos of my projects.
Out damn spot!
 One last difference in construction is the underarm gussets. I turned the seam allowances inward on all my previous shirts, but for this one I finally realized that turning the edges of the gusset outwards is both easier and sturdier. Since I've had problems with the underarms ripping on several of my shirts, I'm very glad to have learned this.
Why was I not doing this before?!
All those little weak points at the corners could have been avoided!
 And here's a picture of the cheap, crappy lace I added and immediately removed. It's not a well lit photo, but rest assured everything about it was bad. I thought it would look at least somewhat nice because the design on the lace is swirly and pretty, but no.
Scratchy, stretchy, heavy, nearly opaque lace.
I will post again soon! This past Friday I finished my entry for the August HSM challenge and I couldn't be more pleased with how it turned out. I just need to get a few better photos of me wearing it.

Saturday, 28 July 2018

Small linen indoor cap

This is my third linen cap! It's a bit different from the other two, being smaller and rounded instead of a big drawstring tube.
It's based on a couple of extant linen ones. Here's a link to one of them.
And here's a link to the other. (Apologies for linking to pinterest, the source page isn't working.)
I made mine in June on the road trip I took with my uncle. I worked on it in the car and it only took a few hours.
(should I do a post on my road trip? I have lots of photos, and am behind on blogging.)
View of the inside.
Just one big hem and one felled seam.
It's all hand sewn with silk thread, and is made of linen from my stash.
I guess there isn't much else to say about it. It's comfortable and it fits, but the weather is too warm to wear it right now.
Hopefully I'll post something else soon! I have a shirt that's nearly finished.

Monday, 4 June 2018

Unlined linen waistcoat

I have made yet another waistcoat! The Historical Sew Monthly challenge for this May was "specific to a time of day or year", and a summer waistcoat was the best option I could think of.
I based it on this extant waistcoat from The Conneticuit Historical Society, for which the source links never seem to work. It's a small boys waistcoat, so it only has 6 buttons, and the pockets are fake.
(I didn't realize it was a child's waistcoat when I was making my version because I hadn't found the source page yet, but I think mine is more appropriate for an adult since I did 8 buttons and added real pockets.)
Waistcoat, c. 1770's
Plain weave linen with Dorset buttons.

Inside view of  c. 1770's waistcoat.
Like the original, my waistcoat is one layer of off-white plain weave linen with facings only along the front edge. Since I wanted real pockets I extended my facing along the bottom edge of the front.

About half of the sewing is by machine. The seam finishing, hemming, inside edge of the facing, and the buttonholes were all done by hand.

I haven't worn it in horrendously hot weather yet, but it's definitely cooler than all my other waistcoats.
I made 8 little Dorset buttons using plastic rings and linen thread. I'll use small brass rings on my next linen waistcoat, but I couldn't use them for this one because I ordered them too late in the month.


The challenge: 5: specific to a time (of day or year)
What the item is: A summer waistcoat.
Material: Plain weave off white linen. A fine one for the pocket bags, and a somewhat coarser one for everything else.
Notions: Linen thread, cotton thread, silk thread, 8 small plastic rings.
Pattern: My own
Year: c. 1770's- early 80's
How historically accurate is it? 70% maybe? It's about half machine stitched, and there are plastic rings in the buttons, but otherwise the look and construction is pretty similar to the original.
Hours to complete: 17
First worn: May 26th, 2018
Total cost: I'm pretty sure this particular linen was given to me, so very little. No more than 2 or 3 dollars.

It will be a while before I can get back to my fabric stash and start another linen waistcoat, as I am currently out of the province with my Uncle. (These last two photos are by him.)
A sequoia tree! I had never seen one before!

I see the speck of dust inside my camera lens has migrated to the top.

Thursday, 24 May 2018

Green & Cream Test Shirt

18th century shirts are my very favorite kind of shirts, and I have not worn any other sort of shirt for several years. And I need to make more of them, because I intend to keep wearing them indefinitely!

But I want to try making some modern-ish shirts too, mainly because I have too much cotton print in my stash. (Most of the cotton prints are ones I know I didn't buy, and have no specific memory of obtaining. I think they breed.)
I don't expect to wear the modern-ish shirts very often, but I think they'll be useful to have on hand, especially for things that might damage or stain my nice white linen.

I say modern-ish because I just can't do a 100% modern button up shirt. They have so many qualities I hate. They're too fitted! Tapered sleeves and curved side seams and shaped sleeve heads, blagh!
They also sometimes have pockets on the front, which I think is weird for a shirt. And vertical buttonholes are insufferable little bastards that I want nothing to do with.

So I made myself a shirt pattern that I hoped would avoid all these problems, and after one mockup I sewed it up so I could properly work out the fit and construction. This shirt isn't terrible but I still have a few tweaks to make to the pattern. I will post a picture of the pattern the next time I sew it up.

I vaguely based the pattern on a regular modern shirt pattern that I copied for a friend, but I changed every piece so much that the shapes look more like the 1870's shirt from The Cut of Mens clothes than the original shirt.
The cream coloured fabric is a mediocre linen I got from my local fabric store some time ago, and the dark green is cotton. I added the green so it would go with the green and gold buttons I used, though I think it may have been a few too many green pieces.
My buttons, which I bought because they were shiny and green and 50% off.
Everything is machine sewn except the inside edges of the cuffs and collar.

I have several complaints about the pattern. The most noticeable one is that the placket is too narrow. I forgot to consider the fact that I prefer horizontal buttonholes, and so the ends of them are butted right up against the folded edge of the placket. It's not very visible from a distance, but looks terrible upon close inspection.
 There are no underarm gussets, but I still put the little triangular ones on the hem slit. They're too important to leave off!
Besides widening the placket, I also need to lengthen the sleeves a bit, and add more width to the back piece. When I was tracing out the pattern I foolishly forgot to make the back piece wider than the yoke so I could do some pleats or gathers or something, and as a result it feels very strained when I stretch my arms forward.  
The upper collar also need to be a slightly different shape, because it doesn't sit as nicely as it should, and I'm not happy with the way it looks when buttoned up.
I have (very grudgingly) decided to add a small placket on the sleeve next time I make this kind of shirt instead of just making the gap in the bottom of the sleeve seam. I put shiny contrasting buttons on the cuffs and they're underneath my wrists where nobody can see them!

The cuffs also feel uncomfortable. I think this is because of the interfacing. My regular shirt cuffs are just as tight as these ones, but they have no interfacing and they are comfortable. I'm not sure if I want to leave off the interfacing or loosen up the shirt cuffs a bit. 
I have at least 4 or 5 pieces of cotton that are big enough for shirts and that I have no other particular use for, but I'm not sure when exactly I'll sew the next one up.

Saturday, 28 April 2018

Extremely Stripey Breeches

Several weeks ago I made a pair of striped breeches with the same cotton I used for my striped waistcoat. I have many complaints about them.
They're lined in plain white cotton, because anything dark might show through the white stripes. The kneebands are lined in cotton twill, rather than being folded in half lengthwise, and I realize now that I should have been doing this on all my earlier kneebands.
The gap at the back has a small triangle of fine black cotton, and another one of those shoelaces.
The waistband is lined in the same off-white twill as the kneebands. The waistband buttons are some sort of white material with metal shanks, while the ones on the knee are 3/8" bone molds covered in fine black cotton.
The buttonholes are by machine, as is most of the sewing, because the materials are neither good quality nor well-suited to breeches. They took a grand total of 20 hours and 39 minutes.

I wanted to try doing ties on the knee instead of a buckle, but sadly the best thing I could find in my stash for this was terrible cheap satin ribbon, which very much needs to be replaced because it's slippery as hell and WILL NOT tie tightly enough. Next time I'm at the fabric store I'll look for grosgrain or cord or something.

The good news is that the crappy ties can be easily replaced! I attached them by poking two holes with an awl and threading the ribbon through, then secured them with some whipstitching on the backside between the two holes.
I can see by where the buttons ended up that I still need to taper my pattern more.
Another big complaint is that the stripes don't go straight down, they bend. The outseam needs to be taken in a bit by the knee, and the inseam needs taking in a bit lower. I really should do this so I can make the appropriate adjustments to my pattern, but I'm not sure when I will as it's sure to be a big pain in the butt.
They look wonky from the back too.
At least they look okay from the side! Paired with the striped waistcoat they're a bit much, but I like the way they look with my grey wool waistcoat.


I'll hopefully do the alterations on them sometime soonish...

Sunday, 22 April 2018

Linen indoor cap #2, and a bit more about my job

 Dear me, I am behind on posting again. I finished this cap at the end of March, and it's taken me 3 weeks to post it! I have another pair of breeches to post too.

This linen indoor cap is very similar to the other one I made, but with the addition of a ruffle.
Instead of hemming the bottom edge I attached another strip of fabric to it with a flat felled seam. I was hoping to get the look of the one in this 1792 William Cowper portrait, but my ruffle sits pretty flat against my head. I think I'd need a stiffer linen for that.
Although I cut the cap to the same width as my other one, it somehow turned out a bit too loose. I added a drawstring to the channel made by the flat felled seam to tighten it up just a smidge. This makes it a bit less comfortable than my other cap, but not too bad.
This same detail appears in the extant cap belonging to William Cowper.
While I am late posting this cap here, I did submit it to the Historical Sew Monthly on time!
The challenge: #3, Comfort at home
What the item is: A man's indoor cap
Material: Linen
Pattern: None
Year: Second half of 18th century
Notions: Silk thread, small piece of cotton cord, polyester satin ribbon
How historically accurate is it? Maybe 80 or 90%? I had very little reference material, but it's so simple I doubt it can be very far off. It's all hand sewn. The ribbon is definitely wrong, but I'll replace it when I get some better stuff.
Hours to complete: 5
First worn: March 31st, 2018
Total cost: No idea, I forget where this particular piece of linen came from. Very few dollars.


Since I have so few photos, and so little to say about the cap, I thought I'd use the rest of this post to talk a bit about my job.

It's at a local tailor's shop and I have worked there for 5 weeks so far. We make a lot of military messkits and police tunics. My tasks consist mostly of cutting linings (and interfacing and cuffs and facings and epaulettes), sticking on interfacing, sewing darts and back seams, and basting things for first fittings.
Here are some photos:
The table where I cut linings.

The shelf where the military buttons and whatnot are kept.
I've been getting along quite well with the cutter, who works across the table from me and cuts out most everything besides linings.
Here's a lovely fish we made to decorate this bulletin board with:
He's the scrap from in between 2 jacket side pieces.
And our other fish, which I brought in to spruce up this dusty vase that was on the shelf for no apparent reason:
She's in two halves, with magnets!
Here is the magical machine that sticks fusible interfacing on:
You press it on lightly with the iron, then feed it through the hot rollers!
Never have I seen interfacing so thoroughly and evenly stuck!
And here's the expectant mother pigeon who lives above the front door:
That's all for now, I hope to post my breeches soon!