Pages

Showing posts with label historical sew fortnightly challenge. Show all posts

Saturday, 11 June 2022

Early 18th century shirt that closes with a ribbon

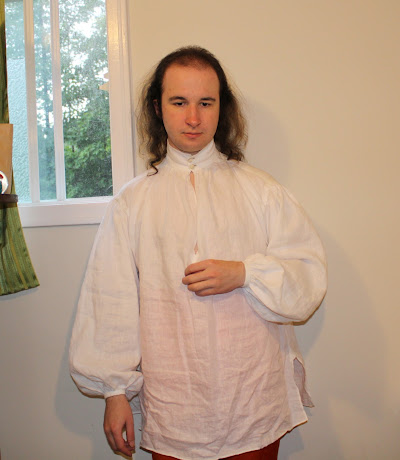
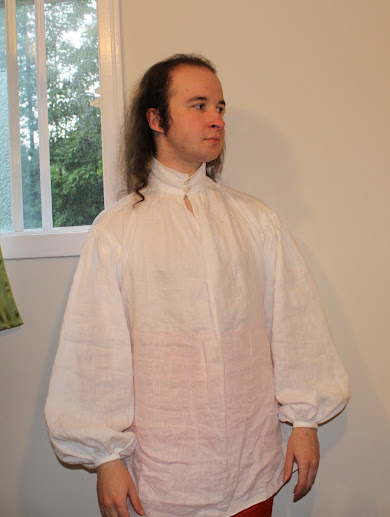
 I made another hand sewn shirt!

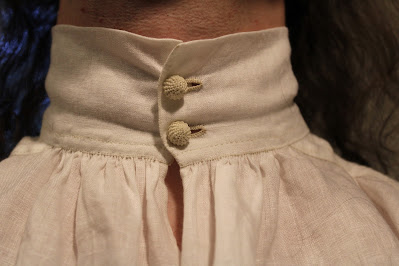
This one's an 18th century style I've wanted to try for quite a long time, where the collar fastens with a ribbon instead of buttons. I have a section with all the examples I've found on my Shirts pinterest board. Usually the wearers are in a partially undressed state, but there are a few more formal ones where the ribbon can be seen peeking out from under a stock. They appear to have been most common in the early to mid 18th century, but there are a few examples from later.

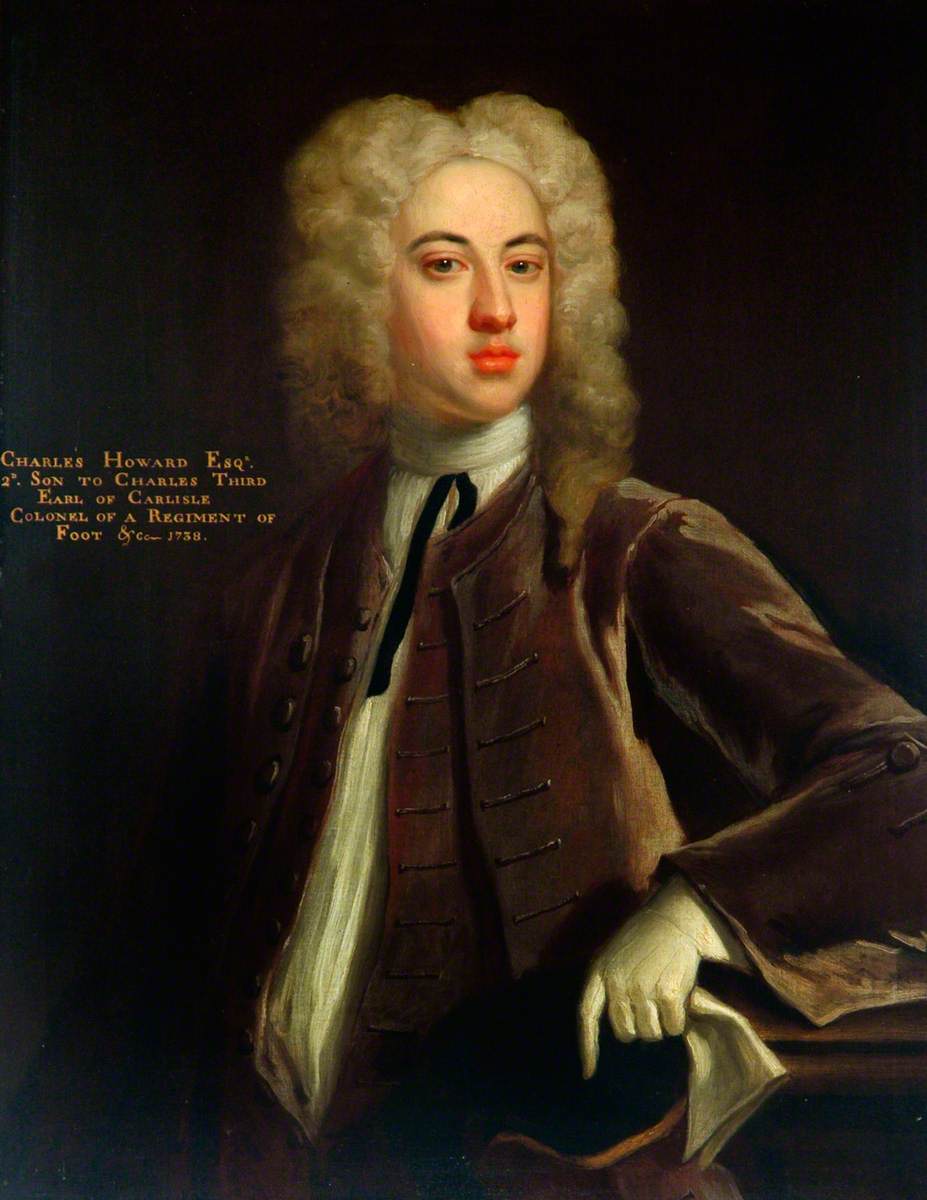
I suspect this evolved from late 17th century styles, when they had those large colourful bows tied in front of their collars. I don't know for sure, since I haven't researched that era, but it looks like the shirts in this portrait and this one are tied with a ribbon in the same way as these later shirts. I have no idea how that worked with the lace cravats they also wore though.

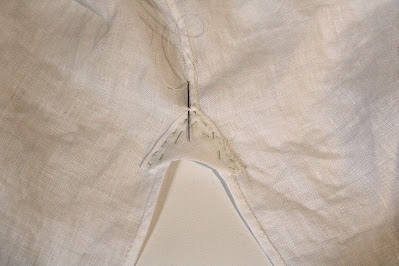
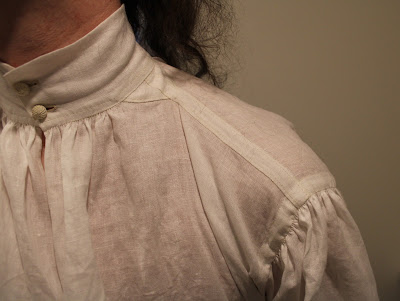
I shan't go into the construction here, since it's pretty much the same as 
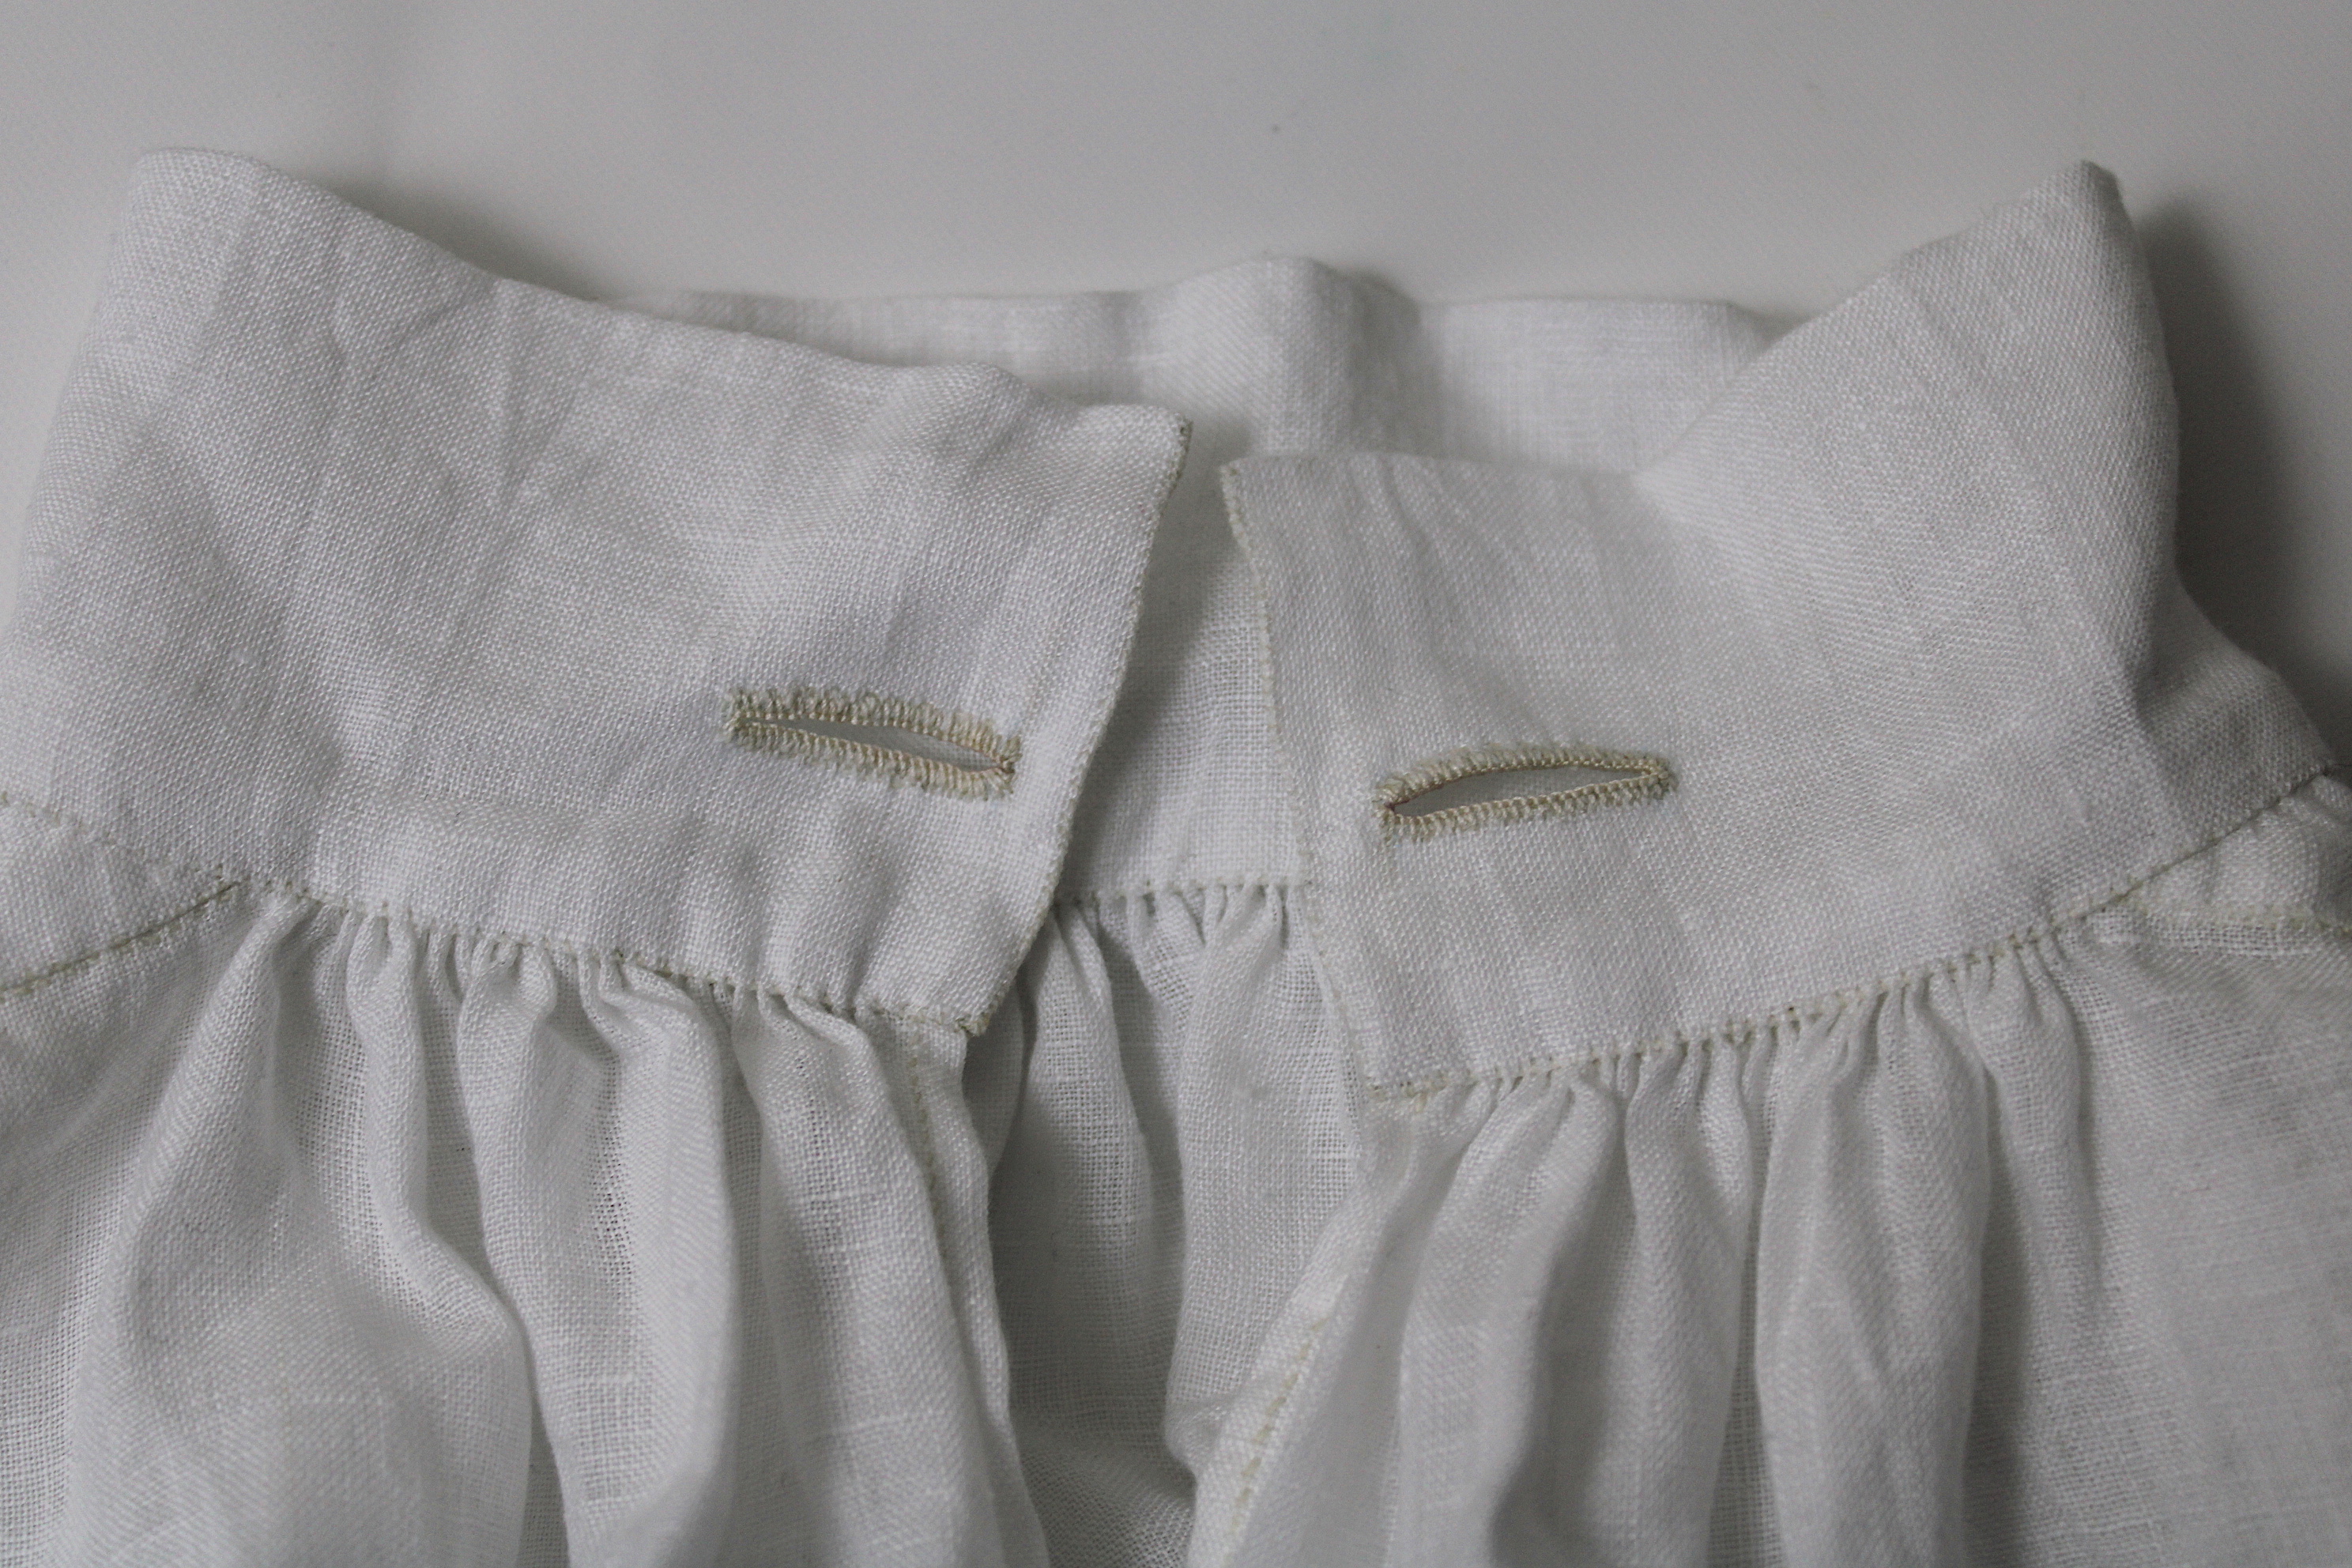
my previous shirt. The only difference is that the collar is shorter because it doesn't overlap as much, and has one buttonhole on each side for the ribbon to go through.
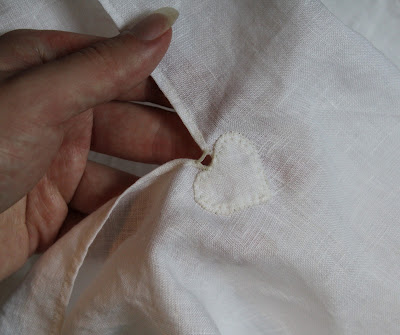
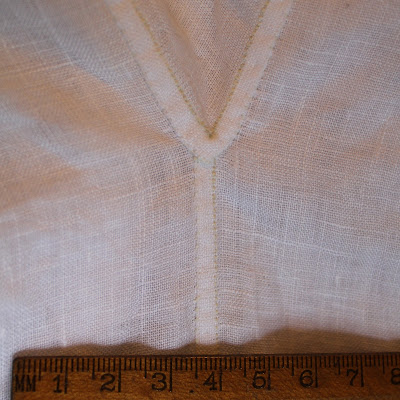
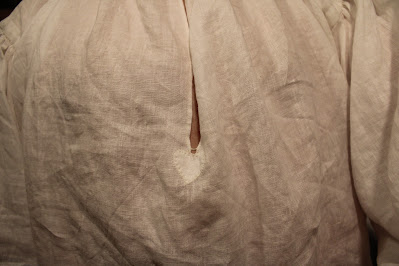
I don't know if the heart shaped shirt reinforcements were a thing this early in the century, but they're sturdy and I like them, so I added one.
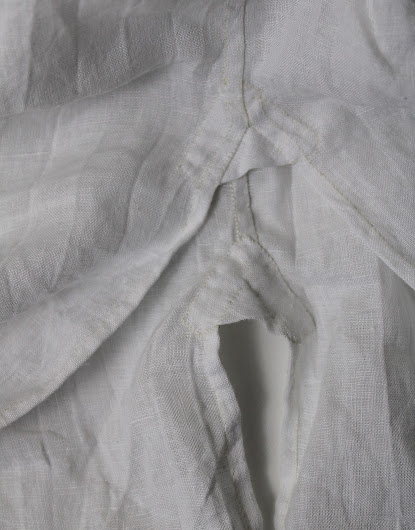
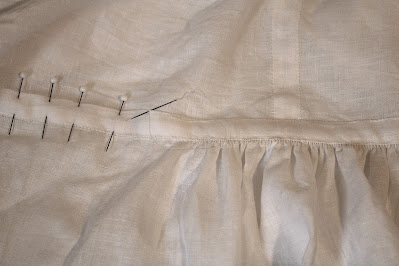
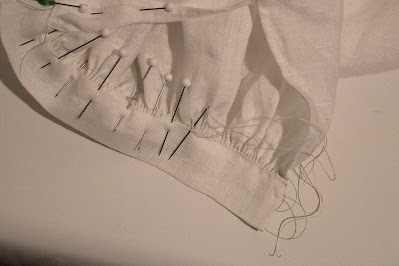
The hem gussets.

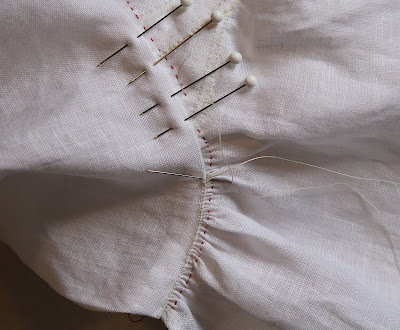
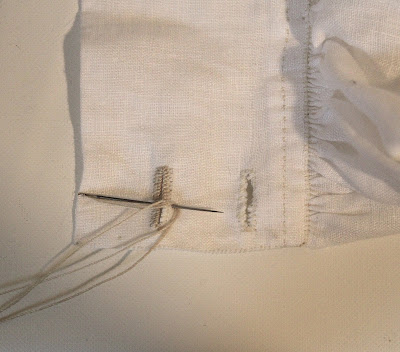
I've found that on some of my shirts the folded edge of the wristbands is very thin and flimsy, so this time I cut them a bit wider and folded them in quarters before attaching them, so the fabric is doubled up all the way through and it fills them out a bit better.
I had a go at recreating this painting, since it's got a shirt and violin and not much else in it.
Young man with a violin by Jan Kupecký, c. 1706.
I think it turned out pretty good (though I know I'm not very good at editing photos).
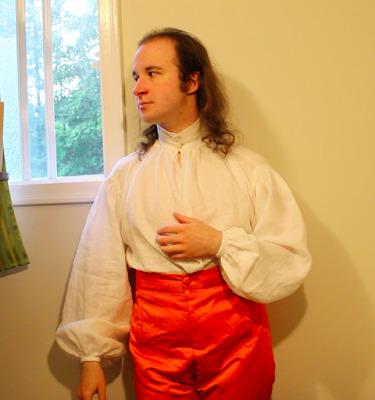
Here are some more shots. I'm wearing it with my green wool 1730's breeches.
I don't know how to play violin, this is an 1890's one that I borrowed from my parents.
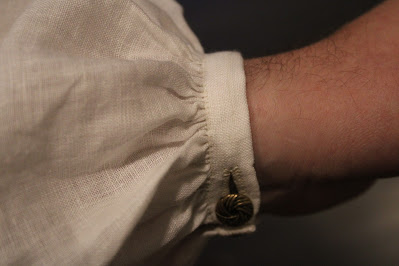
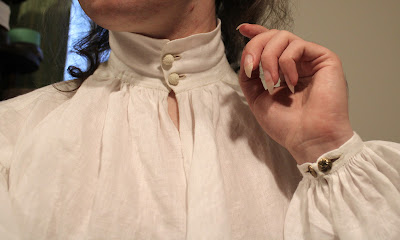
I'm wearing my little brass sleeve links with the pinwheel design on them.


I didn't have a red silk ribbon like the one in the violinist painting, but I did have a pink one, which is one of the colours you sometimes see in other paintings with this style of shirt.
Portrait of a man by Nicolas de Largillière, 1703.


Worn with my 1730's brocade waistcoat.


There are also some that show a narrow black ribbon being worn, so I tried that too.
Sir Charles Howard by unknown artist, 1738.


Both under a stock, and untied, since there are portraits of both.
I found that the collar doesn't sit as nicely as buttoned ones do when it's just tied, but when there's a stock over it it stays put just fine.

 Being all rectangles (and one heart), it qualifies for the Geometry challenge for the Historical Sew Monthly.

What the item is: A man’s shirt.

How it fits the challenge: It’s all rectangles and squares! (Except the little heart shaped reinforcement, which is a square that’s had a little bit trimmed off 3 corners.)

Material: White plain weave linen from Pure Linen Envy.

Pattern: None, just a list of dimensions.

Year: Early 18th century, but it could work all the way to the mid 18th century, and probably for the late 17th century too.

Notions: Linen thread, vintage crochet cotton for the buttonholes, a short length of silk ribbon.

How historically accurate is it? Pretty good! The cut and construction is accurate to the best of my knowledge, and it’s all hand sewn with linen thread. I didn’t add a laundry mark though. I also don’t know for sure if the heart shaped bosom slit reinforcement was around this early, since I’ve only seen examples on a few late 18th century extant shirts, and earlier shirts are even more rare and there aren’t many pictures of them to be found.

Hours to complete: I neglected to keep a time sheet, but probably 30-something.

First worn: May 3rd, 2022

Total cost: About $35 CAD


And that's it! I've got a couple more shirts in progress that are machine sewn coloured linen ones for everyday wear, and I'm thinking I ought to machine sew some white ones too, so I don't wear out my hand sewn ones too quickly.

Saturday, 5 February 2022

Hand Sewn 18th Century Shirt

 I'm almost caught up on 2021 blogging! I wrote that sentence a few weeks ago and this post is still saved in drafts and now it's February, alas.

I made this shirt around the end of last summer.

It's made of white featherlight linen from Pure Linen Envy. I only had 158 cm, so it's a bit shorter than I would have made it otherwise.

After all the shirts I've made over the years I thought I finally had the construction down pretty good, but no! It turns out I'd been doing the gathers wrong all this time. I was looking at some closeup pictures of an extant shirt shortly after I started this one and I noticed that the gathers were sewn from the outside using a whipstitch, with one stitch going through each gather.
I tried it and found it was so much easier getting them even and neat. No wonder mine always looked awful when I backstitched them from the inside like a normal seam.
I did the gathers like this for the collar, sleeve heads, and cuffs.
The rest of the construction is mainly the same as described in my shirt construction post, aside from the fact that it's all done by hand. Originally I had intended to do some seams by machine, but I was so happy about the gathers that I just kept on hand sewing.
The front slit reinforcement.
It's all sewed with fine linen thread from Burnley & Trowbridge.
Because the fabric was so fine I was able to get quite narrow seams.
Half a centimetre! Not the tiniest ever, but not bad.

Attaching the cuff.

Hemming the open bit at the side.

Sewing on the reinforcement gusset,
which I'd basted in place.
I usually use DMC cotton pearl for buttonholes, but for this one I remembered I had some vintage crochet cotton, so I tried using some of that instead. It snapped at one point, but seemed to be in mostly good condition and fairly strong.
I did Dorset knob buttons. I still wasn't sure if I was doing them "correctly", since all I had to go on the first time I made them was a diagram of the stitching with no information on the base. There still isn't much information on the internet about them, but I looked again and found a picture of the underside of one where a horn base is clearly visible. It looks like it's covered a bit differently, but I like mine better because the fabric goes all the way around. I describe how I made mine in more detail in this post
(The extant one linked above has a spiderweb pattern of threads, but I've also seen ones with detached buttonhole stitches like the ones I'm making.)
I'm using small bone moulds and linen thread from Burnley & Trowbridge, and tiny scraps of my linen fabric.

Aside from it being slightly shorter than ideal, I'm quite happy with this shirt! It fits well and is very soft and comfortable.
I wrote down the dimensions of each piece as I cut it out, and the pattern pieces are as follows:

Body - 75 x 158 cm (would have been at least 180 cm long if I'd had more fabric)
Sleeves - 60.5 x 60.5 cm
Collar - 43 x 14 cm
Armhole binding - 44 x 3.5 cm
Underarm gussets - 13 x 13 cm
Cuffs - 19 x 5 cm
Shoulder strips - 21 x 3 cm
Neck gussets - 8 x 8 cm
Hem gussets - 5 x 5 cm

I left 16 cm closed at the shoulders when I cut the T shaped opening, and the slit down the front is 25 cm long.


Here it is with a pair of the sleeve links from my sleeve link video.

This is the only thing I entered in the Historical Sew Monthly challenge last year.

What the item is: A man’s shirt

The Challenge: Zero Waste. The pattern is all squares and rectangles, so there were only a few small geometric scraps, which I saved and can use for any number of things.
My thread clippings and teeny tiny scraps and trimmings were also set aside for my parents, who have a fireplace and can use them as kindling. (I keep a paper bag near my sewing area and put all my useless tiny cotton and linen scraps in it.)


Pattern: More or less the same set of dimensions I use for all my shirts. Exact measurements are written above.


Year: It’s so plain and basic and shirts change so little for most of the 18th century that I think it could work from at least the 1710’s-70’s. If I were to add ruffles the width and placement of them would narrow the date down considerably.

Notions: Linen thread, vintage crochet cotton for the buttonholes, two small bone button blanks.

How historically accurate is it? The most accurate shirt I’ve ever made! It’s completely hand sewn, and I’ve learned a lot of new things since I last did one all by hand. Just a few tiny nitpicks - I didn’t do a laundry mark on the corner, and I’m not sure if I did the Dorset knob buttons correctly. It also came out a bit short because of the aforementioned smallish amount of fabric. It was the end of the bolt.

Hours to complete: I neglected to track the time for this one, but based on previous shirts I’m guessing 40-something.

First worn: September 6th, 2021

Total cost: About $25 (Canadian)
Ok, I think that's all the 2021 garments blogged! With the exception of two leafkerchiefs which are going to be in a video tutorial so won't be blogged about until I finish filming and editing that.