Pages

Thursday 27 March 2014

The Beginnings of a Frock Coat

I am finally making a coat! It will be a late 1780's style frock coat.
The pattern is based on this one.
Young Officer in a Zebra Coat, calling someone to give an account of his services. Galerie des Modes, 1789. (source)
And here is an extant example of a very similarly patterned coat.
Man's suit, c. 1790- 95. Bunka Gakuen.
(I'm so sorry that I couldn't send a link to the page with the suit. Their museum database is insanely frustrating to navigate.)
It has the same seams, as well as the large rectangular pockets placed very far back.
My pattern is roughly based on a couple of the ones from The Cut of Men's Clothes: 1600-1900.

I started by tracing around one of my waistcoat patterns. I moved the side seams further back, took a few measurements, and drew the coat pattern around it.
I drafted the collar with the mandarin collar drafting method we learned in school. The sleeves are the sleeve pieces from my drawstring jacket, but widened a bit, and with a less pointed elbow. No sense in drafting a whole new shaped sleeve.
It worked better than I expected. The first mockup had a great many fit problems, but they were pretty easy to fix.
Here are three terrible pictures of the second mockup.

I was a bit concerned by the diagonal wrinkles on the sides and the puckers at the back of the sleeve caps, but I looked at some extant coats and they wrinkled in the exact same way.

The finished pattern.
It doesn't stand out very well against the concrete floor.
For the outward stuff I'm using a nice black denim. I'm not aiming for historical accuracy with this coat.
This denim is really nice because the dye actually goes all the way through, so it won't get pale spots when it wears.
The lining is linen. It was an icky brown when I got it, but I dyed some of it black. It came out dark grey, but that's fine.
The brown doesn't look too bad here, but it's a really icky shade in person.
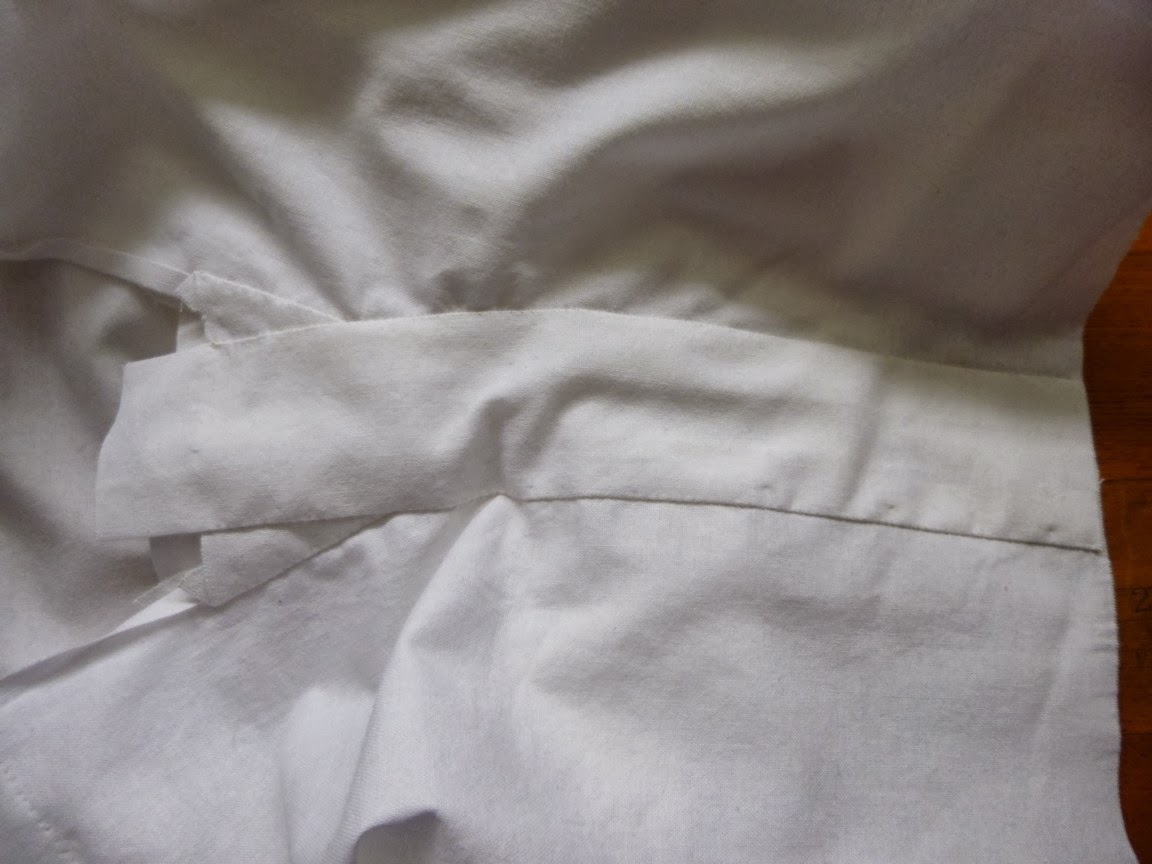
I'm sewing a lot of it by machine using heavy thread. I sewed the pocket flaps by machine on the bottom three sides, then turned them and finished the top edge by hand.
I folded the front edge up a bit higher, so it will hide the back edge.
I have flat-lined the sleeves using the same method that worked so well with the drawstring jacket sleeves.
I pinned the lining pieces onto their corresponding outer pieces. Rather than use a running stitch, I sewed up the sides by machine, using regular thread.
Before turning them I marked the stitching lines with white basting on the denim layer only. Afterwards I marked those lines again with red basting, going through both layers. In this manner I kept the stitching line visible on the right side of the lining, which will be useful when I sew the sleeves on.
I whip stitched the sides of the sleeves together, stopping about 4 inches short of the cuff. This is because I haven't trimmed the cuff to length and I don't want to risk cutting through my stitching.

The sleeve seam from the outside.
 That's as far as I've gotten. I basted one of the sleeves in to make sure the notch is in the correct place.
You can see that I will have to trim a fair amount off of the cuff.
The sides are wrinkling a bit more than they would normally because the wool waistcoat is very bulky.

I can't wait until it's finished! I love the swallow tail shape of these coats.
If my stripey stockings look a little odd here, it's because I am wearing 2 layers of ripped tights over them.
I don't know if I will get much time to work on this over the next couple of weeks.
I have to do a challenge piece for the school fashion show. This year the challenge is rope. I have to make an outfit that is at least 80% rope on the outside by March 12th.
I have all the pieces cut out for my Fairytale challenge, but it is highly unlikely that they will be sewn together by the deadline.

Sunday 16 March 2014

More Pages From The Surprise Cookbook c. 1868

Here are more pictures of The Surprise Cookbook. I apologize for the poor quality of some of these photographs. Click for a larger view.
They specify what the other sauces are for, but how are we to know what to use the egg sauce on?


Boiled squash and pumpkin? Why? They taste SO much better if you bake them.
I have never heard of either of these things.
Potato snow does sound very pretty in appearance, but how would one eat it?
This is the second recipe for pumpkin, several pages after the first. This happens more than once in this book. Cookbooks should not be this disorganized.
At the end of the book there is a chapter called Additional Recipes, which seems like an afterthought. It has recipes that should be in the other sections, but they're just jumbled together in one, as if they were forgotten when the rest of the book was being written.
I have never tasted them together but I seriously doubt that lettuce and gravy are compatible.
 Yay, it's the bread and cake section!

Where do these names come from?
I love how unspecific these are. How much is "some"?


The way the cup cake recipes are presented is quite amusing.


Oh dear, I just realized that some of these recipes are only half here because they continue onto the next page and I didn't photograph all the pages, sorry! I do want to make the whole book available somehow, so that you can see all of the recipes.
A drachm. I haven't seen that measurement anywhere before.


I see a typo!
The pastry section has some very nice illustrations of fruit. Thankfully they have not been scribbled on with crayon like most of the meat diagrams.
Some of these sound quite good. I'd like to try a few.

Saturday 15 March 2014

Gauzy White Cravat & Secondhand Shoes

Gauzy white cravats are an essential accessory for the late 18th century, both for men's suits and women's riding habits.
I made one a few weeks ago, which you can see me wearing in the last photo of my previous post.
Boring, isn't it?

There isn't much to write about it. It's a rectangle of fine cotton that is 55 cm x 146 cm. 3 of the edges are hemmed and the third is the selvedge. I didn't cut it to this length, it was already this size when it was given to me. If I had cut it I would have made it a bit longer.
Hemmed edges.
Since two picture are not nearly enough for a post, I may as well show you the two pairs of shoes I have recently obtained.
I found this pair on the table in the student lounge where people leave things they no longer want. They're really small- only a size 10. I can wear them, but the are quite snug. I am almost certain that the material is fake leather.
The important thing about them is that they have buckles. The buckles are too small, the wrong colour, and are off to one side instead of being in the middle, but they are still buckles. I think the overall look of these shoes goes fairly well with 18th century styles. They are certainly better than lace up ones.
I got this other pair at a secondhand store for 6 dollars. They fit as long as my socks are thick. I had previously been wearing a pair of my grandfathers old shoes and they were much too big, besides being in worse condition.
If I could magically transfer a bit of the size from this pair to the other pair both would fit perfectly.
That is all I have for now. I have started a frock coat but progress is slow. Next I will post more pictures from The Surprise Cookbook.

Tuesday 4 March 2014

White Cotton Shirt

Hello dear readers!
It feels as though I haven't posted anything in months, but it has really only been a couple of weeks. I didn't have much of anything to post, but I do now.
This is the shirt I made for the Under it All challenge.

My mother gave me these 4 magazine pages of unknown origin, and they were extremely helpful. 

Edit from the future: No, this article actually has a lot of problems. Historical costuming tutorials from the 1980's are often outdated, shocking! The most glaring mistakes I see when I look at the diagram are the tapered sleeves, the bizarre assertion that a yoke is an option even though it makes no sense in an 18th century context, and the way they cut the gussets as little on-grain isosceles triangles instead of making them squares folded in half.
They are from the February, 1981 issue of Early American Life. They have a nice little article about shirts, along with a cutting diagram and step by step instructions. The article is pretty good, though it doesn't mention thread buttons.
Curiously, this is the exact same diagram as the one in Loyalist Dress in Nova Scotia.
I followed the measurements in the diagram fairly closely, but I did make a few changes. I did not taper the sleeves. For the collar I cut two 16" x 5" rectangles. For the cuffs I cut four 9" x 3" rectangles.
I cut my ruffles on the selvedge and made them 3.5" wide by 2x the length of the edge they were gathered to.
Linen is the historically accurate choice of fabric, but I don't have that much white linen, and I hadn't made this pattern up before. I used cotton instead.
I sewed the shoulder seams by machine. I figured a bit of machine sewing would be fine since I wasn't using linen.
One of the 4 neck gussets pinned into place.
I whip-stitched most everything into place. In hindsight I should have backstitched it, like the instructions said to do, but whip-stitching is faster.
The top neck gusset in place. There is an identical one underneath it.

The shoulder strip pinned into place.

And sewn down.
I put narrow hems on the ends of all my ruffles. I drew a 6" line down the middle of the front piece, gathered the edges of the neck ruffles, and pinned them on either side of the line.
I stitched them down very close to the edge.
I pinned a facing (7" x 2") on top of that, and sewed it on from the underside.
I went along the same line I used to attach the ruffles.
I turned the facing to the inside, turned 3 edges in, and whip-stitched them to the inside of the shirt.

Having gathered the single layer parts of the neck hole with two lines of hand basting, I attached the outside bottom edge of the collar.
I turned up the inside bottom edge and whip-stitched it down.
I gathered the sleeves into the shoulder area and sewed them on.
At this point the inside of the shirt looked like this.
I sewed the underarm gussets in with a running stitch, and then machine sewed the side seams and sleeves. The edges of the cuff slits were finished with narrow hems.
I gathered the cuff ruffles and sewed them into the cuffs, leaving the ends open.
The outside of the cuff was sewn on in the same manner as the collar. All the edges were turned in and pinned. I stab-stitched the ends shut and whip-stitched the inside edge.
The inside of the cuff, pinned.
It was then time to finish all the seam allowances. (A very time consuming task that I did not take into consideration, which is partly why the shirt is so late.)
The shoulder seam. I cut the allowance of the gathered edge down by 2/3,
folded the other edge over it and whip-stitched it to the seam line.
For the other seams I cut the allowances in half on one side and flat felled them using a whip-stitch. Since most of the seam allowances folded in different directions, I clipped them at all the intersections and overcast the ends.
I turned them all inwards for the gusset.
I put narrow hems on the bottom edges and reinforced the bottoms of the side seams with 2" x 2" triangular gussets. The gussets are the only thing I actually backstitched in.
The cuffs fasten with one big button and the collar fastens with two tiny ones.
The top of the slit sandwiched between two tiny triangles.
The finished shirt is huge. It's hard to take a good photograph of the whole thing, so I left one sleeve out of this shot.
It fits.
I like it a lot.
The cuff button.

The sleeves are awesomely huge. They get in the way a bit, but there is a great range of motion.
A view of the underarm gusset.

Making Dracula hands.
The Challenge: #4- Under it All


Fabric: Plain white cotton, given to me by my aunt.
Pattern: From a 1981 magazine article
Year: Late 18th century.
Notions: Thread, 4 mother of pearl buttons.
How historically accurate is it? The pattern is accurate, the construction is partly accurate, the materials are not. The look is reasonably accurate. Edit from 9 years in the future: No, small baby pre-transition Vince, the pattern and look are very much not accurate. But that's ok, you'll make many more shirts, and learn! 
Hours to complete: Unknown
First worn: March 3rd, 2014.
Total cost: $0


Here it is with a waistcoat and cravat.
Sadly, I am going to have to replace all the buttons on this waistcoat. The fabric backs are quite old and are tearing through. Two of the buttons have already popped off.
I am so glad to finally have a decent shirt.
I hope these construction notes are clear enough. It gets rather convoluted sounding when you type it all out.