

Dear me, I finished this coat over 2 months ago and am only writing it up now.

I wasn't sure if I was going to do anything for the August HSM challenge (Out of a Portrait), but then in late July I was scrolling through pinterest and the death's head buttons in this cute miniature portrait caught my eye.
 |
| Unknown man by George Engleheart. No date given but I'd say late 1780's or early 90's. Sold by Ellison Fine Art. |
Since I had everything necessary in my stash (I'm still sticking to my resolution to not buy fabric this year) and since the restrained colour scheme will go with lots of things, I decided I'd make it. I've wanted to do a coat with big multicoloured death's head buttons for quite some time now, so I was very excited to finally do that! It was also really nice to do a coat with only 2 buttonholes, as opposed to the 79 I did on my last one.
Making two wool coats in a row in summer is probably not the best idea, but now winter is starting and I have two more wool coats.

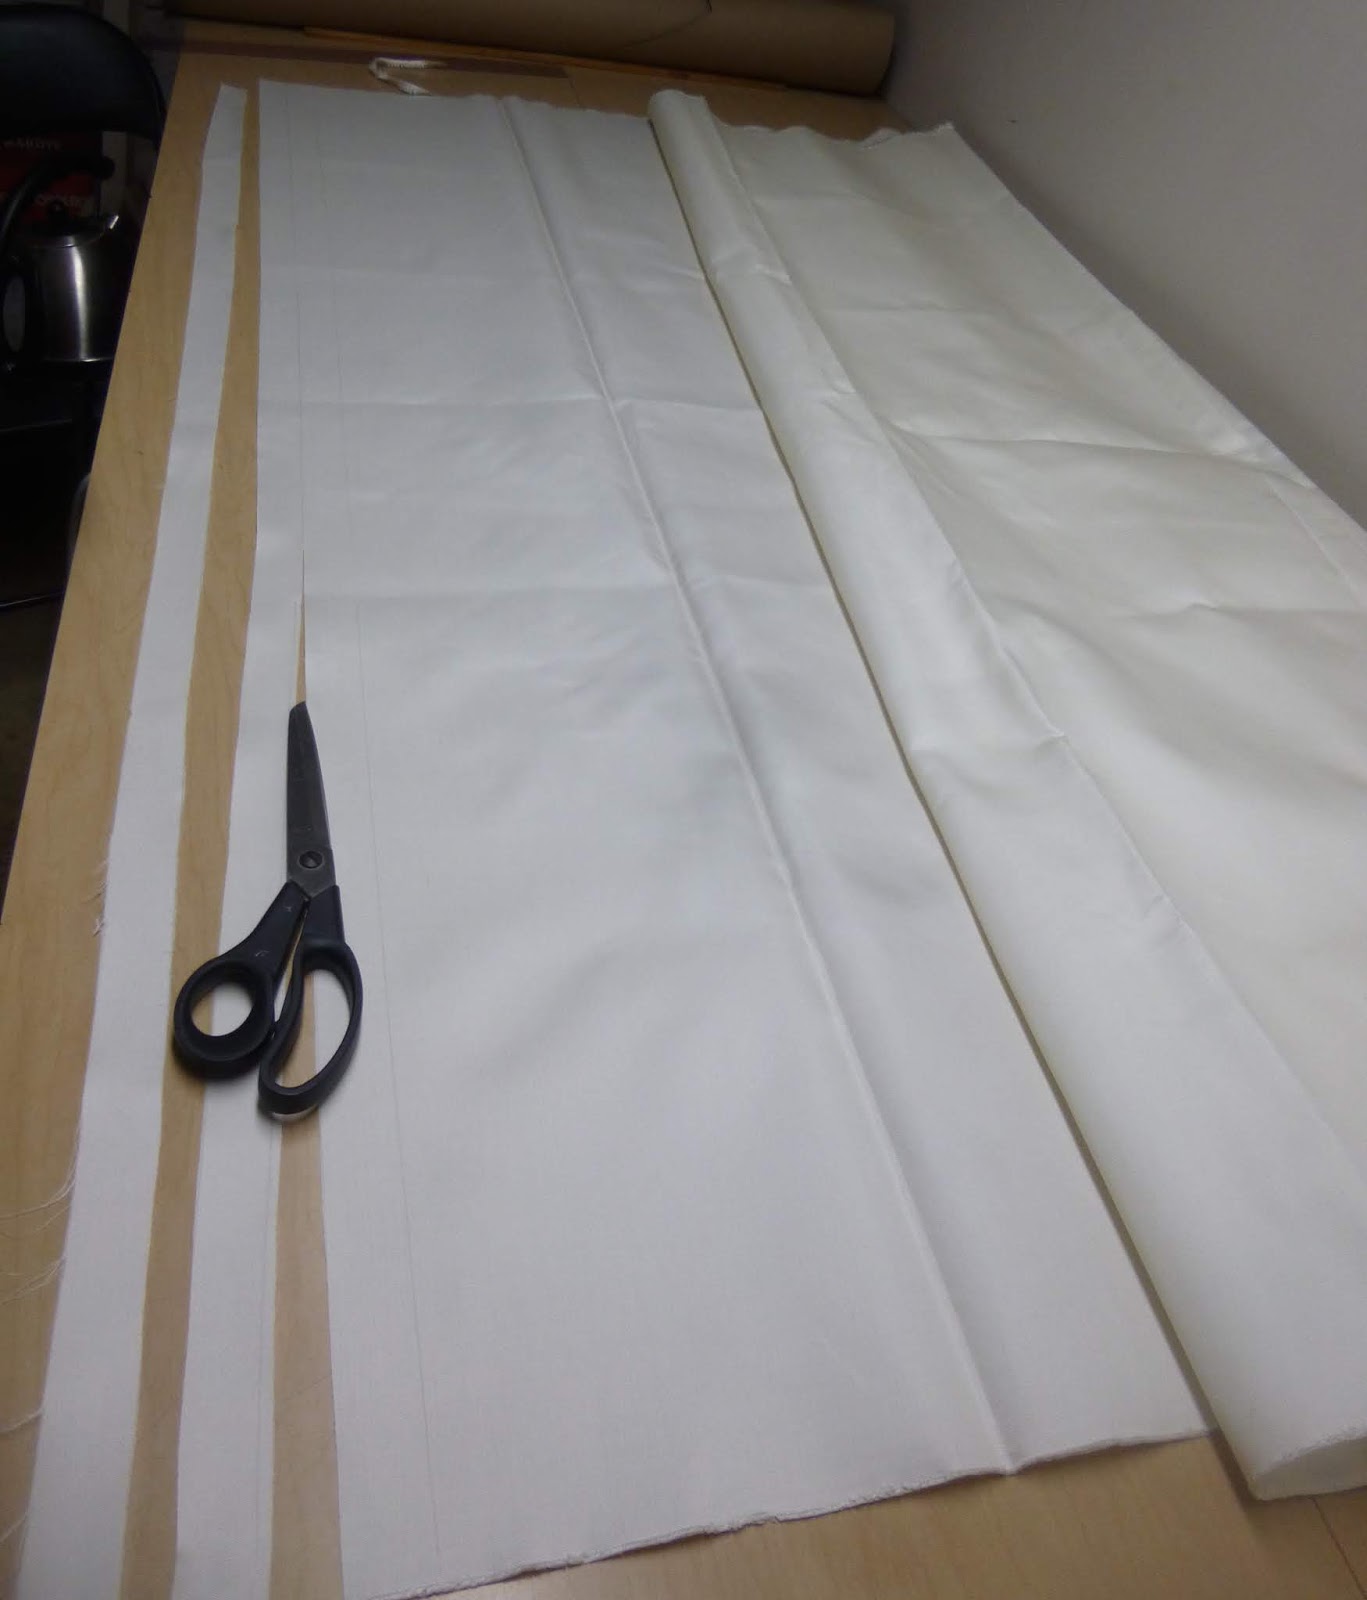
Here's a picture of my fabrics, though the black didn't photograph well at all. The coat in the painting looks like it might be either a silk taffeta or a fine, tightly woven worsted wool, but I used a rather loosely woven wool because it was in my stash and needed using. The writing on the selvedge indicates that it's fine 100's merino, and it has a wee bit of texture to the weave.
The off-white is silk taffeta (bought for an embroidery project that's currently in progress) which I used for the piping, and the blue is the same drapery silk I used to like that brocade waistcoat last winter. The off-white and black cotton yarns are for the buttons, and are from my mothers vast stash of weaving supplies.

For my buttons I used these nice 1.5" wooden discs, which can be purchased in large quantities on etsy. All I had to do to make them suitable for death's head buttons was drill holes through the middle.
The buttons in the portrait aren't super detailed because the portrait is so small, but they're definitely deaths head ones, and appear to be done only in black and white. I used a very off-white for mine, as pure white would be way too much contrast against all that black. The yarn looks cream coloured by itself, but on the coat it looks bright white.

This coat from the V&A has very similar buttons.
 |
| Coat c. 1785-90, V&A |
I followed instructions from the booklet "Death Head Buttons, Their Use and Construction" by Norman Fuss. It's similar to the technique shown by Gina Barrett in this video tutorial, but you use a pin instead of a stick, and tie off the wraps with a separate piece of waxed cord, and make a little x in the middle of the last wraps to help keep them secure. And tie off the thread and tie on a new one for every colour change.
 |
| Hmm, maybe I should try making my own button video? |
I did 20 of them.

I drafted my pattern based on the c. 1790 coat in Costume Close Up. We can't see much of the coat in the portrait, but it has the same sort of high 2 piece collar, and judging from the wrinkle under the bottom button it looks as though he has at least the top two buttons of his coat done up.
The c. 1790 coat pattern seemed perfectly appropriate, and it even had two functional buttons in the right place! The only changes I made were smoothing out the pocket flaps so they'd be the more up-to-date rectangular shape, and using a different cuff design.
 |
| My pattern. I drew it up according to my measurements, but very close to the shape of the pieces in the book. |
There was just barely enough of the blue silk left for the lining. I pieced one of the back skirt pieces, and one undersleeve. I've been trying to cut fabric as economically as I can lately, so I was pleased with how small and few the scraps were. I've put them in my little box of nice silk cabbage so I can use them for another fun patchwork lining. Actually, I have already used one piece in the collar of the waistcoat in my previous post!
 |
| The two pieced pieces of lining, and all the scraps that were left. |
It's a little hard to tell for sure, but I think the coat in the portrait has white piping to match the white on the buttons. The edge of his coat definitely looks lighter than the rest of it, and contrasting piping was very much in fashion at the time. In previous projects with piping I've cut it on the bias, but more recently I have learned that this wasn't done in the 18th century because it's a terrible waste of fabric, so I was excited to try cutting it on the cross grain!
 |
| Being very frugal with my expensive taffeta. |
Cutting enough strips to do all the piping took only 17 cm of yardage. Nice.
I machine sewed cotton cord into the strips using a zipper foot.

I wasn't sure how the piping should be attached, and I decided to fold the edges in first and then sort of stab stitch it on, but in hindsight I think just sewing the piping on first and turing it might have been better.
 |
| I did the pocket flaps first, as usual. |
It was very interesting to compare this coat to the 30's one I made just a couple of months before. So much changed in that 60 years!
The 1730's coat has buckram all down the front, buckram in the cuffs & pocket flaps, extra stiffening in the front skirts, batting in the back skirts, and more batting padding out the chest. But the 1790 one in the book has stiffening only in the pocket flaps, the collar stand, and down the front edge only on the side with the buttons! It also says there's padding in the chest and an extra layer of fabric interlining the shoulders at the back.
This coat also took about 2/3 the amount of fabric that the much fuller 30's coat did. I used 2.8 m of green wool for that one, and had to pieces the skirts in a few places, but for this one I only used about 1.9 m of my black wool. Unsurprisingly, the 1790 coat feels much lighter to wear.

I stitched my collar pieces together so I had an outside and inside layer, then carefully folded the edges in and sandwiched the piping between them.
 |
| I can't think of how else to put piping around a collar. |
I had tacked a piece of fairly lightweight buckram into the collar stand, but after finishing the coat it proved to be floppy, so I took the collar apart and replaced it with much heavier buckram.

I put some running stitches along the folded edge of the collar so the layers wouldn't shift around too much. With all those seam allowances it's a little bulky up there.
I think I angled the back seam on the collar pattern a bit too much, and next time I'll cut it straighter. It's just a little too hunched forward.
The chest padding here is very similar to that of the 30's coat, but as I didn't want to risk any white cotton fuzz sneaking out through the shifty loose weave of the wool I encased my scraps of quilt batting in a bit of black linen.

I tacked these in place with a herringbone stitch, after I'd put the buckram in.
The coat in the book only had buckram on one front edge, but I wasn't about to not interface two functional buttonholes in such a shifty fabric, so I put it on both sides. I stiffened some more of that black linen for it.
I'm using black linen for the interfacing because I think I have more black linen in my stash than white, and I can't remember buying most of it. I have very little brown linen by comparison.
 |
| The front with the buckram tacked in, the padding on top of that, and the piping. |
 |
| little bit of back interfacing about to be basted in. |
For the aforementioned extra layer of fabric on the back I cut two more pieces of that black linen (Not stiffened) and just basted them on around the edges of the back pieces.
I put in the pockets, added the pocket flaps, made the two buttonholes, and sewed on the buttons.
 |
| Buttonholes from the outside. |
With the 30's coat I pieced little bits of fabric in around the buttonholes on the lining side, because the fabric was thick and frayed too much to just cut slits, and also because that's the method used on the precious few inside pictures I've found of buttonholes from around that period.
For this one the lining was thin and tightly woven enough to just cut slits in the lining and turn the edges under. I did the buttonholes in black DMC cotton pearl, through the wool and buckram layers only, before adding the lining.
For this one the lining was thin and tightly woven enough to just cut slits in the lining and turn the edges under. I did the buttonholes in black DMC cotton pearl, through the wool and buckram layers only, before adding the lining.
 |
| Buttonholes after being lined. |
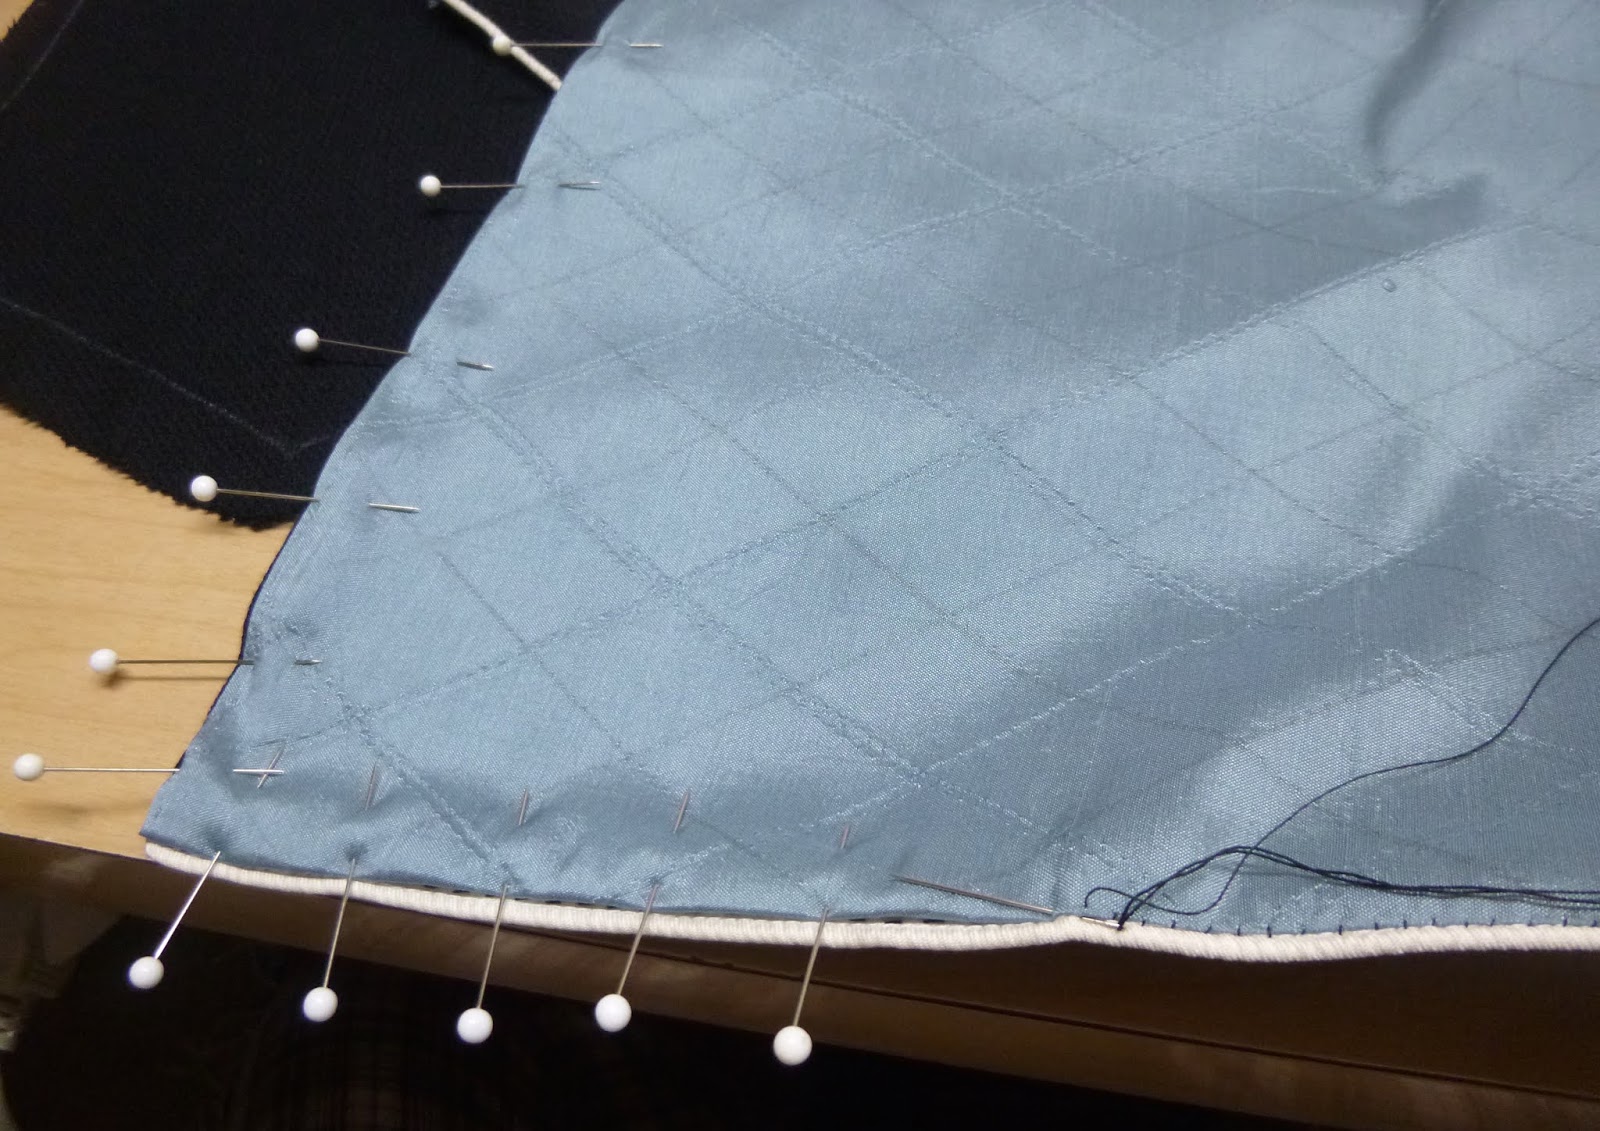
After adding piping to all the edges I sewed the lining in in the usual way.
I wasn't sure which of the back edges needed piping, because you can't see the back in most portraits & fashion plates, but thankfully this striped & piped coat from the John Bright Collection included a picture of the back. It has piping visible on the centre back overlap and on the edges in the back pleats, so I piped all my edges except for the hem and the underlapped edge at the centre back.
 |
| Coat c. 1790's, John Bright Collection. |
 |
| I didn't take any photos while sewing the piping on so here's another one of the lining being added. |
The coat pattern in the book has a cuff that closes with 5 tiny buttons, but since I wanted all my buttons to be big I went with this style of cuff instead.
 |
| Suit, c. 1790-95, Bunka Gakuen Costume Museum. |
The buttons on the cuff in the above photo appear to be functional, but seeing as I wasn't making my sleeves tight enough for that to be necessary I didn't bother. I just finished the whole sleeve end and stuck a fake cuff over top.
 |
| Portrait of a cellist, c.1788. Antoine Vestier. |
The cuff was the last thing I piped, and I sewed it on and flipped it in like one normally does with piping. This worked pretty well, and I think next time I'll do it this way instead of how I did it on the rest of this coat.
 |
| The cuff edges about to be pressed inwards. This was then carefully stitched onto the end of the sleeve. |
I sewed the long seams on the sleeves and sleeve linings by machine, then stitched down the edge of the lining by hand. I basted the two layers together on the sleeve head so they wouldn't shift around.
 |
| Finished sleeves. |
 |
| Here's the lining bit that I sewed down by hand. |
And now it was time for the final assembly!

For my 30's coat I had to move furniture and spread the pieces out on the floor to get photos of all of them, but the pieces of this little coat fit quite nicely on my bed.

Something I talked about with the previous coat was the fact that maybe I should have put some extra something or other around the armhole for a bit more sturdiness, so I did this time. I added little bias bits around the armhole, cut from my black linen scraps. There's no mention of this in the book but it seemed a logical thing to do, and as I've said my wool is fairly shifty.

I sewed the back, side, and shoulder seams with a backstitch. I also tacked down the shoulder seam allowances with a herringbone stitch so they'd be sure to lie nice and flat.

I basted in the sleeves to check the fit, and then sewed them in with a backstitch.
 |
| This appears to be a photo of the basting. |
At this point I noticed I had left the upper front linings all detached and flappy, and though "oh, hmm, maybe I should have basted those in strategic places while they were still flat." But with some careful smoothing and pinning they went into place just fine.

I did a little bit of a topstitch around the top of the sleeve to help all the layers lie flat.


I finished sewing the lining down by hand around the collar and armscye.

I mentioned in my 30's coat post that I wished I'd cut the back skirt linings a bit higher then the waist, so I did that this time. It did indeed make the pleats neater, and I only had to slipstitch a few little bits of lining together after sewing the side and back seams.
I carefully hand stitched the little centre back overlap bits.

I put in the back lining, as usual.

And lastly I pleated the pleats, and tacked them in a few places so they'd lie better. It was much easier than the 1730's coat, because the skirts are so much narrower and the pleats far fewer.
 |
| I think maybe you're supposed to do little bar tacks with these? I just stabbed through a few times with heavy linen thread. |

I sewed the last two buttons on over the tops of the back pleats, and it was done!

Here's the picture I submitted to the Historical Sew Monthly, and sadly the collar is floppy in it because it's from before I replaced the buckram.

The Challenge: August- "Out of a portrait"
What portrait is it based on? Unknown man by George Engleheart, sold by Ellison Fine Art.
Material: about 1.8m of black wool, and the same of blue-grey drapery silk. A little bit of brown linen for the back lining, about half a meter of black linen (some of it stiffened for buckram), and 17 cm of off-white silk taffeta for the piping.
Pattern: Drafted myself, based on the c.1790 coat from Costume Close Up.
Year: c. 1790
Notions: Silk thread, linen thread, cotton thread, polyester thread, 2 different colours of fine mercerized cotton yarn, cotton cord for the piping, twenty 1.5" wooden discs.
How historically accurate is it? Pretty good. Most of the materials are fairly accurate (I think the wool is probably the least accurate of them, since it's fine merino with a rather loose textured weave) and there's a bit of machine sewing but other than that the construction is pretty accurate. The cut and overall look is accurate.
Hours to complete: 61
First worn: August 21st, 2019
Total cost: As with my previous coat- I inherited the wool, some of the stiffening and whatnot was given to me, and I think the rest of the materials came to somewhere between $40 and $50 Canadian.
Overall I'm very pleased with this coat and I think it's one of the best things I've made so far.
 |
| I finally altered those grey breeches so they fit properly! |
I got some nice photos of me wearing it in October, which I will post soon in a different post! (I already posted a few here.)