
I finished these a few weeks ago.
I'd only ever made late 18th century breeches before, and early 18th century ones are quite different. This pair from The Met was my main inspiration.
 |
| Breeches, British, c. 1740. |
And all this makes sense when you look at the waistcoats! Early 18th century waistcoats are very long (mine ends a bit above my knees), so the button fly won't show, and nor will the excessive crotch wrinkles from all that extra fabric there. The splayed shape was presumably better for riding horses?
During the 1730's it was fashionable to only have a few buttons done up on your waistcoat, at about the level of the pocket flap. And since the waistcoats were so long and the pocket flaps quite low, that leaves a very big unbuttoned gap on your torso. Before making my 30's breeches pattern I tried on my 30's waistcoat over my stripey late 18th century breeches, and found that the waistband was so high it was visible in the unbuttoned part of the waistcoat! So I lowered it a few cm for this pattern.
 |
| Back view of the above breeches. |
What doesn't make sense to me is the presence of pocket flaps. Decorative pocket flaps on breeches? Why? They're going to be 100% covered up by the waistcoat, but there they are. Not on all the pairs of early 18th century breeches I referenced, but on quite a few. They're weird, so of course I was very intrigued and had to include them on my breeches.
There are a few more examples on the "with fly closure" section of my breeches pinterest board. (One especially confusing pair has four pocket flaps, but the source link is broken.)
 |
| Breeches, c. 1720, probably French. |
 |
| "After" by William Hogarth, 1730-31. (Detail) |
In Marriage A la Mode (1743), and in a 1751 painting of a soldier, we can see that they're definitely functional pockets! The Met pair appears to have a couple of welt pockets on the waistband too, but I didn't do those.
 |
| Marriage A-la-Mode 2, The Tête à Tête, William Hogarth, 1743. (Detail) |
#/media/File:Marriage_A-la-Mode_2,_The_T%C3%AAte_%C3%A0_T%C3%AAte_-_William_Hogarth.jpg)
The Cut of Men's Clothes has a c. 1730's pattern on page 66 which I based my pattern pieces on. Normally I wouldn't post images from a book, but since the whole thing is available online as a free pdf I don't think it makes much of a difference.
 |
| The front part of the crotch is a perfectly straight line, as are the side seams. |
Since I had already drafted a late 18th century pattern that fits me well, I traced those pieces and changed them to look more like the 30's pattern. I tried to photograph this, but pencil on brown paper doesn't photograph well so you can't really see it, sorry.
I lowered the waist (especially in front), made the waistband narrower and longer, added more material to the crotch seam, made the curve around the knee a bit more shallow, and drew a pair of pocket flaps the same shape as the ones on The Met's pair.
Because the cut of these is so different, I did a mockup.
 |
| Very unhelpful picture of the pattern changes I made. |
Ideally I would have made these out of the same green wool as my 1730's coat, but since I made that with 2.9 metres of inherited wool that I couldn't get more of, I only had scraps left. I bought 1 yard of the closest colour match I could find, which was a forest green wool broadcloth from Renaissance Fabrics. It was a bit more blue than my coat scraps so I overdyed it with yellow. Even though my sample came out perfect, in the actual dyeing I somehow overcompensated and now the coat scraps look a bit bluer by comparison. The difference looks really bad in this photo, but it's much better in person.
The broadcloth I bought is too heavy for breeches, really. It's considerably heavier than my coat wool, and would be ideal for a winter coat or cloak, but it still worked decently well for my purposes. The colour difference shouldn't be too noticeable, because not much of the breeches show when you're fully dressed, and there will be a contrasting waistcoat in between them and the coat.
 |
| Pieced waistband and a pieced back panel. |
Most of the sewing on these breeches is by hand, with the exception of a few seams on the lining and the pocket bags. All the stitching on the wool is by hand with linen thread because that's stronger than the cotton thread in my machine.

I sewed the pocket flaps and pockets in the usual way. Edges of the fashion fabric pressed in around the buckram, the lining put on the back with the edges folded in and stitched down with Le point à rabattre sous la main. Pocket slits cut open and the edges pressed inwards. I sewed the two halves of the pocket bags together by machine and then attached them to the opening with a small whipstitch.


It's not historically accurate but it's comfortable, sturdy, has very little bulk, and is from my stash, so I really don't care. Nobody will see it!


 |
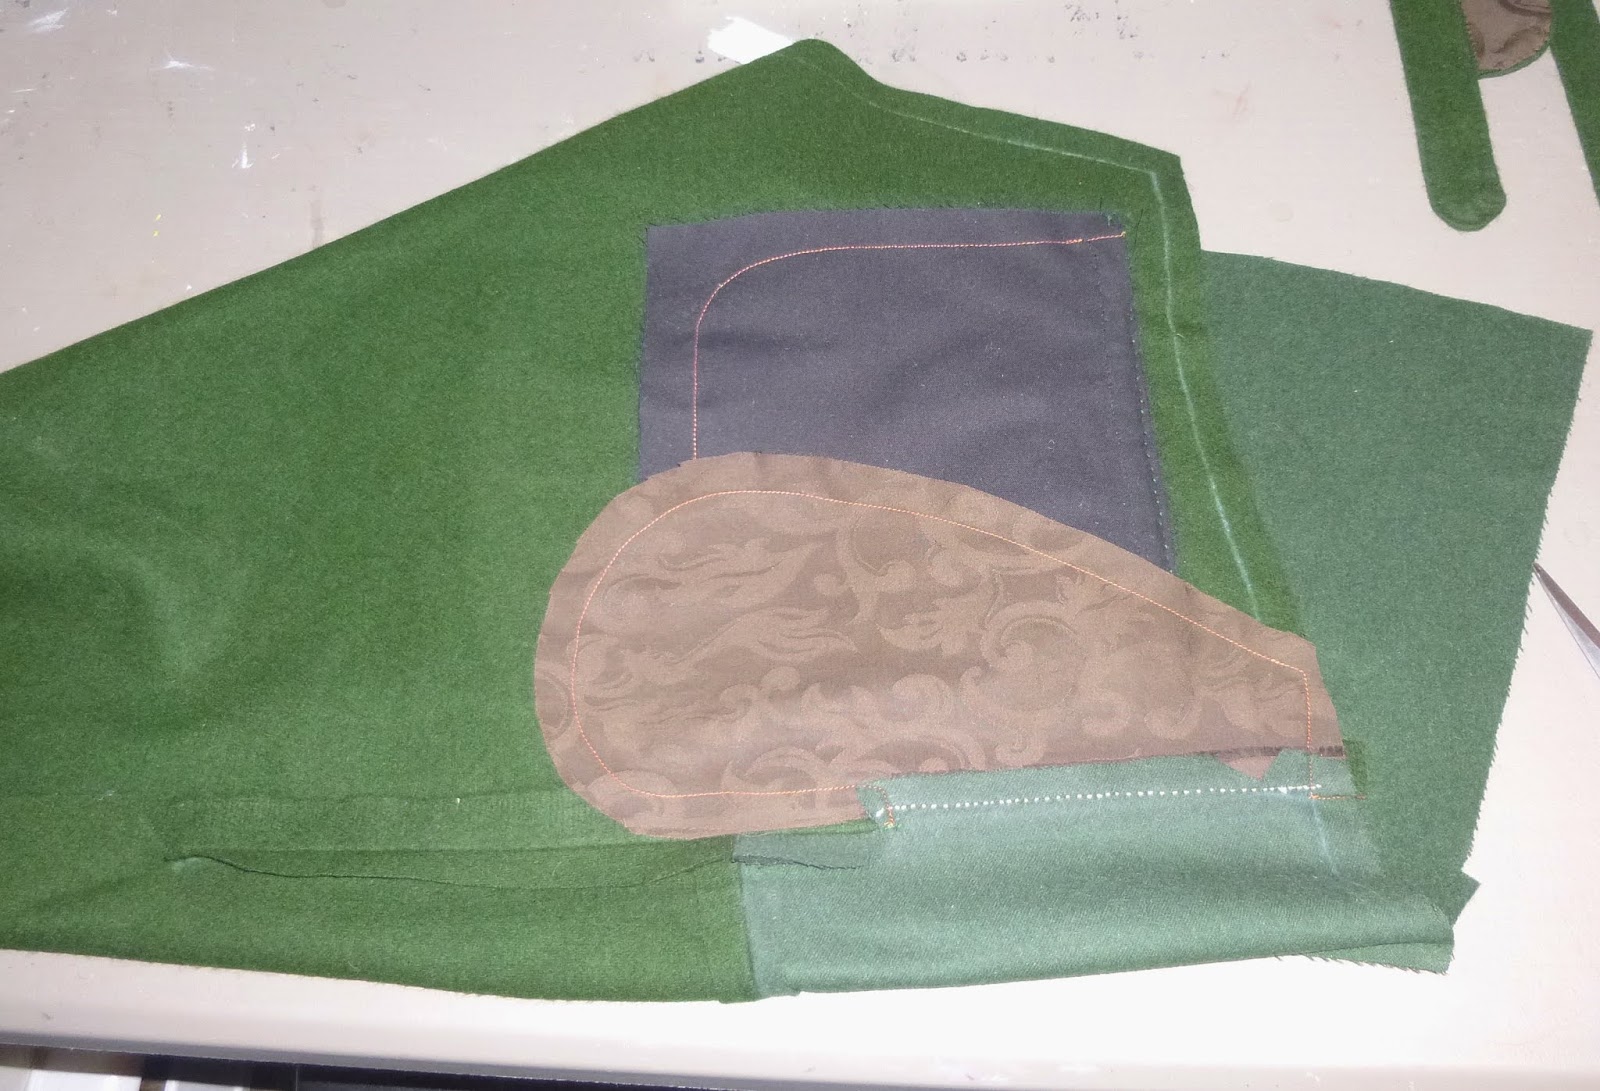
| The overlap bit where the buttonholes will go has the edge folded under but the underlap bit which the buttons will attach to doesn't. I'll trim off that bottom edge at the white line. |
 |
| Inseam sewn, side seam not sewn yet. |
(This is also why I always sew the crotch seam twice when I alter pants at work. I've had to re-sew multiple burst open pairs that some other alterations tailor used only one row of stitching on.)
 |
| Backstitching the lining legs together. |
 |
| Left one is stitched, right one isn't. |


The mid 18th century pair of breeches in Costume Close Up has the fashion fabric gathered, while the lining is pleated. I can't tell if the Met pair has the lining pleated but it seemed like a good way to help cut down on bulk a little, so I did it. After backstitching the waistband on I pleated the lining and secured it with a running stitch.
 |
| Backstitching the waistband on. |
 |
| Wrangling those bulky seam allowances into place. |


The kneebands are lined with the same off-white silk taffeta as the waistcoat, because the end that pokes through the buckle is the only part of the whole lining that might possibly be visible.
Now, buttonholes! I took a lot of pictures while sewing the buttonholes, because this is actually the first time I've done 18th century buttonholes correctly. It's a bit embarrassing that it took so long. I was doing them mostly nicely, I just didn't think to try the bar tacks at the ends for some reason. I'd seen them in lots of images, so I have no idea why I never did them until now.
I mentioned in my waistcoat post that it was only after I'd finished all the buttonholes that I came across a nice tutorial for false 18th century buttonholes, but then shortly after that I came across one for functional 18th century buttonholes! Aside from the bar tack it's basically the same as what I've been doing.
I marked out the locations of all the buttonholes and cut them open with a chisel. I overcast the edges with a fine green cotton thread to keep all the layers in place.

I've seen a few different instructions for how to loop your thread around for buttonhole stitches, but my preferred method is taking the thread from the needle end and looping it clockwise around the needle that's poking through the fabric. I find this the fastest and easiest way, since that end of the thread is already in my hand. If you're working the buttonhole stitches in the other direction you'd have to loop it around the other way.


I forgot to take a closeup picture of the eyelets. I poked holes with an awl, and just sewed around the edges a lot with green waxed linen thread (no buttonhole stitches! I know some eyelet tutorials say to do that but it's too bulky and bumpy.) occasionally widening the hole again with the awl.
I put a short length of cotton twill tape through these holes and hemmed the ends. Can I call it lacing if it's just two holes? With the 4 holes on my later breeches it's lacing, but I think for these I'll just have to call it a tie or something.


The fly extension is lined separately and then, after adding the buttonholes, it's simply sewn to the inside. I backstitched it in from the outside, with stab stitching at the ends to keep it more secure. I did another row of backstitching on the other side of the opening, so it would be more symmetrical, and because the Met's pair has one.
There's no interfacing of any kind in the fly area. I might consider it for a finer fabric, but not this thick wool.
There's no interfacing of any kind in the fly area. I might consider it for a finer fabric, but not this thick wool.
 |
| The completed fly from the outside. |
 |
| The completed fly from the inside. |


The Challenge: Green
Material: Green wool broadcloth, scraps of a different green wool, dark brown cotton damask, a couple of tiny scraps of plain black cotton, an even tinier strip of off-white silk taffeta.
Pattern: Drafted based on one from The Cut of Men’s Clothes, and an extant pair from The Met.
Year: c. 1730’s
Notions: 16 wooden button blanks, a bit of black cotton twill tape, linen buckram, linen thread, cotton thread, DMC cotton pearl, and a little bit of silk thread.
How historically accurate is it? Pretty good. There’s only a little bit of machine sewing in the lining, and the materials are mostly ok, with the cotton lining being the least accurate of them. The cut is pretty accurate, and the construction is probably not totally right but it was my best guess (aside from the deliberate choice to do the kneebands with a slightly later method). I’ve found next to nothing on early 18th century construction, so I’m just trying to work backwards from the mid century stuff in Costume Close Up, and squinting at a lot of photos trying to copy what I think is going on. The look is pretty good, I think, and will be mostly hidden by the waistcoat anyways.
Hours to complete: 34:53 wow that is longer than I expected.
First worn: February 12th, just for a few photos. I actually finished them on the 2nd, but camera troubles and procrastinating delayed the photographing and posting.
Total cost: I’m not exactly sure, but probably at least CA$30. Wool gets awfully expensive when you add shipping costs and convert it from American to Canadian dollars :( But most of the other materials were things I didn't buy.
And I still have some big chunks of my broadcloth left, which I think I'll use for mittens from that Diderot pattern.


Not looser because they're uncomfortably tight or anything, it's just that earlier 18th century breeches generally appear to be a bit looser because they weren't as visible as the later ones.


- Trying to copy that very round inseam curve that the extant pairs have
- Making them just as tight at the knees but a bit looser in the rest of the leg. On the extant pairs it looks like the inseam is kind of.. vaguely s shaped? I'll do that.
- Making the seat just a little bit less full, because both extant 20's pairs appear to have fewer gathers.
- Doing the very slight gathering at the front of the knee, and copying the kneeband method from The Met's photos as best I can.
So that'll be fun! I already have the fabrics for it, but am not sure when I'll get started.
