
In 2021 I got back into making repeating patterns after not having made any since textiles class in college about 4 or 5 years ago.
I like it a lot. I missed doing repeating patterns. I hadn't done any since college mainly because I had no way to edit them, but then I learned about photopea.com and started using that. It's a bit glitchy sometimes (save multiple backup psds!!) but it's free to use and has an offset filter, so it works for my pattern making purposes.
The first one I did was this monster pattern. I drew 24 little monsters in my sketchbook, using a newer pen for the outlines and a pen that was running out of ink for the texture.

I scanned them and arranged them like this. It's pretty easy to make small motifs repeat - you just put some in the middle of your blank image, use the "offset" filter to make the edges shift around so the middle has moved to the outside, and then you can put more things in the middle and keep doing that until it's all filled in.

I did 9 different colour versions of this one.


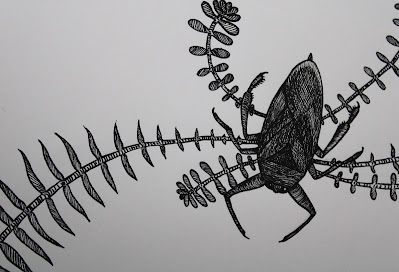
The next pattern I did was much bigger. Spoonflower has weekly design contests, and the one at the beginning of last November was "Quirky Amphibians". The prompt spoke of them wearing outfits and doing everyday activities, so of course I had to submit something. I decided to do a toile featuring frogs in 18th century clothing.
I spent a good portion of October working on it. I made a private pinterest board filled with a couple hundred reference images of pond life and 18th century objects, and once I'd done some sketching and decided roughly what the design would be I sketched the full layout at the final size on 6 large sheets of paper. I held them together with some painter's tape on the back while drawing, and switched the pieces around to fill in all the edges so it would repeat.
In order to do ink drawings of them I transferred the lines onto nicer paper. I don't have a light table, so I used a sheet of glass laid across 2 boxes with a light underneath.
If you're going to do this make sure it's with a light that doesn't get too hot! Incandescent bulbs are not suitable, they'll get way too hot very quickly!
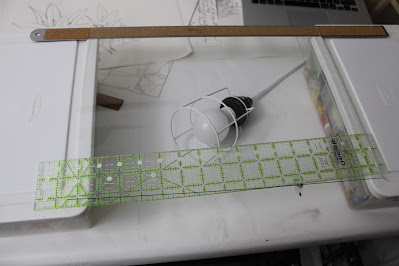 |
| My makeshift light table. This is the glass from a picture frame, but I've since brought home an old window pane that's bigger & stronger. |
I traced the drawings lightly in mechanical pencil and inked them with dipping pens.
Being able to vary the line thickness makes it much closer to the look of engraved printing than I can get with my usual pens.


 A few of the frog scenes were a bit too big to fit onto my parents scanner and I had to scan each end and edit them together, which was a bit tricky. When I finally had them all scanned I arranged them all together on a background the same size as the 6 papers I'd done the sketching on (33" x 28" in total).
I did 6 frog scenes.

This one's my favourite. I think the shading and composition turned out really nice, and that the idea of reading bedtime stories to a cradle full of eggs is quite funny.
I filled in the spaces between them with these little clumps of weeds, and there's a crayfish, a giant water beetle, and a few snails in there too.
I took a photo of the 6 papers together and used it as a guide to show me where to place each of the drawings. Sometime in this process I also darkened up the pen lines (they always look a bit washed out when you scan them) and erased all the yellowish paper background.
I finished it just a few hours before the deadline to enter it in the Spoonflower contest, and it won! (I wish I'd submitted the blue version, but I didn't do the different coloured ones until after, and I'd stayed up all night editing it so was just glad to have it finished.) I did 10 different coloured versions.
 |
| A bit more than a full repeat of the frog pattern. |
 |
| Here are my spoonflower samples! |
A little while later I ordered 2 yards of the green on a linen/cotton blend from MyFabricDesigns, which I intend to make into a jacket.
It's lovely quality and I'm very happy with the colour green that printed but ooghhh, the shipping and duty fees were exceptionally horrible on this one.
I think next time I want some custom printed fabric for me that isn't Spoonflower proofing samples I'll get it from DesignYourFabric, since they're right here in Canada. (Sadly they don't have a public marketplace though. And frustratingly they only take credit card, and I still haven't got one of those. Ugh.)
I think next time I want some custom printed fabric for me that isn't Spoonflower proofing samples I'll get it from DesignYourFabric, since they're right here in Canada. (Sadly they don't have a public marketplace though. And frustratingly they only take credit card, and I still haven't got one of those. Ugh.)
 |
| My lovely green frog toile that was so many dollars to ship. |

The next pattern was not one I had planned to do, but multiple people asked for it.
Way back in surface design class when I was first learning how to make things repeat, I practiced with this little dinosaur doodle. It was not meant to be a proper pattern, and I don't think it's very good, but when I found it in my folders and posted it on the dinosaur pages I got a bunch of people asking for it to be real fabric.
 Well I certainly wasn't going to put that in my spoonflower & redbubble shops, one dinosaur in the same position repeated endlessly on very repetitive scribbles looks awful, so I made a bigger pattern with the same general style.
I drew 14 distressed looking dinosaurs in sharpie.


 I didn't much like the way it looked with most of the colours I tried, so only ended up doing 3 versions of this one. Red scribbles, grey scribbles, rainbow scribbles, and a purple watercolour & coarse salt texture I made back in college.
I drew a full page of scribbles with pencil crayon and made it repeat by using the offset filter and copying little chunks to fill in the gaps.
And then put 4 of those scribble repeats together and arranged all my black dinosaurs on it.
I might try some more someday, after I make more repeating textures.
And finally, I made a hygienic bathroom dinosaur pattern. I mean to eventually do some more domestic dinosaur patterns, but I had hand washing on my mind at the time, so started with this one. I sketched out the design on paper first, just like the frog toile, and used a photo of it as a guide. Drawing over these digitally took so long, because I hadn't borrowed a tablet yet and had to do it all on a trackpad with my finger.
 But finally it was done! I wish I'd made it a half drop, I don't like how square things look when the repeat is small.
 I put a big and a small version on Spoonflower, and no other colour variations. Multiple people have bought it in shower curtain for off Redbubble!
 I added my other old repeating patterns too. I'm not thrilled with all of them, but they're ok. After my samples came I changed the colour and scale of a few of them.
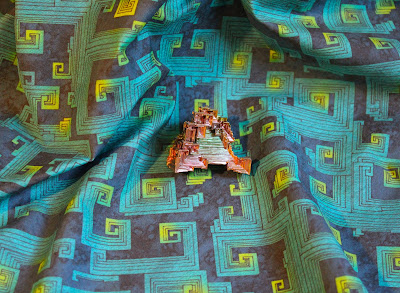
 The bismuth one is definitely the best of the ones I did for this assignment! I drew all those lines with pen!!
 |
| My spoonflower samples. |
 |
| My spoonflower samples. |
In one of my sample orders I threw in my bird print from 2017 fairly last minute. This was one I did for a 3 colour screenprinting assignment and I still have all the files, so I added some colour and texture, and a plainer version with just the outlines.
I did a fall, a winter, and a nighttime version. (I tried a summery one with green blobs, but it looked horrible because the lineart is of bare trees.)
 |
| My older monster drawing style has changed a bit since these. |
 |
| Here it is with an actual piece of bismuth. |
Phew, now I'm finally caught up on 2021 blogging! It was perhaps a foolish idea to wait to do my year in review post until after I'd caught up, because I'm a terrible procrastinator and it's now mid February.


