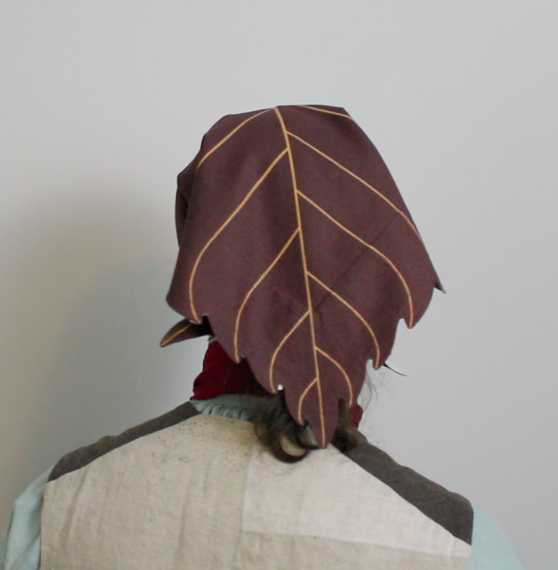
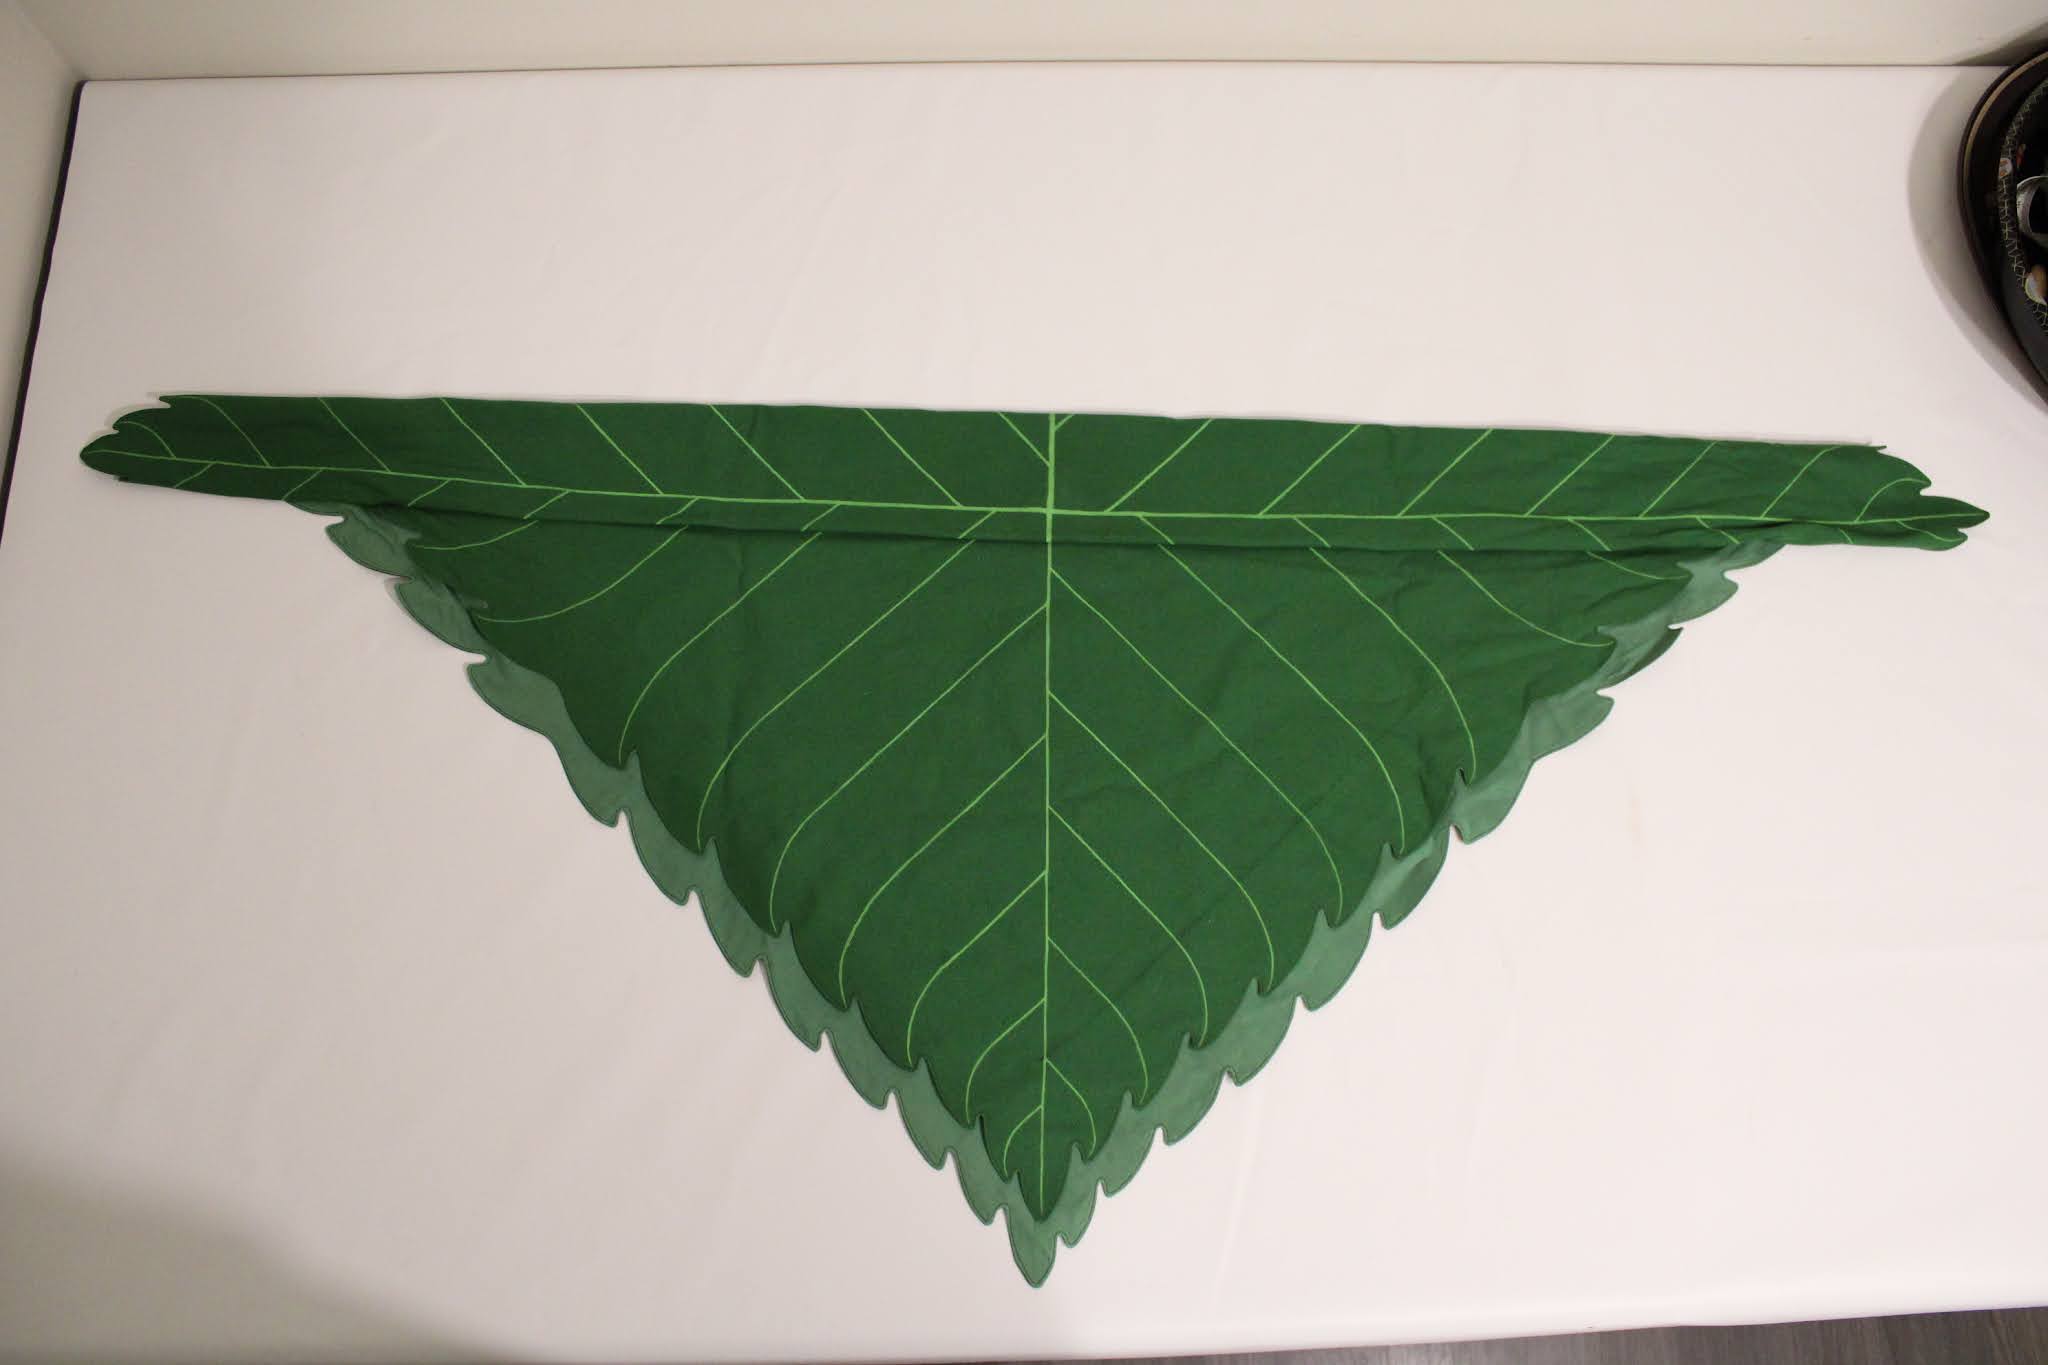
It's an ok size, but it could stand to be a little smaller, so for my next one I'll aim for a finished size of 72 cm square.
 |
A scan of my pattern.
|
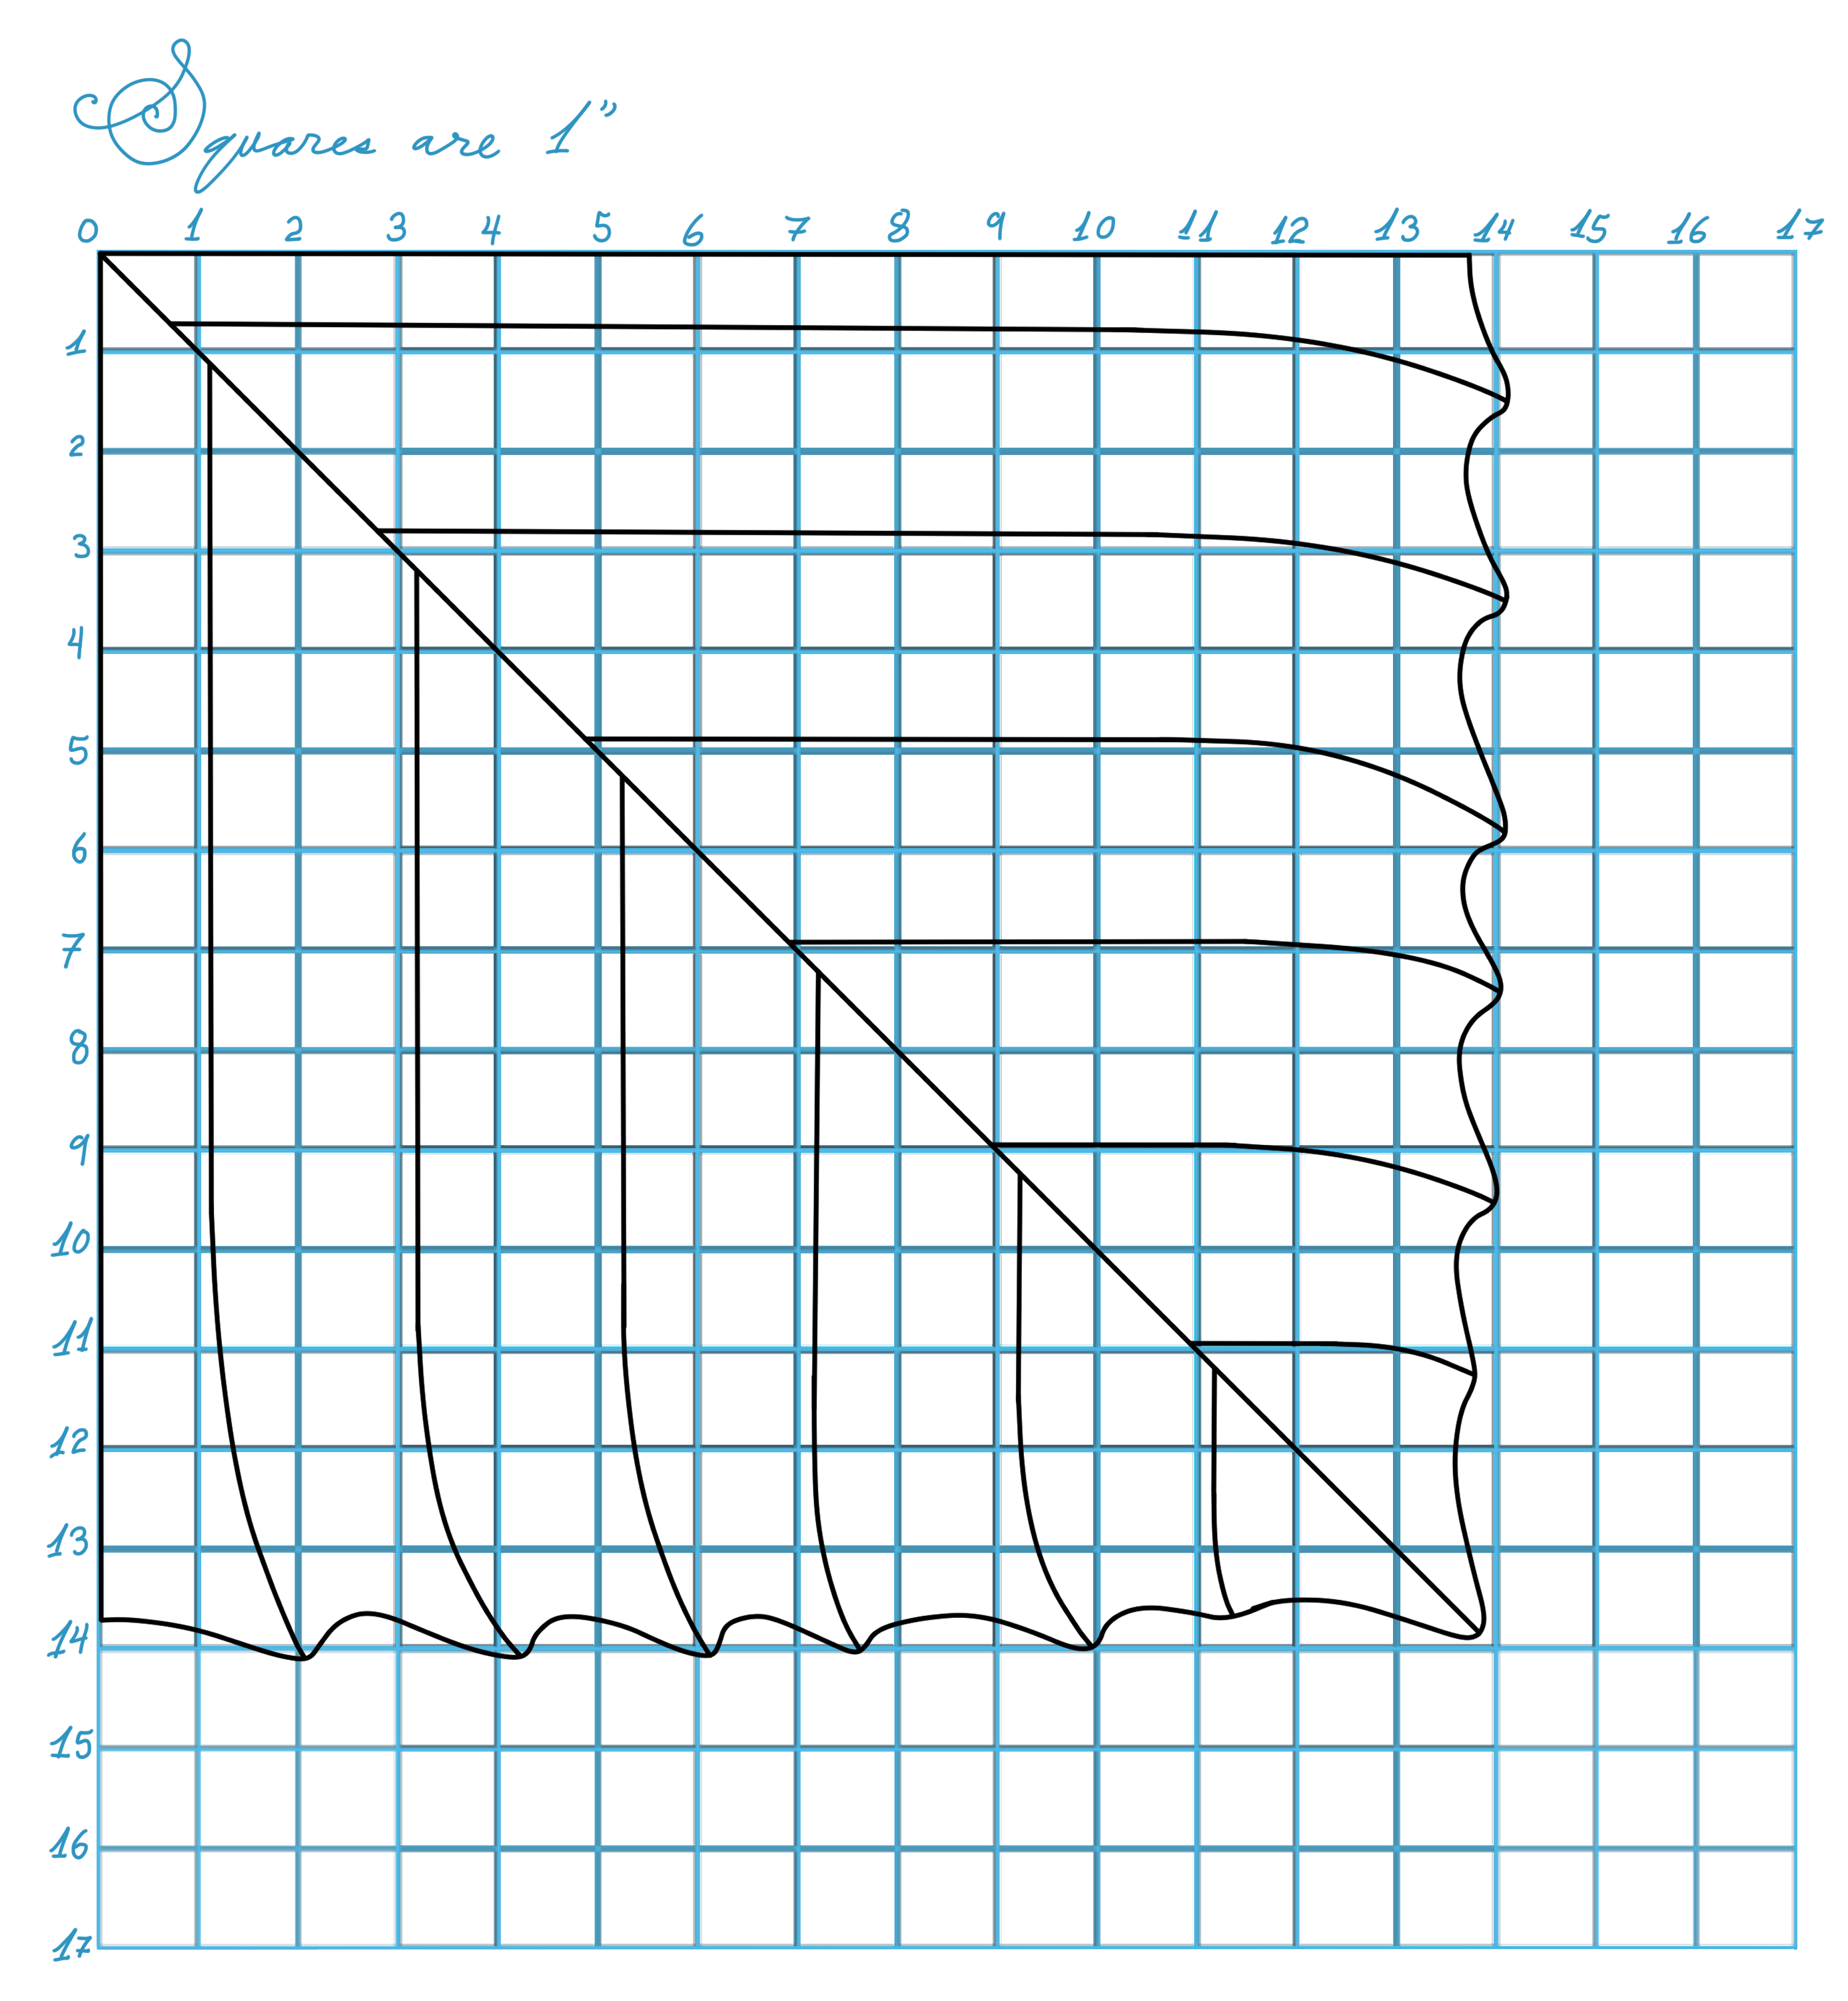
I scanned my pattern and traced it, and here it is on an inch grid so you can scale it up.
My head is 60 cm around, so you might want to scale yours up or down a bit if your head is significantly bigger or smaller than that.
If you'd prefer a symmetrical leaf, you can just copy half the pattern and mirror it. Or draw your own serrated edge pattern on a square the same size, there are many different kinds of leaves to be inspired by!
If you don't want to sew serrated edges, that's ok! There are plenty of leaves with smooth edges, and painting the vein pattern on just a hemmed square will still look leafy.
My main fabric is a plain dark green quilting weight cotton. One metre (or one yard) is sufficient, I bought one metre and still have some fabric leftover.
For the facings I used a much thinner cotton. Not quite sheer, but very lightweight so as not to make the edges too bulky. Half a metre (or half a yard) is plenty for the facings. I used a pale green, since the underside of a leaf is usually a lighter colour.
I traced my pattern piece 4 times, going around all the edges with a white fabric pencil, but
not marking the veins on yet.
Since the veins and serrations are staggered, I didn't flip the pattern piece upside down at all when tracing, I just kept it the same way up the whole time, otherwise the spacing would have been uneven in the middle where the 4 leafy pieces meet.
I cut out the square with a fairly generous seam allowance.
I didn't use a pattern for the facings, instead I cut 4 strips about 7 cm wide and as long as the width of my square. I marked the angled ends by lining up a ruler with the corners of the leaf, and the exact middle of the square (which is easy to see because it's where the squared off corners of the traced pieces all intersect).
 |
I marked both ends on all 4 pieces this way
and cut them off with a 1 cm seam allowance. |
I sewed the 4 corners of the facing with a
very small stitch length, and didn't backstitch. I pressed the seams open, turned my big square over so the marked outline is facing down on top of the table, and smoothed out the facings over top of the square with the pressed open seam allowances facing up.
 |
| The square & facings, right sides together. |
I pinned all around the edge and sewed along the marked line on the square, again with a
very small stitch length.
This took quite a while, since to go smoothly around all those little curves I had to lift the presser foot, pivot slightly, sew a few stitches with the handwheel, and then doing that again and again and again. (I did sew normally with the machine along the longer curves, but for the small ones it was mostly the handwheel)
I trimmed along the outside of this seam very close, about 3mm. This is why the small stitch length is important - so it doesn't come apart and fray. I also clipped a couple of times (carefully! Don't want to cut the stitching!) inside each of those tiny little inner curves.
If you've never done anything like this I strongly suggest doing a sample or several. Making samples is always a good thing to do when trying new techniques.
I turned all the points right side out with the help of my bamboo point turner, and pressed the edge all nice and flat. When turning the edges out I sprayed my hands with a little bit of water, because I find that damp hands make it much easier to work the seam to the outside on edges like this.
(Sorry I don't have many photos of these steps! I would have taken more progress pictures if I'd known there would be so much interest in this.)
I wanted the edge to stay flat, so after pressing it I topstitched very very close to the edge, about 2mm. This also took a lot of pivoting and was very slow. I didn't backstitch for the topstitching, I tied the thread ends off and buried the ends under the facings with a hand sewing needle.
To finish the facings I ironed under about 1 cm on the inside edge of the facings and hand sewed it down with a fairly short
slipstitch in dark green silk thread. When folding in the bits near the corners I unpicked the very end of the seam (which I had not backstitched).
When slipstitching around the corner I did a couple little whipstitches there to help keep it secure, and since the stitch length is short and these seams won't be under any strain it should be fine.
With the edge all finished, it's time to put the veins on.
As you can probably see in the scan of my pattern at the beginning of the post, I used an xacto knife to cut out little rectangular holes along the lines in my pattern.
I marked through these with a washable fabric marking pencil, and then joined up all the dashes, using a ruler for the straight portions.
For painting on the veins I recommend either fabric paint, or acrylic paint mixed with textile medium.
(I used fabric printing ink because I have a lot leftover from textiles class in college, but it's not a great texture for painting.)
I used a very small brush and painted slooowly along all the lines, getting them as smooth as I could and making them very slightly tapered. This was by far the most time consuming part, I think it took me about 7 hours to do all the veins.
Afterwards I realized I could have saved a lot of time if I'd used tape to mask the straight portions, so if you're doing this I suggest laying two strips of painters tape along each side of the 4 main veins, painting them with a stiff brush, then letting it dry.
Remove the tape and do the same for the straight portions of the smaller veins, and then finish up the curved tips with a small pointy brush. (But do a sample first!)
I left it overnight to make sure it was dry, and then ironed it on the hottest setting to heat set it. (The heat setting makes the paint able to stand up to washing, and there should be instructions for how long to iron it on the label of your textile medium or fabric paint.)
 |
| Finished! |
I'm very happy with how it turned out!
To put it on I fold it in half diagonally, but slightly off centre so that one corner is hiding underneath the other. I fold down about 6 cm of the long edge, like so:
I tie it around my forehead with the corner pointing up.
I tie it again the other way to make a square knot.