Pages

Showing posts with label undergarments. Show all posts

Saturday, 5 February 2022

Hand Sewn 18th Century Shirt

 I'm almost caught up on 2021 blogging! I wrote that sentence a few weeks ago and this post is still saved in drafts and now it's February, alas.

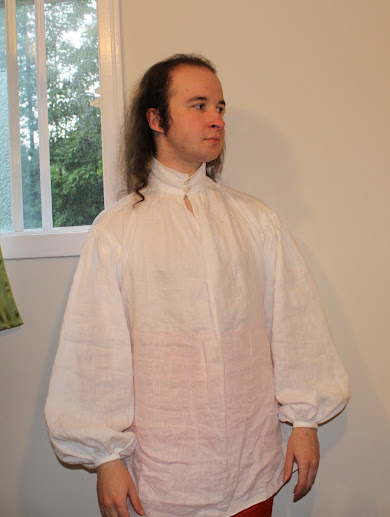
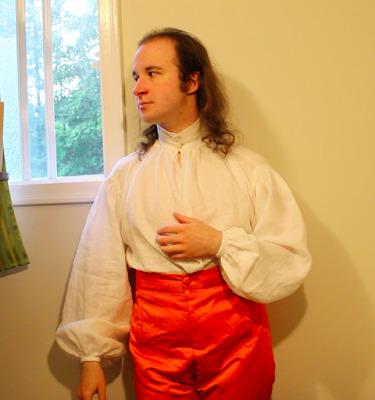
I made this shirt around the end of last summer.
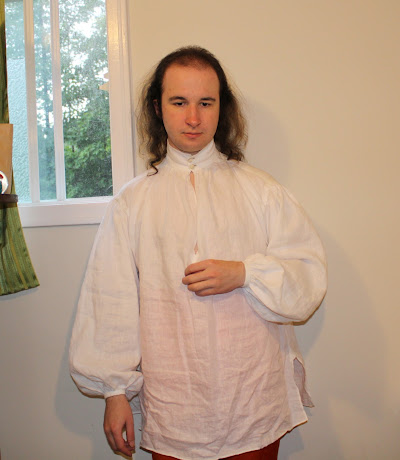
It's made of white featherlight linen from Pure Linen Envy. I only had 158 cm, so it's a bit shorter than I would have made it otherwise.

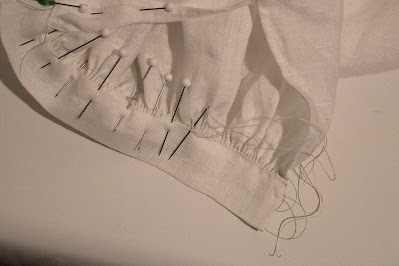
After all the shirts I've made over the years I thought I finally had the construction down pretty good, but no! It turns out I'd been doing the gathers wrong all this time. I was looking at some closeup pictures of an extant shirt shortly after I started this one and I noticed that the gathers were sewn from the outside using a whipstitch, with one stitch going through each gather.
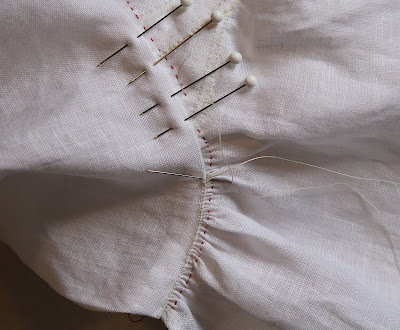
I tried it and found it was so much easier getting them even and neat. No wonder mine always looked awful when I backstitched them from the inside like a normal seam.
I did the gathers like this for the collar, sleeve heads, and cuffs.
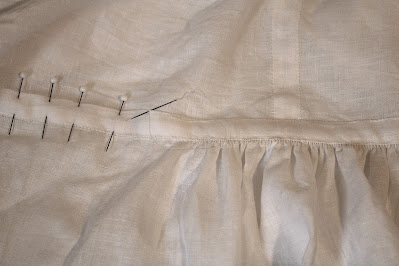
The rest of the construction is mainly the same as described in my shirt construction post, aside from the fact that it's all done by hand. Originally I had intended to do some seams by machine, but I was so happy about the gathers that I just kept on hand sewing.
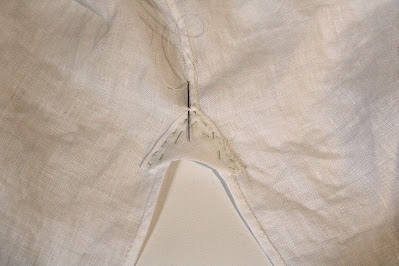
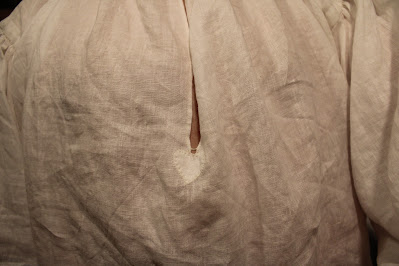
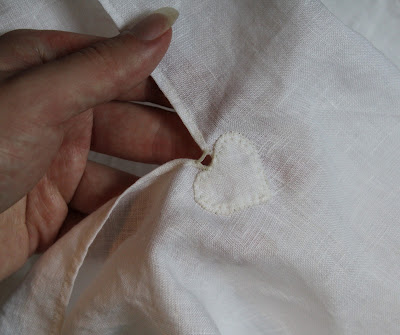
The front slit reinforcement.
It's all sewed with fine linen thread from Burnley & Trowbridge.
Because the fabric was so fine I was able to get quite narrow seams.
Half a centimetre! Not the tiniest ever, but not bad.

Attaching the cuff.

Hemming the open bit at the side.

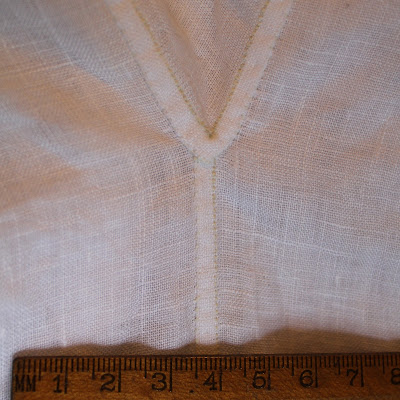
Sewing on the reinforcement gusset,
which I'd basted in place.
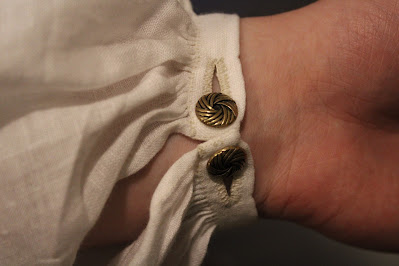
I usually use DMC cotton pearl for buttonholes, but for this one I remembered I had some vintage crochet cotton, so I tried using some of that instead. It snapped at one point, but seemed to be in mostly good condition and fairly strong.
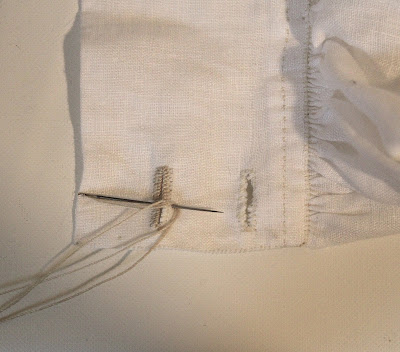
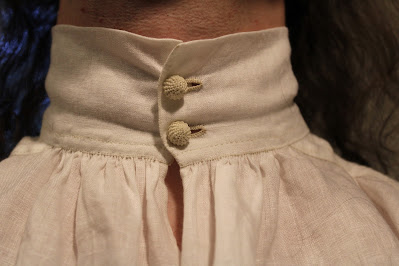
I did Dorset knob buttons. I still wasn't sure if I was doing them "correctly", since all I had to go on the first time I made them was a diagram of the stitching with no information on the base. There still isn't much information on the internet about them, but I looked again and found a picture of the underside of one where a horn base is clearly visible. It looks like it's covered a bit differently, but I like mine better because the fabric goes all the way around. I describe how I made mine in more detail in this post
(The extant one linked above has a spiderweb pattern of threads, but I've also seen ones with detached buttonhole stitches like the ones I'm making.)
I'm using small bone moulds and linen thread from Burnley & Trowbridge, and tiny scraps of my linen fabric.

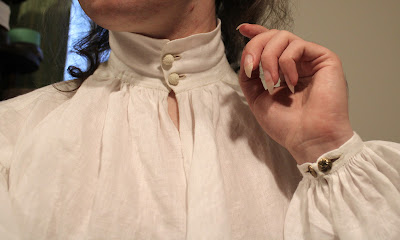
Aside from it being slightly shorter than ideal, I'm quite happy with this shirt! It fits well and is very soft and comfortable.
I wrote down the dimensions of each piece as I cut it out, and the pattern pieces are as follows:

Body - 75 x 158 cm (would have been at least 180 cm long if I'd had more fabric)
Sleeves - 60.5 x 60.5 cm
Collar - 43 x 14 cm
Armhole binding - 44 x 3.5 cm
Underarm gussets - 13 x 13 cm
Cuffs - 19 x 5 cm
Shoulder strips - 21 x 3 cm
Neck gussets - 8 x 8 cm
Hem gussets - 5 x 5 cm
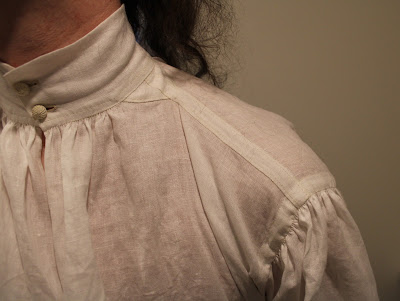
I left 16 cm closed at the shoulders when I cut the T shaped opening, and the slit down the front is 25 cm long.


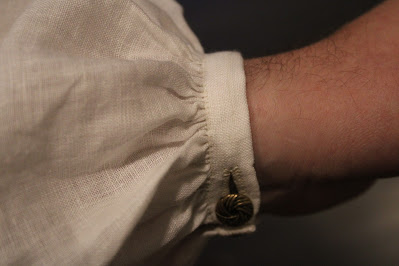
Here it is with a pair of the sleeve links from my sleeve link video.

This is the only thing I entered in the Historical Sew Monthly challenge last year.

What the item is: A man’s shirt

The Challenge: Zero Waste. The pattern is all squares and rectangles, so there were only a few small geometric scraps, which I saved and can use for any number of things.
My thread clippings and teeny tiny scraps and trimmings were also set aside for my parents, who have a fireplace and can use them as kindling. (I keep a paper bag near my sewing area and put all my useless tiny cotton and linen scraps in it.)


Pattern: More or less the same set of dimensions I use for all my shirts. Exact measurements are written above.


Year: It’s so plain and basic and shirts change so little for most of the 18th century that I think it could work from at least the 1710’s-70’s. If I were to add ruffles the width and placement of them would narrow the date down considerably.

Notions: Linen thread, vintage crochet cotton for the buttonholes, two small bone button blanks.

How historically accurate is it? The most accurate shirt I’ve ever made! It’s completely hand sewn, and I’ve learned a lot of new things since I last did one all by hand. Just a few tiny nitpicks - I didn’t do a laundry mark on the corner, and I’m not sure if I did the Dorset knob buttons correctly. It also came out a bit short because of the aforementioned smallish amount of fabric. It was the end of the bolt.

Hours to complete: I neglected to track the time for this one, but based on previous shirts I’m guessing 40-something.

First worn: September 6th, 2021

Total cost: About $25 (Canadian)
Ok, I think that's all the 2021 garments blogged! With the exception of two leafkerchiefs which are going to be in a video tutorial so won't be blogged about until I finish filming and editing that.

Thursday, 2 May 2019

Blue undershirt

In late January, when I went to the fabric swap, I obtained some blue cotton flannel-y stuff. (It only has the fuzzy texture on one side but I don't know what else to call it.) I also got some cotton prints, including this blue & white stripe. I immediately washed these two fabrics and cut out another Nelson undershirt - something I've been meaning to make more of since I made that first one back in 2017.
 Unlike the first one I made, which has a lot of hand finishing, this one is mostly machine sewn. The materials don't look anything like the historical ones, so I decided it would be best to flat fell all the seams by machine.
I still made 10 thread buttons for it, even though it's probably weird to have handmade thread buttons with machine buttonholes. I found a greyish blue linen yarn in Mama's stash that matched my blue flannel fairly closely, and I used that on small plastic rings.
In my first undershirt I cut all the panels long, but for this one I tried doing the separately attached bottom bit, like in the original. It doesn't really make sense to do it that way though, unless you're attaching a bottom piece of a different quality like the original has, so next time I make this pattern up in all the same fabric I'll just do the long panels.
Once the shirt was all finished I thought it looked pretty good, but then I put it on and went "oh no!"
It turned out I had somehow marked the cuff slit on the wrong edge of my pattern pieces, and so had sewn the sleeve closure on the wrong side. It was on top of the wrist and looked terrible, besides being much more awkward to button!
Aaaah! No!
With the entire cuff already finished there was no question of picking it out and re-sewing it on the other side. I simply cut it off, flipped it around, and sewed it on the other way. I corrected the marks on the pattern too, because I don't want to do that again.
The two wrist buttonholes are by hand, because they're right on a join between two pieces.
I covered up the join with another strip of the stripey print. This happened roughly a month and a half after I'd cut off and re-sewed the cuff, because I am still very very bad about doing alterations.
The sleeve is now a bit shorter than it should be, but overall it's not too terrible.
It's less warm than the other one, because the flannel is thinner and less fuzzy, but it's still quite comfortable. Here are two badly lit photos of me wearing it. The lighting was much better in person, but the camera was being foolish.


Hopefully I'll get some more flannel things sewn this year, especially nightgowns. I really need to make more nightgowns.

Sunday, 31 March 2019

Another shirt, this time with slightly more exciting ruffles

This was my Historical Sew Monthly item for February. I cut it out nearly a year ago and it sat around for many months until I finally decided to begin sewing it up.
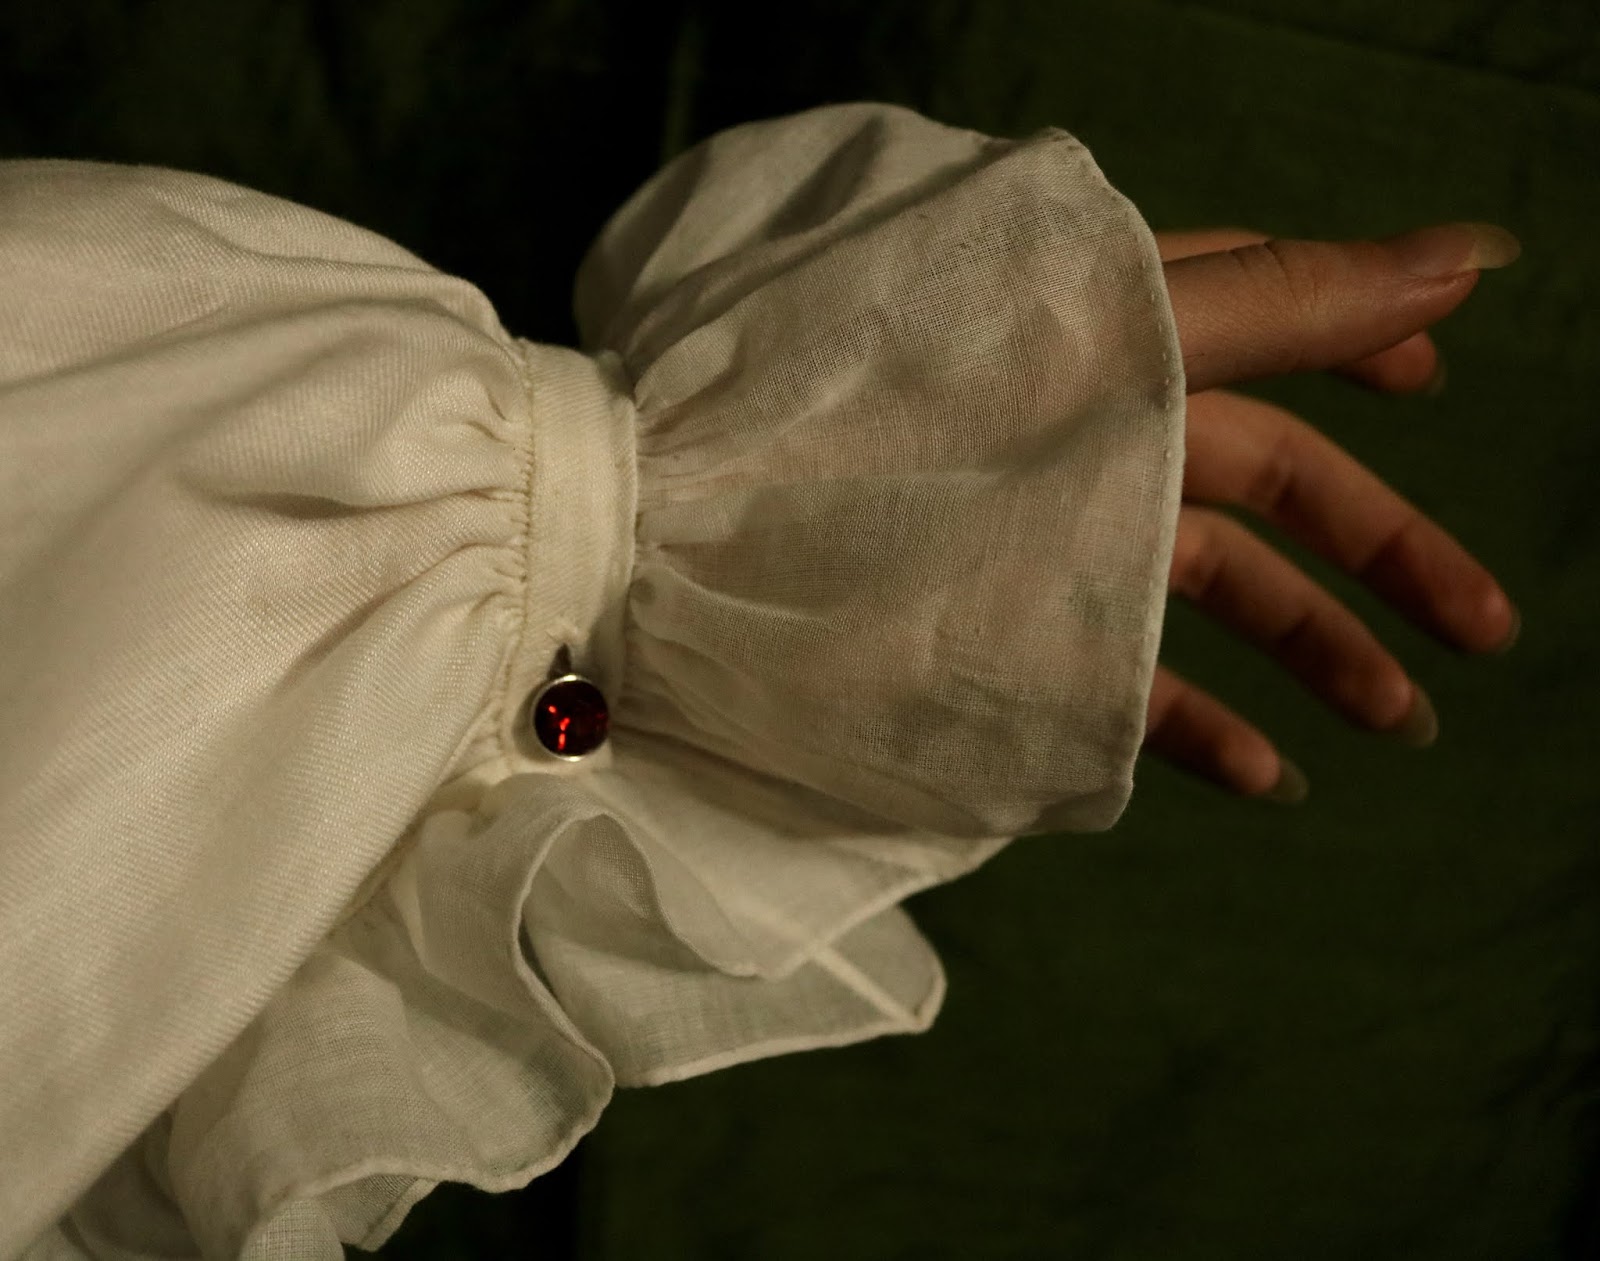
I've wanted to try one of those shirts with ruffles on the cuff slits ever since I noticed that they existed. It's hard to see that part of the sleeve in a lot of portraits, but I've gathered a bunch on pinterest where a cuff slit ruffle can be seen.
(In most of them there are other ruffles but there's one very weird shirt in that portrait of Paul Revere holding a teapot where there are ruffles on the cuff slit and nowhere else on the shirt. It is very strange and I do not like it.)

I also managed to find photos of an extant shirt that has these ruffles.
Shirt, 18th century, Meg Andrews.
Here's one of the portraits in which the ruffle is most clearly visible.
The Greenwood-Lee family by John Greenwood, c. 1747 (Detail)
My shirt is made of that fine linen twill I got years ago. It's an inaccurate weave for 18th century shirts but I still have a bunch that needs to be used up.
It's mostly machine sewn. There's hand finishing on the bosom slit and the inside of the collar. The cuffs, ruffles, buttons, and buttonholes are all by hand. Hm, maybe that's not mostly machine sewn.
These are definitely the best ruffles I've ever done. I didn't know how to attach ruffles properly until very recently, when I came across this nice video tutorial on doing rolled whip gathers.


Attaching the ruffles.
  The ruffles are made from a semi sheer cotton that has been in my stash for years. I think it might have come from Mama's stash originally. I'm quite sure I didn't buy it.
I hemmed the ruffles with a small rolled hem.
Ruffles attached! Lovely!
As with so many historical sewing techniques, I couldn't figure this out on my own, but it seems so obvious now. It took quite a long time to attach all the ruffles but the results are well worth it.
I can't see the seam joining the two parts of the ruffle on the extant shirt, but I'm assuming it's just a tiny flat felled seam. And the narrower ruffle must have the end cut on an angle, since there's no other way to attach it smoothly to a wider one.
The scrap of fine cotton I had wasn't quite big enough to cut all the ruffles out of in one piece, so one of the slit ruffles is pieced in the middle. (The part that's at the innermost end of the slit.)
I sewed my ruffle seams by hand and made them very small. I made a new pair of sleeve buttons after I finished this shirt, with floral metal buttons, which are shown in the photo above. The red ones in the photo below are one of two pairs I made with cheap rhinestone buttons last year.
I was a bit late posting this in the HSM group. I originally cut the cuffs too small, and after I had hand sewn them on, and done buttonholes on them by hand, I had to take them off and make new ones 1cm longer. This was rather discouraging, so I was 3 days late finishing it.

Because I had cut the shirt out so long before I sewed it up, the collar turned out to be too high. I should have noticed and trimmed it down before sewing it on, but I did not, and so it's a bit too high collared to be an early 18th century shirt. I could probably just fold it down and hide it under a stock though.
The Challenge: #2 - Linen/Linens

What the item is: A man's shirt

How it fits the Challenge: It's made of linen, and is an undergarment

Material: Linen twill, fine cotton for the ruffles

Pattern: My usual set of shirt dimensions

Year: uhh 1760's-70's ish? It could have gone as early as the 30's if I hadn't made the collar too tall.

Notions: Silk thread, linen thread, cotton thread, heavy linen thread for buttons, DMC cotton pearl for buttonholes.

How historically accurate is it: Maybe about 80%? The linen twill isn't an accurate weave for shirts. The main seams are by machine, but there's a fair amount of hand finishing. The pattern is mostly accurate but I did cut the collar a bit too high.

Hours to complete: 40 (Including picking off and re-doing the cuffs)

First worn: March 3rd, 2019

Total cost: I think about $15 or so (Canadian). The linen was on a buy 1m get 2 free sale.
I love my gauzy ruffles! They make such a difference in how nice the shirt looks!

Monday, 3 September 2018

Early 18th century shirt #2

I finished this shirt over a month ago and I'm just posting it now, oh dear! (I did manage to submit it to the HSM album on time though.)
But it's extremely similar to my previous 18th century shirt, so there isn't much to say about it.
 At the beginning of this year I had grand plans to finish a coat for the "Sleeves" HSM challenge, but didn't get started in time, and I didn't want anything to do with coats in the disgustingly hot July weather anyways.
Since linen undergarments are something one can never have too much of, I made a second shirt for the 1730's suit I will have someday.

It's cut to exactly the same dimensions as my previous one, but in a coarser linen, and with different cuffs. There's also a lot more machine sewing in this one, and it doesn't currently have any lace ruffles, though I intend to add some.
The shirt fits the theme of the challenge because the sleeves are huge, but also because they represent a new thing I've learned about 18th century shirts.

I shared some pictures of my other shirt in an 18th century sewing group on facebook, and got some good constructive criticism about the cuffs. It seems that sleeve buttons were the way cuffs were fastened for most of the 18th century, and I had no idea! All the pictures I'd been looking at were of guys with big ruffles which were hiding the sleeve buttons, and it didn't occur to me to investigate the cuffs further!

(I'll still use the regular sort of button for my everyday shirts, because they're less of a hassle, but the 30's suit is going to be a Fancy outfit.)

I found some cheap plastic buttons at Fabricville that looked very similar to some extant 18th c. sleeve buttons, so I bought them and put them onto two large-ish metal jump rings which I bent and squashed into a more oval shape.
Ideally the cuff would be narrower, but with this coarse linen
I feared it would be even more wonky and lumpy.

Nowhere near as fine as the originals that inspired them, but at least they're very similar in shape and colour.
18th century sleeve buttons found at an archaeological dig.
(Source)

What the item is: A man's shirt
How it fits the challenge: This shirt is extremely similar to the one I made for the February challenge, but the main difference is in the sleeves. (See above.) The sleeves are also very large and noticeable, but I think the learning part is more important to the challenge.

Material: White plain weave linen.
Pattern: None, just a set of dimensions.
Year: Early to mid 18th century (though my end goal is for this to go with a 1730's suit)
Notions: Linen thread, cotton thread, silk thread, 2 bone button blanks. (and 2 small metal rings & 4 plastic buttons for the sleeve fastenings, though technically they are not part of the shirt)

How historically accurate is it? Maybe 75-80%? Most of the sewing is by machine, but otherwise the construction is pretty accurate. The sleeve buttons are cheap plastic, but aesthetically very similar to extant ones.

Hours to complete: 21:40 (This includes time spent hand hemming and applying some terrible lace, which I promptly removed because it was horribly itchy and cheap looking.)

First worn: I think it was on July 21st or 22nd, just to see how it fit.

Total cost: I forget where the linen came from, but I'm guessing less than $10 if the linen was given to me, but probably closer to $25 if I bought the linen. It's rather hard to tell plain white stash linens apart.


 Instead of a heart shaped reinforcement I did a little bar with buttonhole stitches across the bottom of the bosom slit. I was trying to make it look like this one, but for some reason I didn't look at the photo while I was doing it, so it could have turned out better. But it's nicely sturdy so far!
Black speck is cropped out of this one.
The buttons on the collar are the same sort of Dorset knob as on the previous shirt.
 Back when I took the photos of me wearing the shirt there wasn't really anything wrong with my little digital camera (Aside from it being picky about lighting, and generally unflattering in perspective), but a couple days ago a black speck appeared in the lens. I think it moved there when I dropped my camera, but I'm not sure how it got inside. Just like the long dust speck that has been in there for several months, I can't seem to shake it out of place, and it's definitely inside because it won't wipe off. The camera also seems to be getting gradually worse at focusing.

Perhaps I should get a better camera? I am uncertain, as the good ones are quite expensive, but it would be great to be able to get higher quality photos of my projects.
Out damn spot!
 One last difference in construction is the underarm gussets. I turned the seam allowances inward on all my previous shirts, but for this one I finally realized that turning the edges of the gusset outwards is both easier and sturdier. Since I've had problems with the underarms ripping on several of my shirts, I'm very glad to have learned this.
Why was I not doing this before?!
All those little weak points at the corners could have been avoided!
 And here's a picture of the cheap, crappy lace I added and immediately removed. It's not a well lit photo, but rest assured everything about it was bad. I thought it would look at least somewhat nice because the design on the lace is swirly and pretty, but no.
Scratchy, stretchy, heavy, nearly opaque lace.
I will post again soon! This past Friday I finished my entry for the August HSM challenge and I couldn't be more pleased with how it turned out. I just need to get a few better photos of me wearing it.