Pages

Saturday 22 June 2013

Blueish-Grey And White Striped Waistcoat

 Hello! I am quite happy to be presenting my first ever regular clothes post.

For as long as I can remember I have been wearing the plainest clothes I could find. Plain, dark, solid coloured shirts and plain, dark, solid coloured pants. Almost all of them in knit fabrics. These were the most favorable options when all there was to choose from was either boring or ugly/indecent. But now that I can sew reasonably well, I can start putting together a wardrobe that I actually like, and start dressing the way I want to.

I want to dress sort of like a late 18th century or early 19th century man. Their clothes were all so fabulous.
For my first real everyday garment I have made a waistcoat.
 It is my fourth waistcoat. I may post about the first three later, under the title "Early Sewing Disasters". My pattern was loosely based off of Disaster Waistcoat #2, which was based off a very chopped up and mangled lab coat.
 It still needs some work. The seams that attach the back pieces to the side pieces either need to be moved further back or further forward. The top of that seam is at an awkward angle that puts a lot of extra bulk into the seam allowances.

My fabric was synthetic and stripey. It was from Mama's stash but she gave it to me a couple of years ago. I think it might have been a bribe to get me to do my homework or something.
 The wider stripes are plain weave, but the narrow ones are made of floats. The grey stripes look greenish in some lights, but they aren't.
I had a bit of trouble stiffening the lapels. I wasn't going to use fusible interfacing because I don't really like it, plus I only have small scraps of it. It probably wouldn't have been stiff enough for this waistcoat anyway.
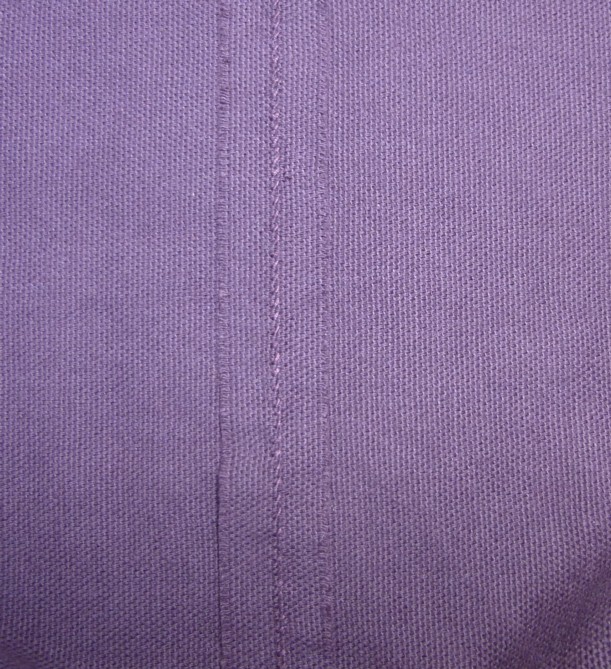
I have no hair canvas and I do not know if Fabricville sells hair canvas. Even if they did I probably wouldn't buy any, for I am very low on cash at the moment. So I was left with whatever I could find in my stash. I found a drapery fabric that was sort of thick, a cotton polyester blend, and made a lot of pitiful pad-stitching.
The piece of "interfacing" that I wasted so much time on. There is another triangle of fabric over the lapel.
 The pad-stitching is pitiful because it hardly made a difference at all in the stiffness of the fabric. Mostly it just made it thicker, and left a discreet field of pockmarks on the underside of the lapel. I was disappointed, but not really surprised.
The lapels and collar still needed interfacing, so I washed and ironed a small portion of the cross stitch stuff that I used for the top of the silly hat. It shrank a surprising amount.
 I didn't make as many stitches because it was difficult to put the needle through this material. I was careful to hide any stitches among the floats in the narrow black stripes in every place except the underside of the lapels.
The collar with one layer of cross stitch fabric.
 Somehow the stripes on the collar matched up perfectly. The lapels weren't so lucky.
 The waistcoat is lined with polyester satin. I bought a great deal of it to use for various linings a year or so ago.
The waistcoat has six buttons, three of which are functional. They are plastic buttons that I covered with scraps of white silk leftover from the bow-loops on the silly hat.
Buttons being covered, the small circle on the left is to pad out the front slightly to help hide the hollow spot in the button.
 I really like these buttons, though they are more difficult to put through the button holes. The button holes are machine sewn because synthetics don't deserve hand sewn ones, especially when one has wasted so much time pretending to tailor lapels.
 Aside from the general inferiority of the materials, there were a few mistakes. Most notably where the topstitching sort of smeared the ends of the stripes at the top of the lapels(this can probably be attributed to the shiftiness of synthetic fabric).

But once it was finished, I discovered the strangest sewing mistake I have ever seen. On part of one of the shoulder seams the fabric appears to have been snagged a few millimeters out from the seam and sewn under. It creates the effect of a short section of piping.
Weird, isn't it?
 I haven't the faintest idea how it happened, but since it is remarkably neat and uniform for a sewing mistake, it doesn't really bother me.

Update: I found another strange mistake.
The collar is off center by about a centimeter. You can tell from the stripes. I don't know how this happened either, though it might have something to do with the placement of the lapel interfacing. It took quite a while to notice, so I guess it's not too bad.

Here is the waistcoat on me, along with The Cravat Of One Hans Pfaal, one of my fathers old shirts, and a pair of my awful knit pants. I really need to sew suitable replacement items, the shirt is far too wide and the collar is all wrong, and tucking in the shirt makes obvious shirt lines in these knitted pants.
 I like this waistcoat very much, even though the materials weren't great. Big buttons and big lapels are both features that I love. Speaking of big lapels, can you see the Count Olaf influence? He has a fabulous wardrobe, as many movie villains do, and the coat he wore in the scene where he is introduced inspired me to cut the lapels this way.
I tried to smile, but there was too much sun shining in my eyes.
 As you can see, I used the wrong side of the fabric for the back. For some reason waistcoats that have the same fabric on the front and back just look weird.
 I think wearing waistcoats will improve my posture. I am sitting up much straighter than I usually do because slumping in this thing causes awful wrinkles.
That's it for the waistcoat part of this post, here is where things stand on the Historical Sew Fortnightly:  I missed the Pretty Pretty Princesses challenge. I was going to make Ana de Mendoza's eyepatch, but I could not find any suitable cord. I'd still like to make it some day.

For the the next challenge, Lace & Lacings, I intend to knit a pair of lacy 1840's mitts. I decided upon this project 3 days ago, but have not yet started them. This is because, while looking for my fine yarn, I came across a piece of felt. In this piece of felt were several holes and three disgusting, brown, hairy larva. Oh crap.

I've spent the past two days going through everything in my room and looking for anything made of wool, fur or feathers. Thankfully there wasn't any moth activity anywhere else. But moths are not to be taken lightly. All my wool and fur things are now in a big black bag with a thing that puts off bug killing fumes. All my feathered hats are in a closet with another fume thingy, where they shall remain for the next few months.

At least it's summer, so it's okay that all the furry and wooly things are unavailable. And I am very glad that nothing else was eaten.
I know that this group of moths is an important part of decomposition because hair doesn't rot, but I still think they are EVIL!
I HATE THEM! I HATE THEM! (source)
 I now have eight days to knit a pair of lacy mitts. I think I can finish them on time, especially since lace knits up quickly. At least that's what I've heard. I've actually never knit anything lacy before, but I have knit other things, and the knitting books say that lace is relatively easy.

Have a good day, and remember to watch out for the moon, which is going to be closer to the earth than usual this weekend.
This isn't a full moon, but it does sort of resemble one.

Tuesday 18 June 2013

Early 20th century beaded black reticule.

Once again I find myself behind on posting. This is not good. It has occurred to me that it would be a good idea to build up a backlog of unpublished posts, that way I could avoid this sort of thing and post exactly once a week instead of approximately once a week.
Since I don't have any posts on sewing ready today, I'm sharing another pretty thing from my Old Stuff Collection. There were more than just photo albums in my Grandparent's attic. I also found some very nice old bits of costume, including this fantastic reticule.

 I'm not sure if I'm remembering this correctly, but I think my Grandfather said his aunt brought it back when she visited Europe, which was some time around 1920. I think it could easily be a few decades older than that though.

The reticule is made of fine black leather, with the rough side out. It has two pockets, one on each side.
 They both close with metal snaps.
You can see the smooth side of the leather inside the pocket flap.
 They are tacked on only at the corners.
They aren't attached very securely.
The main body of the reticule is made of four identical pieces. When it is lying flat you can see the two on the front and back, while the two on the sides are folded in between.
The one with the purple back is the outside piece, and the ones that are all black are the two side pieces that are folded in.
 There are two loops of cord that are strung through 8 grommets at the top. The cord has a synthetic feel to it and has become sort of fuzzy from wear. The ends of the cords are encased in little covers made from more of the same leather. They might have a bit of stuffing in them, as they are sort of puffy and pillow-like.
 For some reason, the smooth side of the two outside pieces is a deep purple, while the other two are completely black. The purple backed leather is also slightly thinner. Odd, isn't it? I would have put the pockets on the thicker pieces.
Here is a better shot of how it folds. One of the cords goes through one way and one goes the other way.
 While the reticule is in pretty good condition for it's age, there is a bit of damage. One of the grommets has popped out and there is a bit of tearing above one of the pockets.
The soft fuzzy side of the leather also sheds black dust, you can see the large grey smudge it left on the sheet in several of these pictures.
The tearing and the popped out grommet.
 There is also a part of the loopy beaded fringe that is seriously messed up. It appears that part of the fringe broke at some point, and somebody did a super crappy repair job.
What a mess!
 It's worse than it looks in that picture. While the two lines of fringe  on the other side are separate.....
 .......the shoddy repair has tied the other two edges together!
Who did this? What were they thinking?
 The repairs are also done in brown thread, while the rest of the thread is black. I plan on properly repairing the fringe someday, I'm not sure when that will be, but I will update this post when I do.

Here is a picture of the unaltered fringe. It's all the exact same pattern. The fringe is on the bottom edge of the bag and the bottoms of the pockets. The narrow beading is on all other edges except the two that are covered by the pocket flaps.
The beading is done with black seed beads and colourless seed beads, the fringe also has black bugle beads. The black beads are faceted, the clear ones are not. At each point where the beads attach there is a single stitch holding them on. This is the only stitching holding the edges together!

That's all for now. Hopefully I shall be back in less than a week with some actual sewing.

Monday 10 June 2013

Purple Petticoat

My 1780's petticoat is finished! It's actually been finished since Friday night, it just took a while to get good pictures of it.
I'm working on a purple pierrot jacket and this is the petticoat to go with it. Here is my main inspiration picture.
Journal de luxus, 1791. (source)
I am not copying the plate exactly, I'm using it here because it's the closest fashion plate I have found to my design, but I'll talk about the pierrot in another post.

The petticoat is made of a cotton drapery fabric that was in the "buy 1 metre get 2 free" pile. I cut two sections for my petticoat, 44" for the front and 84" for the back, I cut along one thread so that the side seams would be perfectly straight. The basic construction of the top part is taken from this tutorial by American Duchess, but the rest I did quite differently.
I made pocket slits and sewed down the sides, stopping about a foot from the bottom because I hadn't cut it to length yet and didn't want to cut through a seam.

One of my pocket slits. You can just see where the narrow hem stops, at the bottom of the picture.
The petticoat is entirely hand sewn. I used whipstitching, which I read about in this article from extreme costuming. I'm not sure if it was used on 18th century petticoats, but it worked really well.

The seam from the inside.
The seam from the outside.
I waxed every bit of thread I used, and doubled it for extra strength, and I am thrilled with how these seams turned out. They didn't even need ironing! Whipstitching is awesome!

I pleated the top edges and used more whipstitching to hold the tops together. I tried to pleat the front section down to 7 inches, which is how long it was when it was pinned, but it somehow shrunk to 6 inches after I sewed it.  I had to make the back section longer, which was a good thing because there is almost twice as much fabric in the back. I put in a row of stab-stitching just above the lower edge of the selvedge.
Knife pleats. It's kind of hard to see, but there is whipstitching on the top and stab-stitching a little lower down.
I folded the edge of the twill tape over the top of the pleats so that the bottom edge would be above where I thought the waistband would end. I attached the folded top piece with a row of stab-stitching and the bottom row with whipstitching. I put some more stab-stitching above the whipstitching, just to make it extra secure. It was at this point that I realized that a waistband would be completely unnecessary and would add way too much bulk to an already bulky apparatus. So my petticoat has no waistband.
A close up of the 3 rows of stitching attaching the twill tape.

The non-waistband. The longer section on the left is the back.
I put the petticoat on over my stays and bum pillow and pinned up the hem to the approximate height that I wanted it. This was not easy, seeing as I have no dressmaker's dummy of any kind, and the fabric dipped lower whenever I reached down to pin it. I got my father to look at the hem to make sure it was at the proper height and then I cut the excess fabric away, leaving 4 inches to be turned up.

The excess fabric consisted of a rectangle and two triangles, which is good since this is for the squares, rectangles & triangles challenge. The rectangle was removed from the front panel, and the two triangles came from the forward edges of the back panel. I left the middle of the back the full width of the fabric, since it has to have a train and go over a bum pillow.
A rectangle and 2 triangles. The rectangle is actually slightly wider in the middle.
The extra length having been removed, I then finished sewing the side seams. I pinned the hem up again. I made the hem almost 4 inches wide in the front, and a little narrower in the back. This is so that I can adjust the length, if I need to, when I get proper 1780's shoes. Right now I'm using my Grandfather's old shoes, which are only slightly too big and have about an inch of heel. They don't resemble any kind of women's shoe but they're the only "nice" footwear I have.

 Hemming the front section proceeded smoothly, but when I reached the side seams I realized that I could not possibly turn up an edge that curved downwards at such an angle.
I had not thought this through.
I was quite distressed for several hours, until I came up with a solution- a sneaky hem godet!
I picked out the end of the seam, stopping less than 1 cm above the folded edge. I cut a triangle of scrap fabric and set it in the end of the seam. Problem solved!

The unpicked seam end and the triangle that it will soon receive.

A sneaky hem godet.
It smoothed out very nicely.
The sneaky hem godet from the outside, after ironing.
The curved part near the back required a bit of gathering. It shows through a tiny bit more than the hem godet does, even though I covered the ironing board with a towel. Perhaps I pressed down on the iron a bit too hard.
Gathers near the back of the train.

And here is the finished petticoat. The front just grazes the ground, while the back drags behind in a pretty train, sweeping up all kinds of dust bunnies and any other nasty things that may have dropped onto the floor.
I now understand the purpose of a balayeuse, which unfortunately seem to be from a later era.
From the front.

From the side.
From the back.

The Challenge: #11-Squares, rectangles & triangles.


Fabric: 3.25 m of dark purple cotton drapery fabric. The label said unknown fibres, but I said cotton and a burn test agreed with me.

Pattern: Draped with some ugly old curtain panels that I cobbled into a sort of petticoat, You can see it in the silly hat post, I took the basic measurements from it. I've been wearing it since I have a deficit of petticoats but I really need to make some proper ones to replace it.

Year: Late 1780's- very early 1790's.

Notions: 334 cm of white cotton twill tape.

How historically accurate is it? The look is accurate and so is the hand sewn-ness of it. My construction method is probably not accurate, but it would have been entirely possible with 18th century materials. The fabric is not accurate.

Hours to complete: 19 hours, 23 minutes.

First worn: Saturday (2 days ago)

Total cost: Well, the fabric worked out to a little more than $3.00 per metre, and I used 3.25 m, so maybe about 11 or 12 dollars (Canadian).

Thursday 6 June 2013

Victorian Photo Album #1 Part 2

Here are the last 18 photos from the Victorian Photo Album that I posted a few weeks ago. I had planned to have my Squares, Rectangles & Triangles project finished by now, but it's late because I'm having trouble with the hem. Since I'm behind on my "approximately once a week" posting schedule, I'm posting the other half of this album.

Behold the most epic moustache in the history of epic moustaches:

Uncle Ezra Briggs
Isn't it fantastic? It's like a whale tail on his upper lip.
It must have required an incredible amount of maintenance, something like to Mr. Poppleton's I imagine.
Aunt Clara Briggs
Her hair is so nice and crimpy. I've never been able to achieve that look because I'm afraid of burning my scalp with the stovetop iron.
Will Flemming
I wonder what that thing on his head is, perhaps some sort of giant furry military cap?
Elsie Flemming
 There's that fringe monster chair again, Elsie looks very concerned.
Ethan McBride
A respectable moustache, but not all that impressive after page 19. He does have more hair than Ezra Though. I also see a fingerprint in the bottom right corner.
Uncle Ephram Briggs
 This one has a fingerprint too, and it's way too small for the frame it's in. I think it was in an oval frame at one time, you can see the fade marks.
His watch chain has me confused, it's all weird and stringy. [Update: I am now more convinced than I was before that it's braided leather, having recalled the mention of a leather strap used as a watch chain in a Christmas story that that I read in middle school. Papa thinks it's leather also.]. His shirt too, gingham with a white collar? It also looks like there is something white and fluffy in his pocket.
Aunt Adaline (Adeline?) Briggs
I like the lines on her bodice, they would exaggerate the hourglass shape of her torso if we could see the entire dress. I saw a picture of Lily Langtry in something similar, which looked very elegant. It's in this book, I can't find the image anywhere on the internet. It's a shame about the smudge on her face. That lace thing is quite charming for something that looks so much like a doily.
A group portrait, I'm not sure exactly who is who, these names are extra scrawly.
 Oooh, a group portrait! I wonder what the occasion was. I very much like the outfits of the two girls on the right in the front row.
I will attempt to read the names, but they are not easy to make out. Starting from the top right; Barbara(I'm not at all sure about this one since whoever wrote it made a mistake and wrote over it rather than erase it.) Thomas, Will Lindsay, Clara Briggs, This one looks like Jrid and that can't be right(Could it be Jared with the A accidentally left out?) but the last name is definitely Briggs, Mary Thomas, Angie Briggs.

I think I got the last names right, since Briggs and Lindsay have appeared in the album before and there were two named Thomas, but the first names are nearly illegible. Are there any handwriting experts reading this?
Mrs Don Plummer
 She's gorgeous, and she has optical illusion lines on her bodice too. Her hair looks very shiny, it's probably very greasy.
Sena McBride
 A worm has eaten through this page, there are 2 holes near the corner.
Aunt Lydia McBride
That's rather a lot of fringe, isn't it? Yes. Too much fringe.

Very nice choker and earrings though.
Aunt Lydia & Judson B.
Buttons! Huge buttons! I like these buttons. This is the 5th Lydia to appear in this album.
Grandpa Judson Briggs
 This looks like the same Judson from the previous photo. My Grandfather's father was named Judson, I seem to remember hearing that he married twice and that my Grandfather came from his second family, this might be him with his first family. [Update: Nope, I misremembered, see corrections by my father in the comments thread below.]
I've got a picture of him when my Grandfather was young and he looks quite a bit older(and he's lost all his lovely, wavy hair), but it might be the same guy.
Mrs E Plummer Aunt Han?
There's a bit more name written here than usual. Maybe Aunt Han was a nickname or something. Does anybody know what those two circles on the bow-tie are?
Jack McBride
 Is that a watch, or a watch chain decoration? I think it must be a decoration, for I have never seen a pocket watch as small as that.
No name for this one. There's a small scribble on the upper right, but I'm not sure what it is.
 A nice enough looking fellow, but not much of a moustache.
Most of the men's jackets in this album have very small lapels, or very large lapels. I like these wide lapels better.
Uncle John McBride
 He's quite handsome, and his outfit is very interesting. A gingham jacket, a striped waistcoat, and a not-white shirt that has white cord details on it. I have never seen a 19th century man with a shirt like that.
G.W. White & Wife
I love this picture! I'm not sure how this couple would have been seen in their time, but to me they look eccentric. With her loose jacket and huge frog fastenings, and his walking stick and very bushy sideburns, they seem to have a unique "look".

And that concludes the first of 4 19th century albums. You may use these photos if you wish but you must send a link back to the source! Any insight into the unusual details on these outfits is most welcome, I don't know all that much about 19th century fashion.