I finished 3 pairs of pants in 2020 and still haven't posted them yet, so here they are. I didn't take a huge amount of progress pictures of any of them, so will put them all in one post, starting with this purple cotton pair.
They're cut from
that purple petticoat I made waaayyy back in 2013 and never wore, and I still have a big chunk of fabric left. It's a fairly cheap and loosely woven cotton, so I don't expect it'll wear very well, alas.
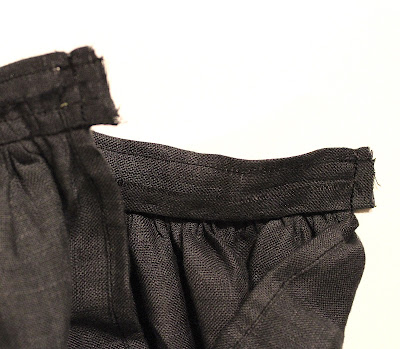
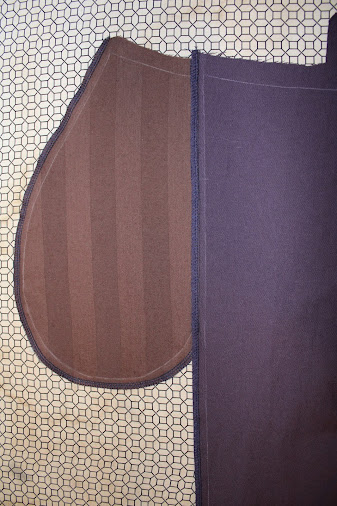
I serged all the exposed edges before sewing. I was awfully indecisive when choosing the other fabrics. The pockets are made of a brown bedsheet cotton, and the fall lining is an off-white bedsheet cotton.
 |
| Fall lining serged and seamed together. |
I did the fall plackets my usual way,
and have a tutorial post on that.
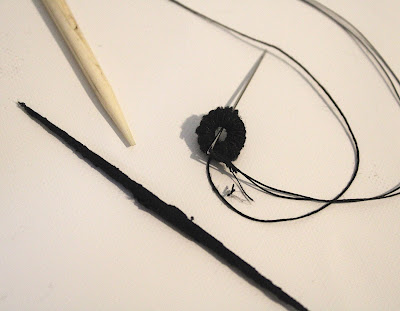
The buttons are covered in a more tightly woven cotton in a similar shade of purple, because I was worried the main fabric would wear out too easily. They're made the same way I do my 18th century covered buttons, and
I have a video tutorial on that! |
| It was a scrap of muslin I'd dyed purple in textiles class. |
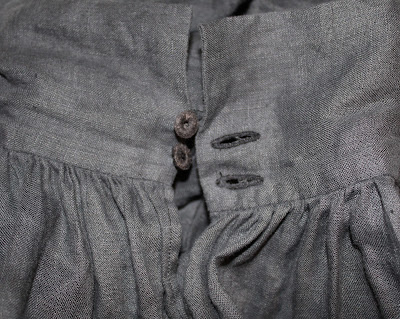
The buttonholes were machine sewn and then covered with buttonhole stitches by hand.
This was a somewhat ill-fitting pattern that I'd drafted earlier in the year and then altered, and I don't think the fit of these is quite as good as it could be, but pretty close. I tweaked a few things and the next time I sew it up they should fit even better.
I tried facing the pockets backwards,
like you see on some 18th century breeches, and I'm not sure if I like it or not. There is more room back there, and it doesn't interfere with the fall placket, but it's more awkward to reach into.
The next pair was one I started several years ago and then left half finished in a bag until this spring. They're dark blue linen and so, so nice for hot weather.
I did 18th century corner pockets, but with no side seam. I just sewed a little dart there instead and hand felled it.
Other than that they're pretty similar to the purple pair. Unlined, edges mostly serged, and the buttons covered in a more tightly woven fabric in almost the same colour.
 |
| I think these buttonholes are also machine sewn and then covered by hand. |
I wish I'd put a bit of interfacing in the fall plackets, since the linen is so soft.
 |
| Hand sewn eyelets and cotton tape for the lacing. |
 |
| The inside of the hem. |
I never can seem to get a nice, well lit photo of pants on me.
 |
| Awful lighting! |
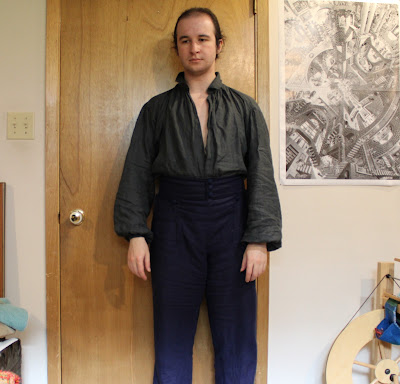
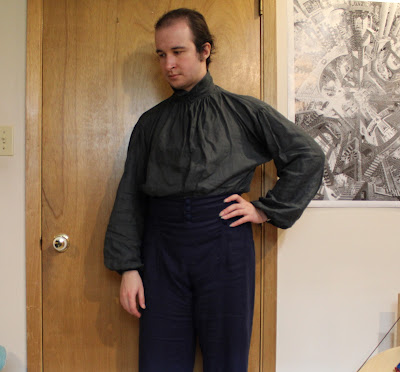
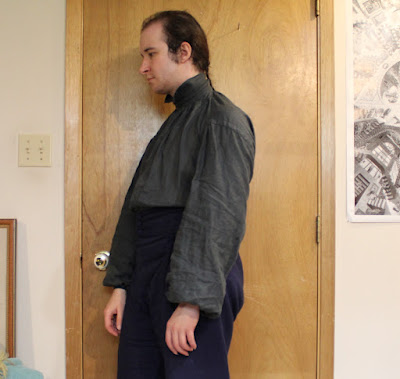
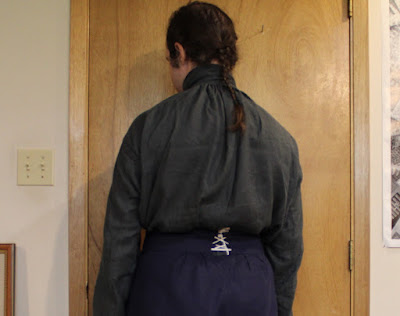
The last pair in this post is actually the first pair I finished. I made them last winter. They're black cotton twill fully lined with cotton muslin, and only comfortable in cold weather.
I'd originally intended for these to be the first video I did of a complete sewing project, and I filmed the whole process, but even before I started editing I realized all the footage was awful.
Since I filmed it in the winter there was very little daylight, and all I had was one trouble light and my ceiling light, both of which are usually behind me when I'm working in my sewing area, so everything was grainy and murky and shadowy, and made even worse by the fact that it was mostly black and white fabric. It's no good making a sewing video if people can't see the actual sewing clearly. Adding my bedside lamp only made things a bit more yellow with extra shadows.
I also wasn't happy with the fit. I'd made the pattern by just extending the bottoms of my
late 18th century breeches pattern, and hadn't considered that they'd fit differently once they were longer and looser. The front looks ok but there are a lot of unsightly diagonal wrinkles on the back.
So I threw out all the video clips of them, but I have since gotten
a big light with one of those umbrella diffuser things, so now I can film when it's dark out and have footage that doesn't look like garbage! I expect I will make a pants sewing video someday, though I'm not sure when.
Because this was the first sewing project I filmed, I forgot to take any still photos of the process. I still don't think I have a thorough post on pants construction, oh dear!
 |
| My goodness, these are dusty. |
 |
| More awful lighting :( |
I still have some more 2021 garments to blog about, but hopefully I'll catch up soon and post my year in review!


 After the pockets were done I lined the fronts in a plain light brown cotton. The facings are hand sewn on first, and I trimmed the extra lining out from under them.
 I sewed the 12 buttonholes through all the layers with off white cotton pearl.
 The printed panel came with little ship's wheel button covers, but I wanted mine to look like the ones on the original so I painted my own button covers on an un-printed white edge strip.
 I covered them the usual way, and sewed them on before the lining. Some footage of me sewing them on is in my 18th century cloth covered button video!
 I made my collar a bit higher than the original, and with a strip of the ship border sewn to the main fabric. It's stiffened with 3 scraps of buckram which I overlapped and sewed together.


 I didn't get pictures of it in progress, but it's just a few staggered layers of quilt batting scraps, which I basted in place and covered with a scrap of thin cotton. The fit on the shoulders isn't awful, but it's still wrinkly enough to annoy me.
 I think it'll look even better with an olive green wool I have in my stash and mean to turn into a 1790's coat someday.


 Next time I will do the welt pockets differently, and try even harder to correct the shoulders!