Hello! I'm going to make my own version of the iconic bird printed velvet robe from episodes 7, 8, and 10 of Our Flag Means Death. I'm not going to do it in the same colours, but I do want to keep the cut as screen accurate as I can.
I've made a mockup, and have drawn out my pattern diagram, which I hope will be helpful to other people who are also looking to make this robe.
 |
| Photo by Aaron Epstein |
It doesn't have much in common with 18th century wrappers, unlike the yellow one Stede wears in earlier episodes, but this isn't the post to get into historical accuracy so I shan't.
(I've got a very long guest post on the show's costumes over on Frock Flicks. Part 1 is here and part 2 is here.)
The robe is fabulous and I think it works very well for the show!
It's made of a printed cotton velvet (not silk, as Izzy mistakenly called it) and there are a number of online shops that carry the exact same design. Handicraft Palace has it on their website, as well as on ebay, and is the company the show's costumers got the fabric from.
It should be noted that their 3 yard listing is much cheaper than 3 individual yards, so even though the robe only requires about 4 and a half (unless you want to do pattern matching) it's more economical to just get 6 using the 3 yard option if you're buying from this seller.
The etsy shops Theblockprints, TheTealThread, and Godsgiftstextiles all have it.
All these places have it in a variety of other colours besides pink, and I've ordered the dark purple version for my version of the robe. Edit: My purple velvet arrived and is NOT dark at all, it's a very different shade of purple from the photos, so I'm going to overdye it.
I've been told that the way it looks in the show is more accurate to how it looks in person than the extremely bright hot pink it is on the website's photos. And that it sheds a lot of fuzz in the wash. I'll be sure to serge the edges of all my pieces before sewing, even though it'll be fully lined. I don't want any internal fraying to fill the hem up with lint.
If you're looking for a more budget friendly option, or dislike velvet, Theblockprints and Handicraft Palace both carry the same pattern printed on a smooth plain weave cotton.
Hannahgreenecostumes and heathervanderstitch on instagram, who worked on the costumes, have both posted about the robe and here's what they said about it in the captions and comments:
"Lining is a fuchsia matka from Sai Silks in NYC with vintage tassels from @westerncostumecompany."
"I started with a traditional kimono pattern draft and added a box pleat at the back neck because costume designer Christine Wada wanted more movement around the feet, but not be too baggy on the shoulders. I also had to add shoulder seams to keep the birds facing up."
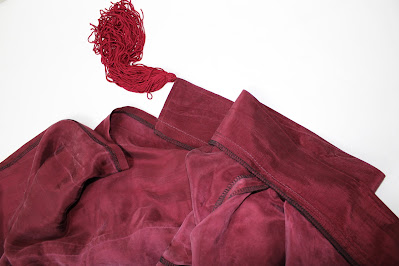
"The tassels are stitched to the corners of the sleeves and the corners of the neck band. There are 4 total."
"I don't think it had any beading, I'm almost sure it was a thread tassel."
"The piping is actually a bright orange dupioni and the lining is fuchsia. Initially the robe lining and piping were all going to be either the fuchsia or the orange, but when we did stitching samples to determine the size of the piping, the fuchsia didn't pop well against the fabric. The orange however wasn't as cohesive with the outer fabric, so we used both.
"@shizenbeauty did a great job of getting that exact 1/8th" piping! I swooped in at the end and stitched on those great tassels."
 |
| From Hannah Greene's instagram. You can see the inverted box pleat quite clearly here. |
After having had a quick look at some sites, the pink silk matka I've come across has been awfully expensive, especially for the rather coarse texture it is. Personally I'd want something more slippery for a lining, like satin, or perhaps taffeta (which is maybe too crisp for the lining of something so drapey, but will soften up if you wash it).
There are definitely lots more pink lining fabrics out there, but I haven't looked very hard because I'm not looking to buy any, and this post is more about the patterning.
 |
| A good view of the piping. |
We don't get any good clear shots of the upper back in the show, but you can kind of see the pleat here.
They've done some pattern matching, and you can see the two red flowers are in the same place on the neck binding.
Not many good views of the tassels, but you can sort of see them in a few shots when Ed is wearing the robe.
The tassels appear to be made partly of threads in the same shade of pink, with a cap of what looks like a dull tarnished metallic gold, or maybe just brown.
 |
| We can see here that it's about ankle length on Ed, and he's a little bit taller than Stede (when Stede isn't wearing heels). |
 |
| From Hannah Greene's instagram. |
 |
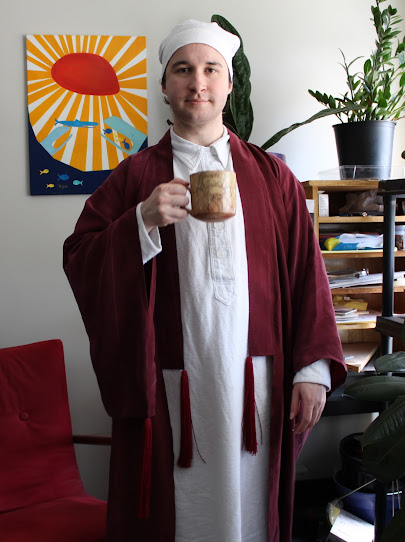
| Here it is with my fish print flannel nightgown. |
Comparing it to the original, the one big difference was that my neck binding was about 3" too short. The 9" tassels I used ended at just the right level though, which means that for the final robe I'll do 6" ones.
After adding the extra length and accounting for seam allowances, and the necessary seams at the top of the sleeves and CB of the neck binding to account for the nap of velvet, here's roughly what my pattern looks like:
 |
| Not up to my usual standards, but still wearable. |


Thank you so much for this! I was nervous to try making this but your work has made it so much more doable. Can’t wait to try it now.
ReplyDeleteYour review on Frock Flicks made me want to watch the show! Your robe is going to be awsome. I really like the mock up too.
ReplyDeleteHi! We've been pouring over this robe in the OFMD cosplay group for months now, there seems to be an almost impossible to see rim of piping around the armhole on each sleeve too- it doesn't extend past the opening to encompass the full sleeve though. Many thanks for the differences in print breakdown, and the diagram of how to fix the inverse box pleat in place- very useful! I can't wait for the next part of your costume review on Frock Flicks, the first one was a delight! Lovely balance of enthusiasm for the show and historical breakdown. Cheerio!
ReplyDeleteThis is amazing 😍
ReplyDeleteI’m impressed by the drape of your rayon version! It looks like the tassels were the right call. I bet it has excellent movement too.
ReplyDeleteThank you so much for this! Do you happen to have any tassel sources, for those of us uncertain about making our own?
ReplyDeleteThis is really helpful! I'm very familiar with standard kimono construction (I do SCA reenactment and that's my focus) and was planning to approach this similarly, but there are enough little differences that seeing your take on it has really helped. (For one, the neck opening is quite a bit wider than standard, but that makes complete sense!)
ReplyDeleteI'll be lining (and piping) mine with teal-colored Thai silk, kind of a taffeta weight, because I live in Bangkok and silk is cheaper than good linen here. :)
Thank you so much for the diagram and explanations ! I decided to make the velvet blue-green robe worn briefly by Ed near the end of the 2nd season, though it's way less seen. Did you end up making the final version of the robe ?
ReplyDeleteI started it, but it's still on The Pile! I have been working through The Pile a lot this year, so I will finish it eventually.
DeleteIt would have been super fast to sew up, but unfortunately I got the purple version of the fabric and it arrived bright and horrendous and nothing at all like the nice dark plum in the photos. I overdyed it with red and it came out a lovely burgundy, but the dyeing made the pattern much lower contrast, so I decided to add a bunch of beading to parts of the print to make it stand out more, and I haven't got much of that done yet. Someday! Hopefully this year, but we'll see!