
Part 1 of the written tutorial covered the measuring & cutting, and this part will cover the construction.
Intro, Video, & Hand Sewing Links
Tutorial part 1 - Pattern & Cutting
Tutorial part 2 - Construction - You are here!
First we need to do a narrow hem on the front slit. I do a double fold of about 4 mm, and then pin and baste it. You'll have to taper the hem down to nothing at the bottom, but don't worry about the raw edge, it'll be covered up soon.
With stiffer cotton fabrics you can get away with a lot less basting, but since this is linen and is a bit wiggly, I'm going to be doing a lot of hand basting on this shirt.

If you hate hand basting, I understand, I used to hate it too. But I have come to love it! It's so useful! It makes my narrow hems and felled seams so much neater, especially with more difficult fabrics.
 Then you can machine sew the hem. I usually use polyester thread for my coloured shirts because it's much easier to find exact colour matches. I use a pretty short stitch length, just a bit longer than a millimetre.

When going around the bottom, just stick to the edge as closely as you can. Then pull the basting out. I usually take it out as soon as I've sewn the thing it was holding.
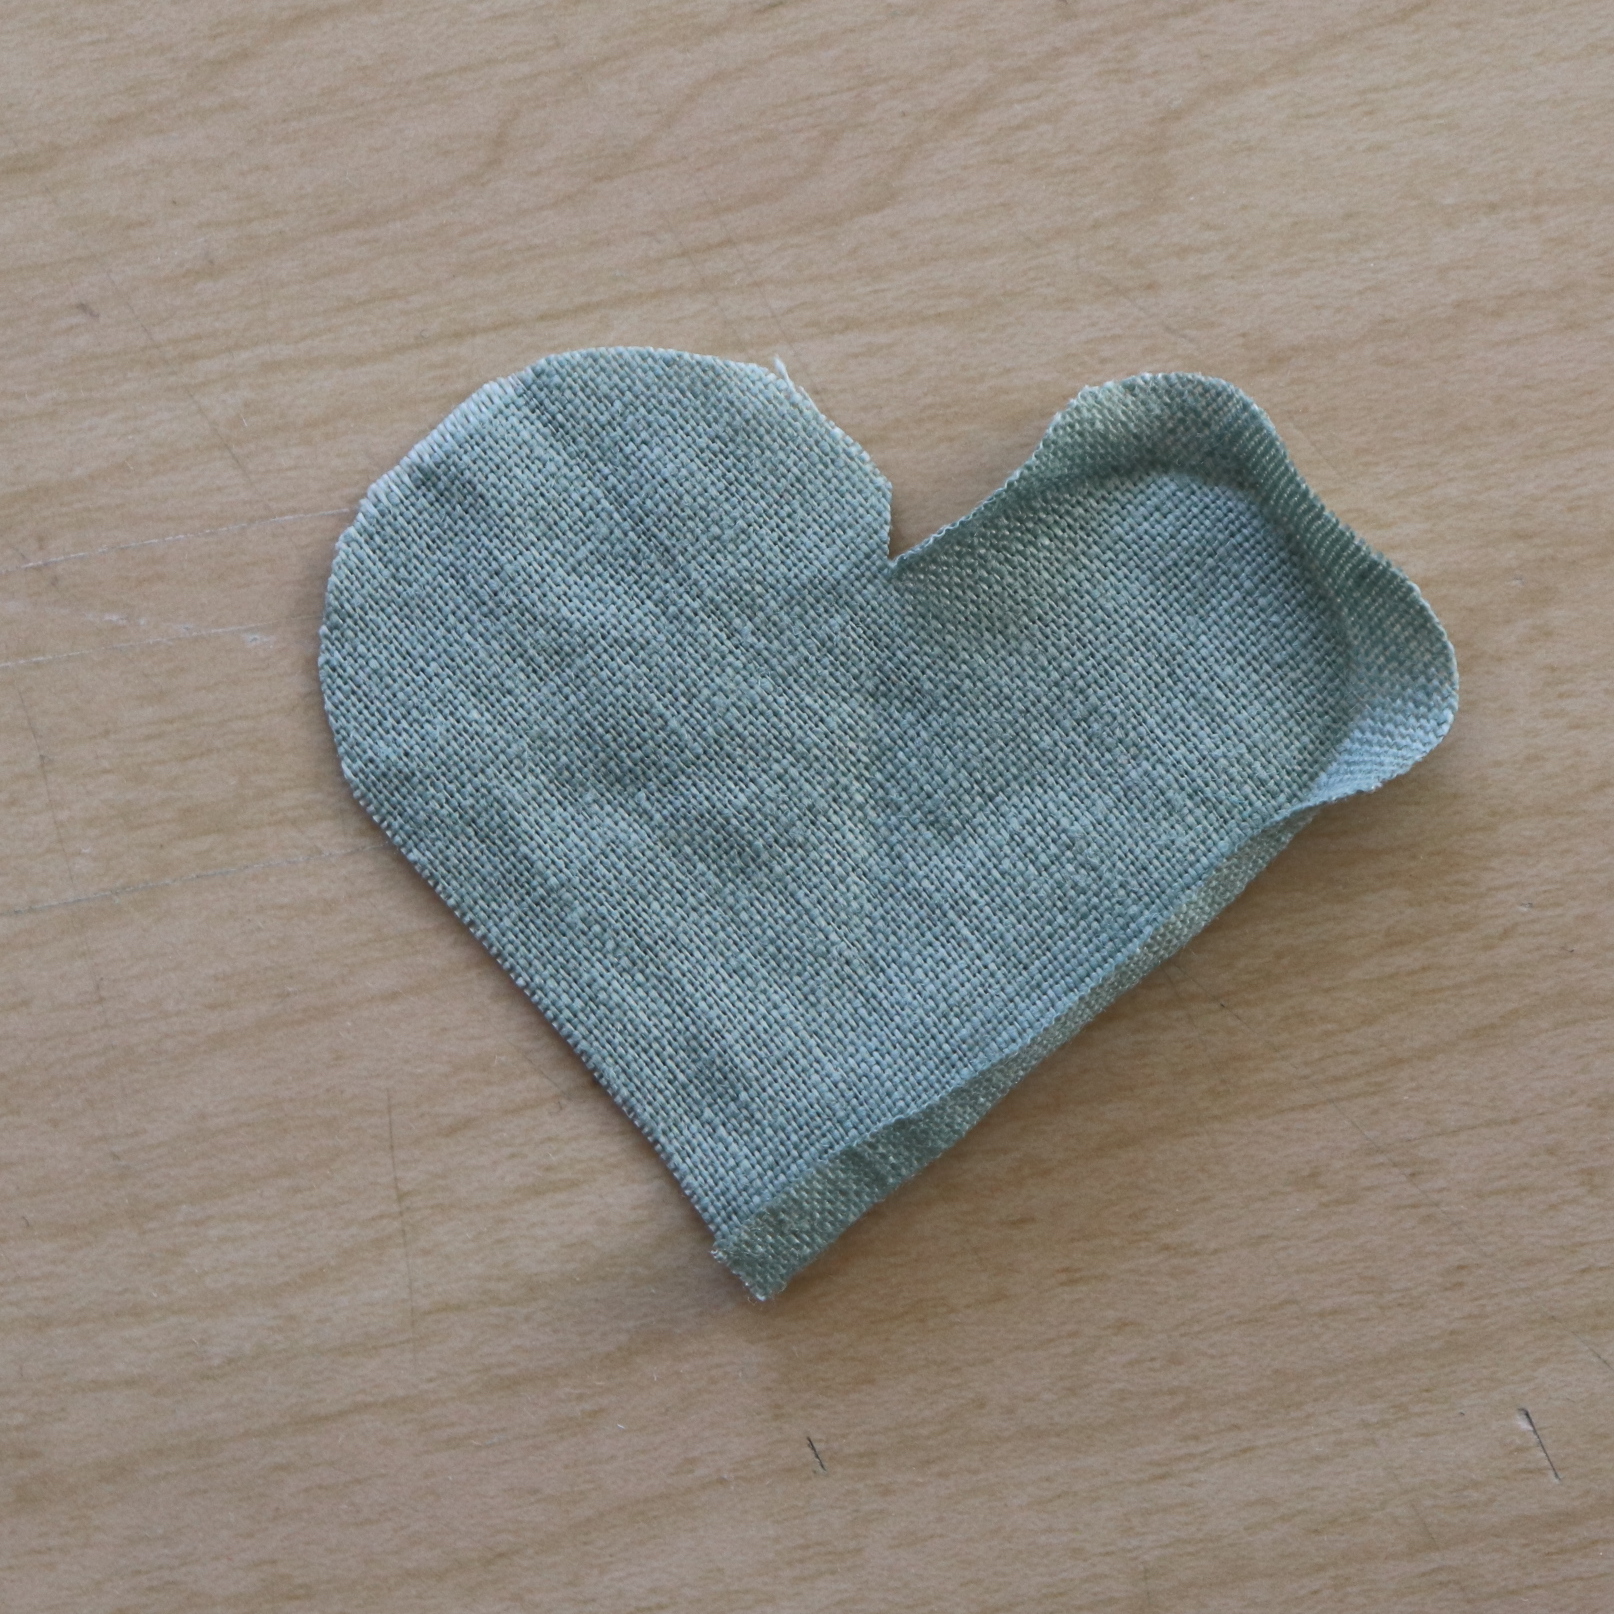
 The heart patch goes on the inside of the shirt, after you've folded all the edges in. Creasing the curved parts with your thumbnail helps with this. It's easy to fold things by hand with linen, since it holds creases really well.
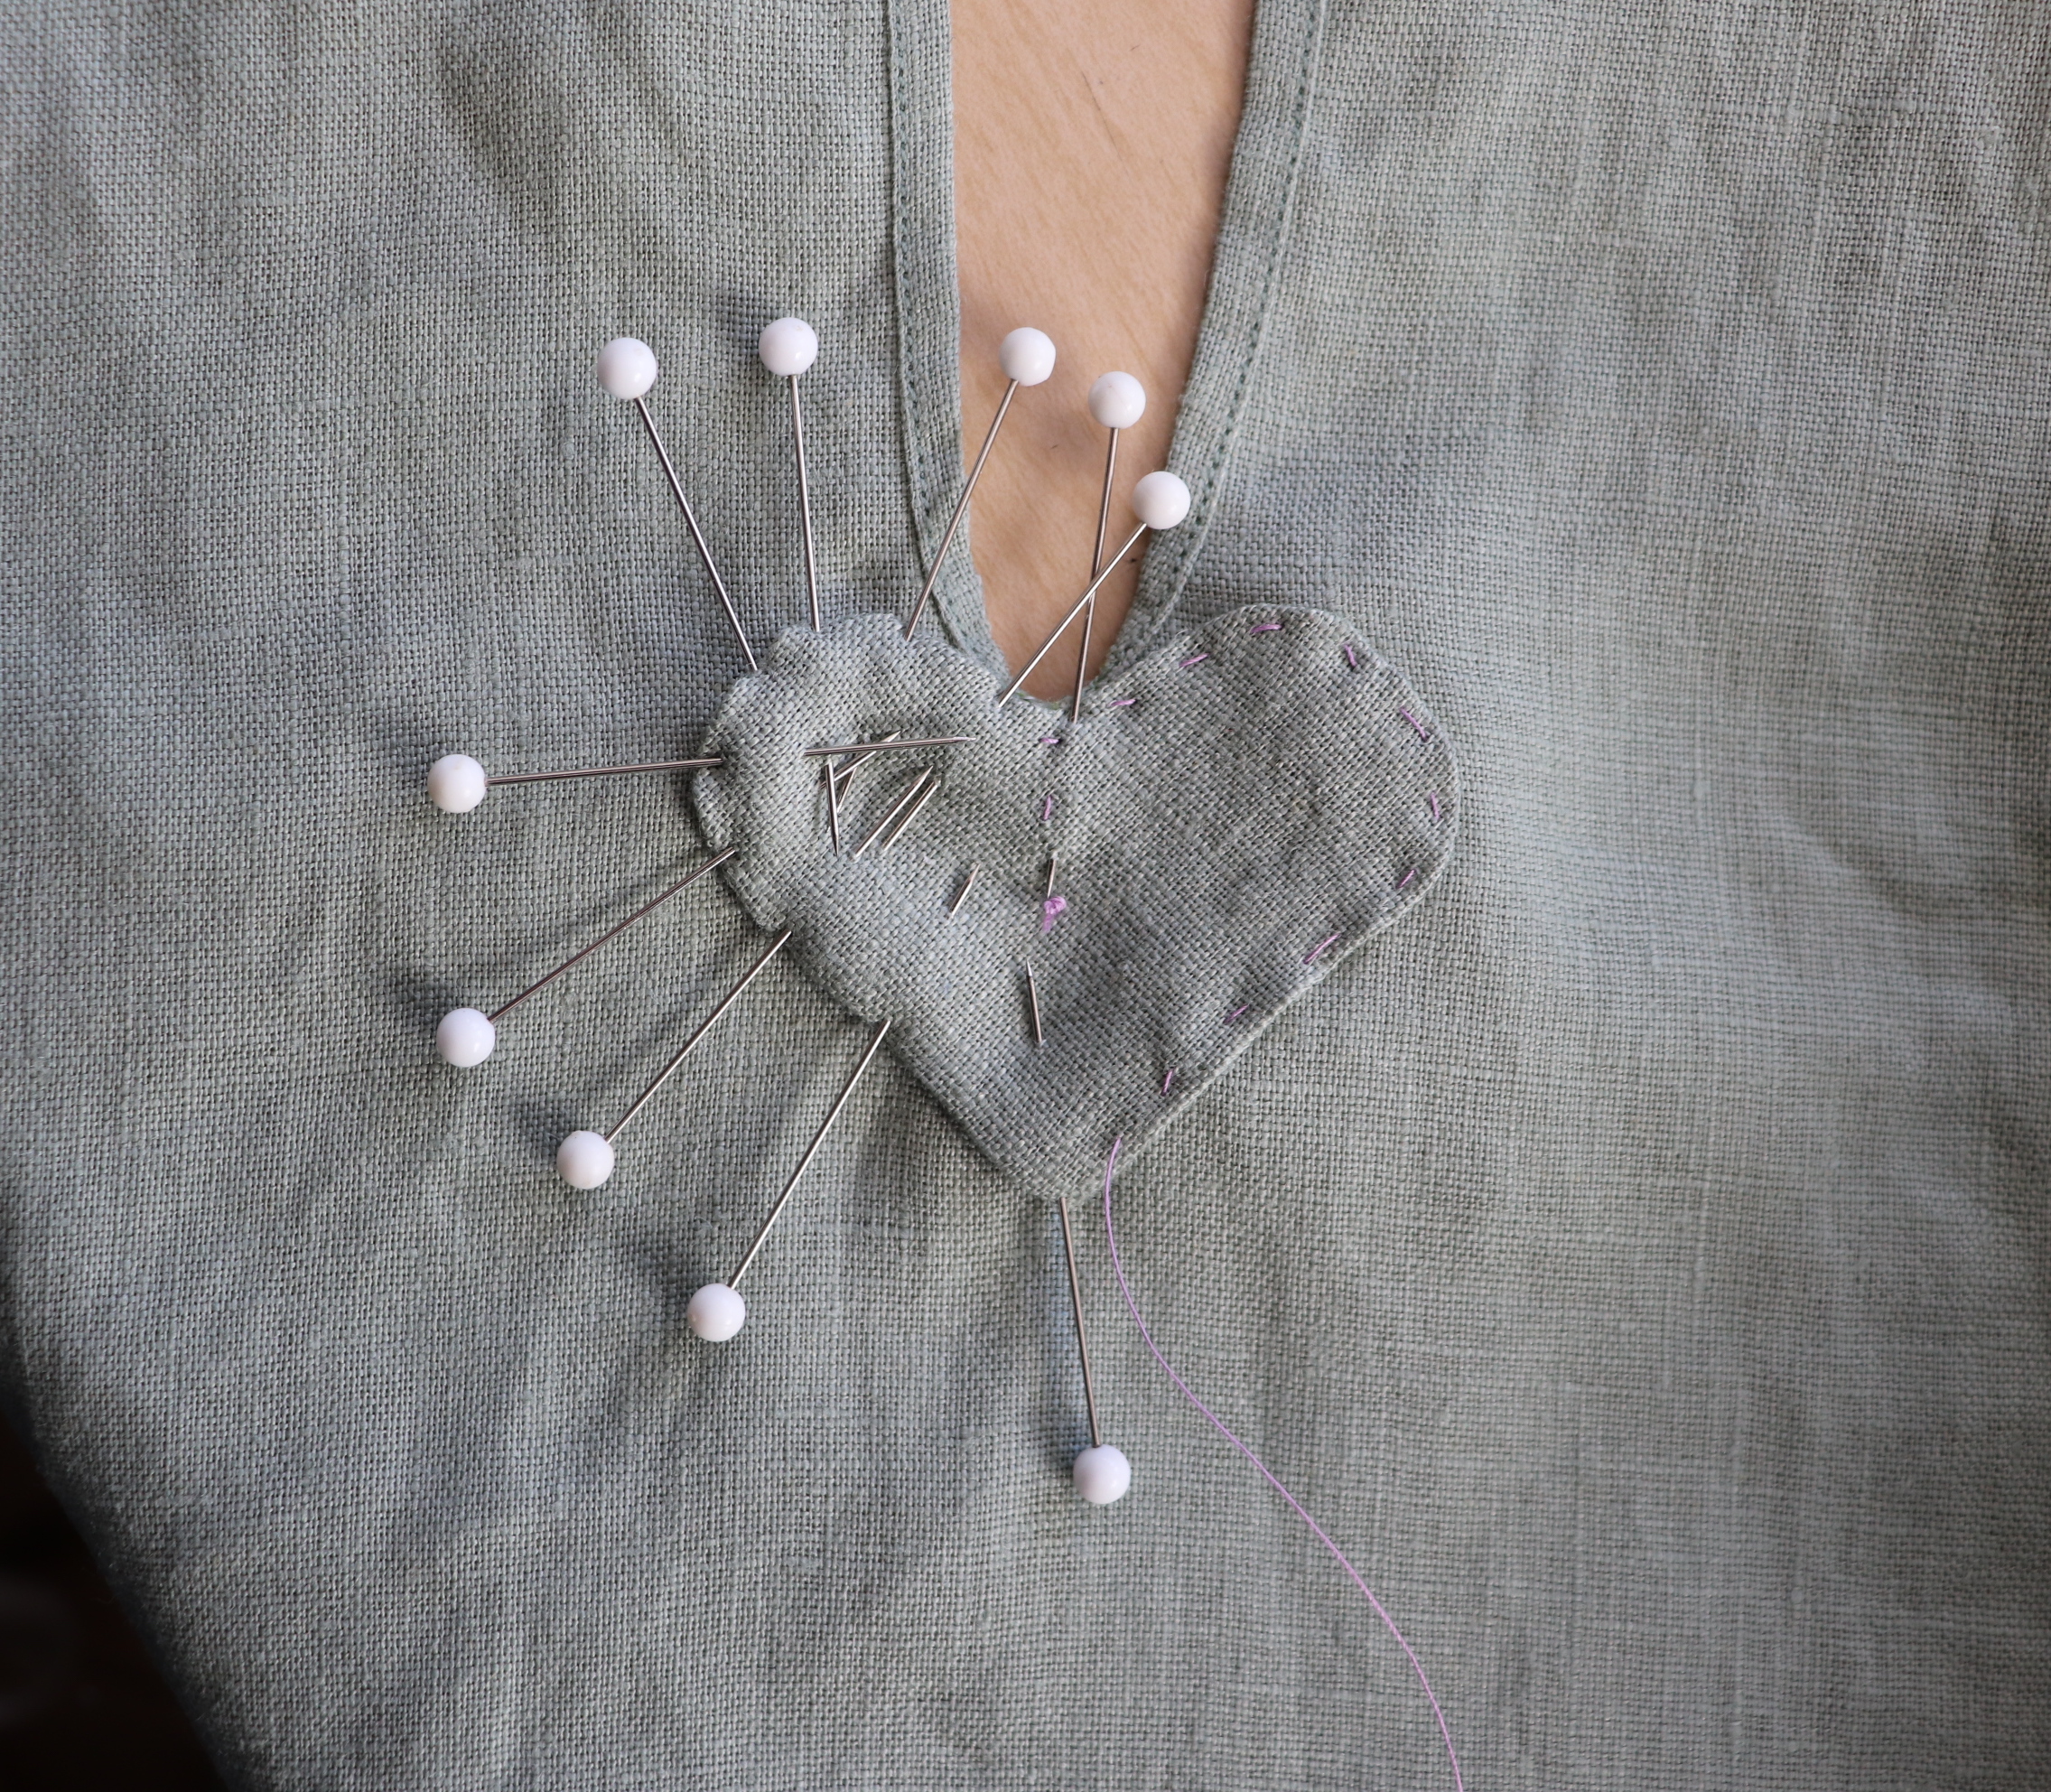
 With the shirt body spread flat on the table, hem sides up, pin the heart on as centred as you can get it and then baste it on. The indent at the top should be even with the bottom of the slit.

If you baste nothing else on this shirt, baste this part, it's so small and fiddly and doing it with just pins would probably not turn out as well.
 Topstitch it in by machine, leaving fairly long thread tails. This will require a lot of careful pivoting, and I use the hand wheel for most of it.
You can go around once if you want, but I usually go around twice, the second time a couple of mm further in. Leave long thread tails when you finish the seam too, so you can tie them off by hand and bury the ends under the heart.
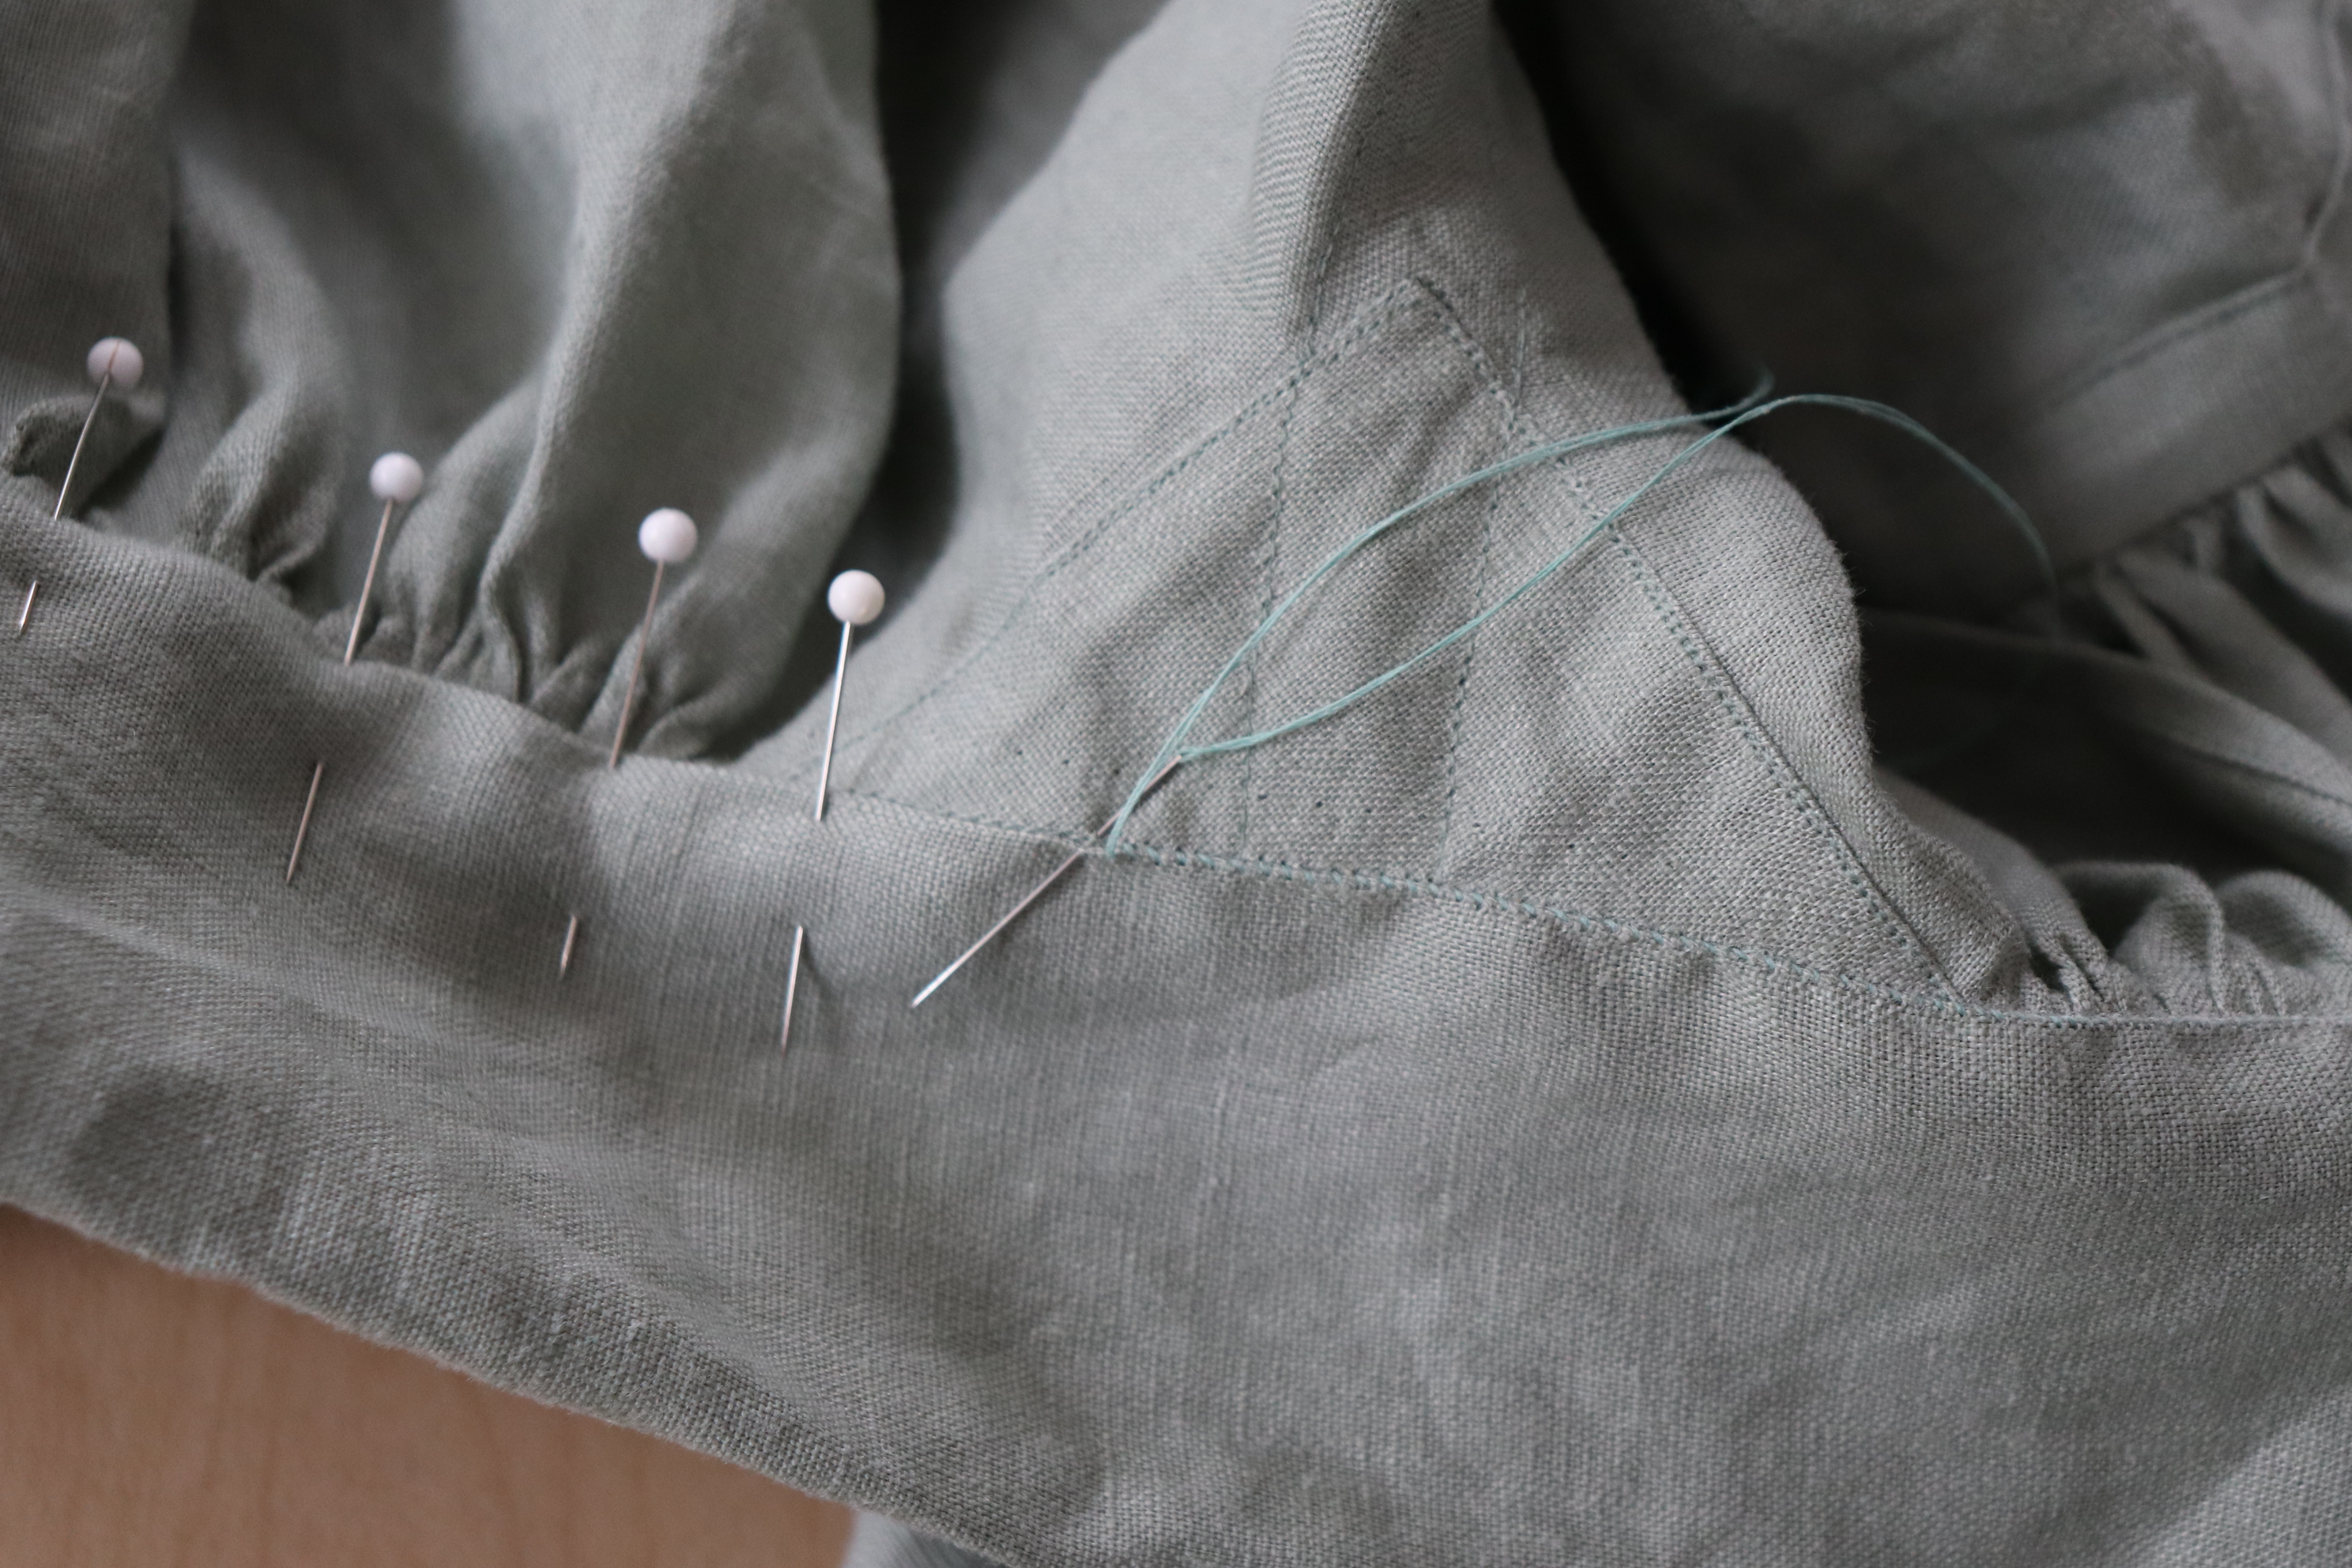
 Now you can cover up those little raw edges at the bottom with buttonhole stitches. I use cotton pearl or crochet cotton for this, which is also what I use for most of my buttonholes.

I sometimes have to settle for a colour that's not very close to my fabric, because the range Fabricville carries is very thorough for some colours and pitiful for others. (They don't have ANY grey pearl?!)
I wax the very tip of the thread to help it stick in the hem before starting.
 I start the buttonhole stitches about 1 cm up from the bottom of the slit. When you go around the very bottom you should catch both the edge of the slit, and the heart, finishing all the raw edges there off with the buttonhole stitch.
 Now it needs a bar tack, to reinforce it more, and to prevent it from gaping as much. It should be a bit closer to the bottom than the top of the buttonhole stitches, because if it goes right at the top of that section then you'll have a small weak hem right next to a sturdy bar tack and it's more likely to wear out.
 Sew back and forth a few times to create a little clump of threads, and then do buttonhole stitches on top of that clump.

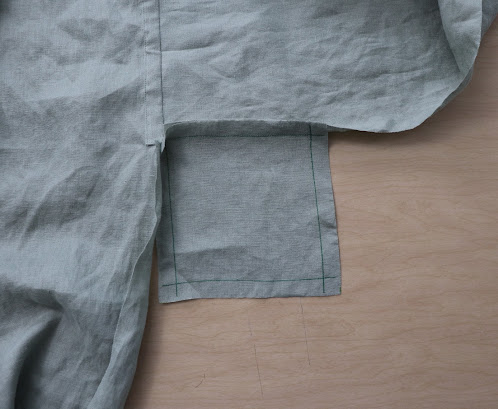
 Pin it onto the outside of the shirt, lining up the middle of the square with the point at which the front slit will end.
 Sew along it with a very small stitch length, and cut the rest of the slit open.
 Turn it to the inside of the shirt and press it.
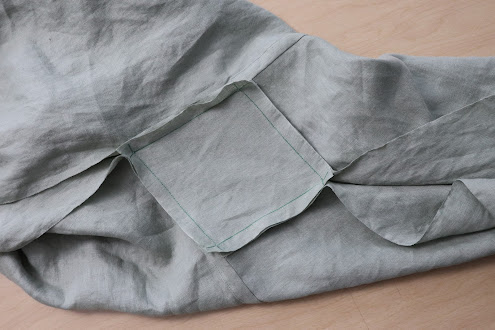
 Then fold in the hem and baste it, before folding in all 4 edges of the square and basting them too.
 You can now machine sew down one side of the hem, stop and turn around and sew once or twice around the whole edge of the patch, and then continue up the other side of the hem.


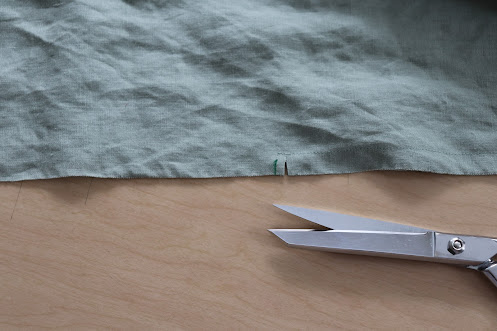
If you want to do a diamond shaped patch instead of a heart one, those are even easier to sew on by machine! You will need to leave at least the bottom few cm of the front slit closed when cutting the shirt body.
Cut a square of about 4 cm and mark a line going from one corner to the middle. Mark a curved V shape on it, making the distance between the top ends the V four times more than the width your narrow hem will be. I want a 4 mm hem, so these are about 16 mm apart. I've also marked my stitching line so it ends about 4 mm in from the edge of the fabric, because we need to be able to turn that edge under.


You can also do the hem first if you want to, and then do the patch second, but it's more efficient to do it all in one go.
 The buttonhole stitches are optional here, because the seam there has finished and reinforced that edge, but you should still do the bar tack to reinforce it and prevent gaping.

 Take the one corner you did not trim and pin it onto the inside of the shirt, about 1 cm in from the tip of the neck opening. Overlap the edges by about 8 mm and pin them on too, tapering it to end right on the edge for the other 2 corners.
 Topstitch them in by machine, as closely to the edge as you can get, and then fold the other half of the gussets to the outside.

 Then topstitch them down. Since we did the inside halves first, only one line of stitching should be visible on the outside.
 Press in the long edges on the shoulder strip and pin them onto the shoulders like so. The shoulder point should already be marked on the body, and I like to fold the neck gussets in half to mark the middle of them too.
 I find it annoying to sew these with just pins, so I always baste them on.


Now it's time to sew the shoulders.
If your cutting layout required you to cut the body in 2 pieces, sew the shoulders closed the same amount you would have left open if you'd cut it all in one. The pieces much be wrong sides together so that the seam ends up on the outside. This is because that place will be covered up later with a shoulder strip, so having those seam allowances on the inside would make no sense. I recommend a small seam allowance, maybe 5 or 6 mm, so you don't have to trim it to keep it hidden under the shoulder strip.
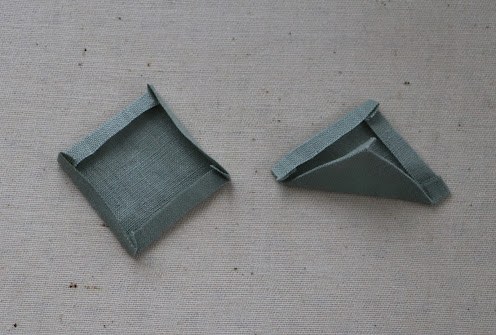
Press the edges in on the shoulder gussets. I do about 8 mm.
Only one of these corners (the one sewn to the inside) will be exposed in the final shirt. The one opposite that will be under the shoulder strip, and the other 2 will be inside the collar.
To reduce bulk, I unfold 3 of them and cut the entire corner off the seam allowance.


Make sure it overlaps the seam of the first half by just a teeny bit.
I like to baste the second half so I can be sure it's neat and even. You can trim a little ways into the 2 folded corners if it's not sitting nicely.


Topstitch them close to the edge, much like the shoulder gussets. It's easiest to sew straight across the neck hole from one side to the other. Trim the ends off if they turned out too long.


Time for gathers and attaching the collar. Fold the centre back portion of the neck opening in half to mark the middle, and re-mark the middle of the shoulders if necessary.
Now switch to a very long stitch length (I do 3.5 mm, which is the longest my machine can do) and do 2 lines of stitches around the entire neck hole. I also switch to a strong polyester thread if I'm using cotton for the main construction.Since I want my collar & neck opening to have a 1 cm seam allowance, I'm doing the first row of gathering stitches 5 mm in from the edge, and the next row 1 cm further in than that, so each will be about 5 mm away from either side of my seam.
Doing 2 lines of gathering stitches like this makes much more even gathers than just one.
(While you still have the machine set up for gathering, sew the same 2 rows of stitches on the middle 2 quarters of the tops of the sleeves, and set them aside for later.)
 I used my clear grid ruler to mark 1 cm seam allowances on each end of the collar, but I don't always do this.

Fold the collar in half, and half again to mark the quarters, excluding the seam allowance at the ends.
 Pull on the gathering threads, making sure to pull the threads on the same side of the fabric at each end.

I cut the thread in the middle of the shoulder gussets so I can pull on those ends too, since the gussets won't be gathered.
Match up the quarters on the neck hole to the quarters on the collar, and pin it in place, squooshing the gathers around until they look evenly distributed.
 I don't like sewing over pins, but I also like leaving pins in when I sew gathers, so I go over them first with a fairly long stitch length (about 3 mm) and then again with a normal small one after pulling out the pins. I sew from the un-gathered side both times.

In between the two lines of stitching it's good to check to make sure there's no horrible wonkiness, because it's easier to fix before doing the smaller stitches.

 I don't usually do this on my shirts because the fabric is normally not wide enough, but I do all my nightgown shoulders this way.

If your shirt body is cut very wide you may want to put some of the gathering in the shoulder gusset.
For this, you'll have to start before adding the gussets, right after finishing the front slit. Mark halves on the front 2 portions of the neck opening, and quarters on the back. Sew 2 lines of gathering stitches on each of these 3 sections separately.
Pull the thread tails on the ones nearest the shoulder point to gather up those halves/quarters down to the size of the gusset, then sew it in as usual. I like to cut the tails off after sewing on the first half, so I don't have to try digging them out from under the second. Now you can use the remaining thread to gather the rest of the neck into the collar.


Press the collar up and away from the body, press the long edge in, and fold it right sides together, making sure the edges are even.

 |
| You can just barely see that I've trimmed off a small corner of seam allowance, but nothing else. You'll need that front edge seam allowance to add stability to the buttons. |
Now it's the best and most sensible time to attach the sleeves.
I have seen far, far too many people sew up the sleeves and body and then attach them afterwards, and it makes me sad! It's so much easier and more efficient to attach them first!
(This does not apply to tailored things, but very much does for anything unstructured and unlined with a sleeve and side seam that line up, like shirts and shifts and nightgowns.)
All the modern button ups I alter at work have the sleeves sewn on first and felled, and then the side and sleeve seams closed up as one. The late 19th-early 20th century factory made shirts and nightgowns I've examined are done that way too.
 The middle point of the sleeve should already be marked, and the gathering stitches already sewn while you had the machine set up to gather the neck hole.

lay the body wrong side up on the table and make sure the shoulder point is clearly marked, then mark the area you will attach the sleeve to. I sew my sleeve on with a 42 cm seam, which means I need to make a mark 21 cm away from that shoulder point on either side.
Gather the sleeve down, not to the distance between those marks, but so that 1 cm of sleeve sticks past either side. Pin the sleeve to the right side. The marks are where the stitching ends, and we'll need some seam allowance protruding past that. They're on the wrong side because it's easier to stitch in a straight line from the side with no gathering.
 Most of the time my sleeves aren't huge enough to have much to gather, and the gathers look better if they're fairly full and concentrated near the top of the sleeve.

Sew it on, remembering to stop at the marked lines on the body. I use a longer stitch length to sew over the pins on the gathered section, just like I did for the neck, but I don't need to go over it a second time because that'll happen when we add the armhole binding.
 Since the armhole binding was cut 2 cm longer than the seam I sewed my sleeve on with, it fits perfectly on top of the end of the sleeve. Sew it on so that the sleeve is sandwiched between the body and the binding, stopping at the same place so the binding also has 1 cm of seam allowance protruding on either side.

Press that end of the binding inwards. Clip into the sleeve and body seam allowances, stopping at the end of the seam. Clip into the sleeve seam allowance again from the side, so that you've removed a tiny square. Don't cut anything off the binding.
 To reduce bulk from the gathers and shoulder strip, I like to trim off about half the seam allowance from the sleeve and body, but I don't trim any off the binding.

Press the seam so that the binding is facing in towards the body and the sleeve is sticking out away from it.
 Turn the long edge under (the short ends should already be folded under because you pressed them earlier) and baste and topstitch it down. For some reason this bit always puckers and wrinkles up if I don't baste it, even though it's cut on the straight of grain.
 At this point the whole thing should look like a giant +
 Before sewing in the underarm gussets, it's helpful to mark seam allowance on them. I do 1.5 cm.
 I stick a pin right through the corner where those two stitching lines meet and then I can line it up accurately with the corner of the armhole binding, and I use another pin to pin it in place before taking that one out.
 I sew the gusset in one side at a time, stopping at the corners of the marked lines so that I still have my 1.5 cm of seam allowance free at each corner.
 On the third side, make extra sure that you're sewing it to the other side of the same sleeve, because it is possible to mistakenly close up the back as if it were a sleeve.


(That only happened to me once, but was very frustrating. And make sure you're putting the things right sides together, because I also once did one inside out.)

 On the side seam you also need to leave a vent, so the shirt tails go around your legs more easily when tucking them in. I usually leave 30 cm open on mine, but it'll differ depending on how long your shirt is and where your hips are in relation to the hem. You may want to try it on to see what a good height for it is.
 Sew those seams closed. I use at least 1 cm of seam allowance, or up to 1.5. As long as there's enough material to fell, it's fine.


Fold the corners of the gussets up and out of the way before you start pinning the side and sleeve seams.

On the end of the sleeve you will need to leave a vent for the wrist. I leave 12 cm open on mine, which is a good length for me to roll up my sleeves, but yours may be different depending on the thickness of your arms.
If the two sides of the end of the sleeve are slightly different lengths, which they often are, measure up from the shorter one.


On the sleeve seam, clip into the seam allowance about 1.5 cm up from the end of the vent.
 On the side seam, make the clip much closer, about 5 mm up from the vent.
 Trim the side and sleeve seams in the same way. On those it doesn't matter which side you trim. (Unless one is more scruffy or shorter than the other, in which case trim that one.)
 On the sleeve seam allowance, remove a tiny triangle from the corner of the one you trimmed, right by the end of the wrist opening.
 It's easier to press these seams over a sleeve board, and I like to press them open with my thumbnail before pressing the longer seam allowance over the shorter one.
 I then fold the edges under and pin them.


On the side and body pieces, clip into the seam allowance right at the point of the gusset, like so.
Do NOT trim or clip anything off the gusset itself! Leave the gusset alone!!


Trim off slightly more than half on all 4 allowances of the body and sleeve pieces that are underneath the gusset.


Press and fold under the edges of the vents too. If one of the ends of the sleeve vents is too long, now is the time to trim it.
On the sleeve seam allowances, fold in all three corners by the end of the vent, so as to not have any raw ends there. (That's why we trimmed the corner off the shorter sleeve seam allowance, just so there's a bit less bulk in the way when you fold that corner under.)
 On the side seam you don't need to worry about the raw ends though, because they will be covered with gussets.
I baste these seams too, if I'm using linen. (Or voile, or anything thin and/or shifty. I don't baste them if I'm using cotton bedsheets though.)

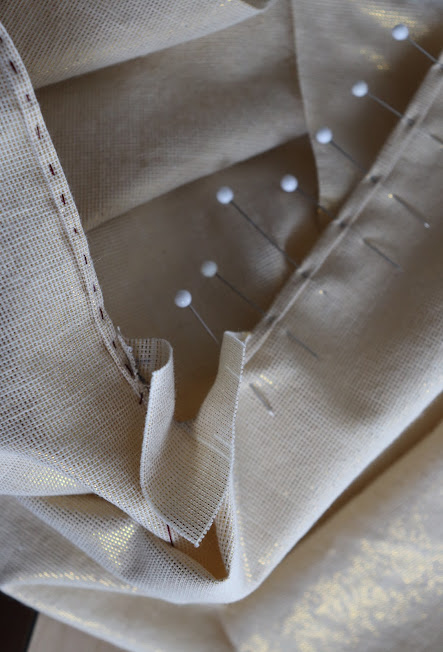
 |
| Side seam vent before sewing. |
 |
| Sleeve vent before sewing. |
On the side seam I sew from the side of the vent that's on the same side as the seam allowance, and go straight up onto the seam itself and then do the other hem separately.
But on the sleeve seam I start from the hem that's opposite the seam allowance, and go diagonally across the little folded corners, doing a backstitch along the way to reinforce it a bit. Then do the other little hem separately.
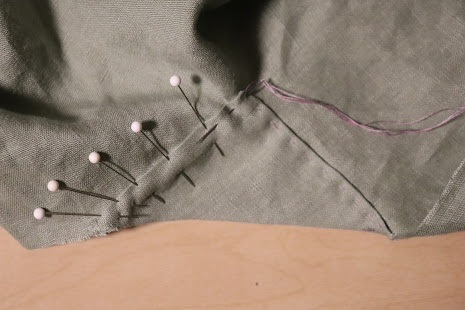
 |
| Side seam after sewing. |
This does leave a weak point where those corners intersect, but since it's on the puffy end of the sleeve it doesn't really take any strain, and I've never had it tear.
But I have had the fabric at the opening at the vent tear a few times from the strain of rolling up my sleeves, so that bit can be reinforced with a bar tack.
 Remember to take all the basting out after you finish felling these seams.
 |
| Sleeve vent after sewing. |

Now that those are done, we can fell the gusset! Put it over either a tailors ham, or the pointy end of your ironing board. Press the edges outwards, and fold them under and pin & baste as usual.

I stab stitch the corners while basting to make sure they're nice and secure.
When starting seams in the middle of something I always worry about the thread tails getting sucked into the machine and causing a big snarl, so I do a couple of stitches a few cm away from the seam to keep them out of the way.
 Once those are sewn down, the edges of the gusset should have nicely covered up the ends of the sleeve and side seam.
 Now the smallest gussets can go on. Press about 5 mm in on all the edges, and fold them diagonally like so. You could cut them a little bigger and fold them perfectly in half if you want, but I think it's nicer if it's off centre.
 Then pin, baste, and topstitch them onto the tops of the side vents, again lining up the corner with the seam itself and not the felled edge. Make sure that the top of the gusset is high enough to cover all those raw ends, and the bottom is high enough for the smaller side of the folded gusset to overlap the vent opening. If you've clipped the seam allowance too high up you may need to make a bigger gusset.


The vent ought to be splayed open so as to be parallel to the edges of the gusset.
 Topstitch it on, going around the outer edge on the inside of the shirt, and on the inside V shape on the outside of the shirt.

This does leave 4 spots of visible backstitching very close together, so you can tie off the threads by hand if that bothers you, but I don't because I always tuck my shirt in.
For the hem, I just double fold it by hand and sew it like all the other narrow hems. I always baste it first with linen, because it's on the cross grain and therefore has a bit of stretch.
 Now there's just the wristbands to sew on. Just like the collar, I marked a line 1 cm in from either end, and folded and marked the quarters on both the wristband and the end of the sleeve.

Unlike the collar, I drew a stitching line 1.5 cm in. (As I talked about in the cutting post, I like my wristband seam allowances to go all the way to the edge to make it sturdier, so this is one quarter the width of my 6 cm wristband piece.)
I don't usually mark my wristbands with the stitching lines, and after having done it I realized it would have been easier to line things up if I'd put the long stitching line marks on one side of the piece and the short quarter marks on the other, but oh well.
 Run the usual 2 lines of gathering stitches along the end of the sleeve, and gather it up, matching the quarter marks on the sleeve to those on the wristband.
 Just like the collar, I sew along the gathers first with a long stitch length, and then a shorter one after I've taken out the pins.
 Press the wristband so it's sticking out away from the sleeve, and press the long edge in. It should almost meet in the middle with the other seam allowance, but not quite. (I tried putting them edge to edge in the video and it made the edge of the wristband a bit bumpy, so 3 mm apart is better.)
 Fold it right sides together, with the edges even with each other, and sew the ends up. I usually like to trim off the corners of the seam allowances, and sometimes half the seam allowance on the very end, but for a lightweight gauzy fabric I leave all of it because it needs all the structure it can get.

It's like making a pintuck, but it goes on the inside when you turn the wristband right sides out, so you have the added stability of a seam there without the fuss of having to cut it in 2 pieces.
Turn the wristbands right side out.
And now the wristbands (and the collar, if you didn't do it earlier) can be finished off with whipstitches.


Another thing you can do to make it sturdier if you're working with a very thin fabric is to sew the wristband on with 5 mm less seam allowance, and then fold it perfectly in half wrong sides out and sew 5 mm in from the folded edge. I use a zipper foot for this so the gathers don't get in the way.
 |
| Bad video screenshot because I don't have a photo. |
 |
| A bamboo point turner is helpful. |
(But if you want to finish the insides by machine, I have instructions for that in part 3, since it's how I did the wristband for the wrist ruffle sample.)
 I like to put my needle right under the machine stitches so the seam is lined up as nicely as can be.
 Now all that's left to do is buttons & buttonholes. An 18th century shirt ought to have thread buttons, but if you're doing one for a fantasy costume or your everyday wardrobe you can use whatever you want.

I like the thread buttons though, and they hold up well to washing, which is why they used them so much historically.
There are a variety of different thread buttons, and I don't want to get too much into them right now because this is the machine sewn version of my shirt method, so I'll just link some video tutorials by other people.
 |
| (Video screenshots again but I'll hopefully remember to come back and add better photos.) |
They're made over a ring, and I've done a lot for my everyday shirts with plastic rings, but on the gold shirt I tried metal rings. As the name suggests, they look like little wheels. 

 On a scrap of the shirt fabric I trace covers with a pattern that's twice the diameter of my moulds, and cut it out with about 3 or 4 mm of seam allowance.


Bird's eye buttons can be made with either a core of thread or of fabric. I've made thread ones for some shirts using thick linen yarn, and have tried a few fabric ones too, but need more practice with the latter.

For this shirt I'm using Dorset knobs, which are much rounder and have a fun little lattice over them. They're also much more obscure as far as internet resources go, which is a shame.
I get the general impression that these are more of an earlier 18th century thing, and that the flatter Dorset wheels are a more late 18th century thing, but good reference images of things as tiny and frequently covered up as shirt buttons aren't the most plentiful, so I could be wrong.
(But it does track with the way buttons, especially coat buttons, changed over the course of the 18th century. With some exceptions they tend to be smaller and rounder in the earlier decades, and then they gradually spread out like cookies in the oven, so that by the 1780's and 90's they're very flat.)
I start out by making a regular cloth covered button (which I have a separate video about).
The historical ones ought to have a mould made of horn or bone, but I'm using very cheap 1 cm resin beads. I have some bone moulds but they're much thicker and quite expensive, and these buttons are chunky enough with the thin beads in them.
2 buttons on the collar seems most common for 18th century shirts, and that's what I usually do on mine.

I used washable marker for this so it would show up in the picture better, but it took so so much soaking to get all the dark green ink out of the finished button, so try using a lighter fabric pencil instead.
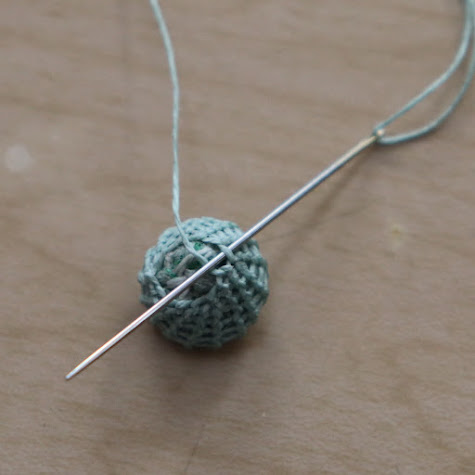
 I fold in the seam allowance and gather up the edges with a running stitch. I'm using fine linen thread, doubled and waxed. I pop the bead in and draw it closed.
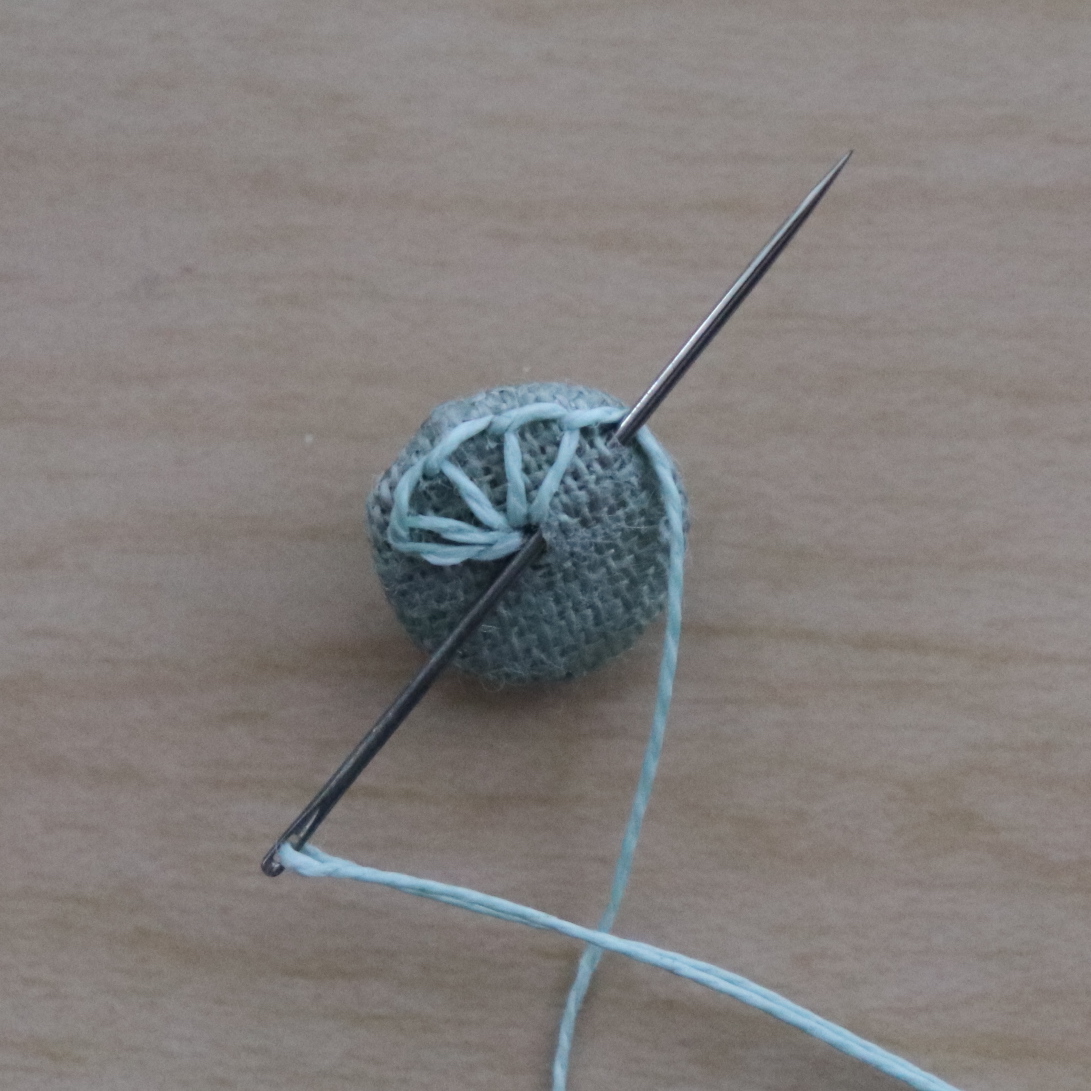
 I then sew all those little bumpies very firmly together, going across the middle each time to the bump opposite the one I'm on.
 I try to squish the gathered ends of the finished buttons into a nicer, more rounded dome shape, since I don't want the finished button to be lumpy.


If I were to use these as regular fabric covered buttons these would be the undersides, but for the knob buttons they'll turn into the tops.
 I'm using the same cotton pearl I used for the bar tacks, only because I don't have any linen thread in a remotely close colour to this. I cut a length of thread, wax it, and tie a knot in the end. Using a sharp needle I go in on the smooth side of the button (I often need pliers to get it through) and then go back down through the same hole again so that the thread is securely anchored.
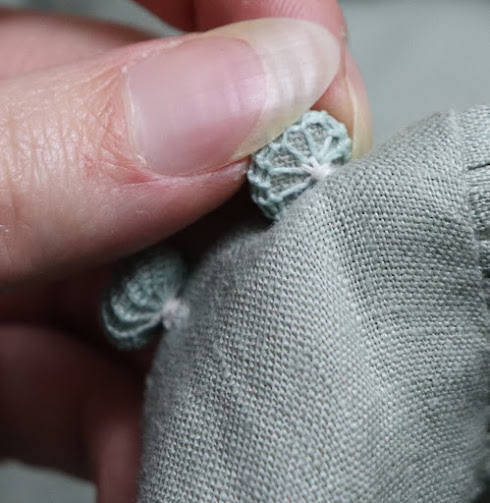
I then do blanket stitches around the bottom, fairly small and close together but not too close.

 When I need to decrease I just skip over the occasional stitch.
 Then I switch back to the sharp needle and bring the thread back to the underside and tie it off.


 |
| Go in there and then out again. |
I switch to a blunt needle so I can go between the threads without piercing through them, and start doing detached buttonhole stitch up the sides.


(Here I would like to add that if your collar comes out too small and you can't overlap it and add buttons, you could make a new collar, but you can also save the old one while still being historical! You can do a buttonhole on each end and thread half a metre of ribbon through it. This seems to have been fairly common in the early 18th century, but there are some later examples, and the latest I've seen is from 1803. I made one a couple years ago, so I'll link to that post.
You've already done the buttonholes and there are two? Well there's one example I've seen of that too! Interestingly, it has a thin cord threaded through one of the pairs instead of a ribbon.)
For buttonholes, I already have a written and a video tutorial on how I do them by hand, so I don't need to say much here. For everyday shirts I usually do machine buttonholes instead of the overcasting step, and then sew over them by hand.
It saves a little time, but also makes them more sturdy, which is helpful on such an unstructured garment.
 I do them 5 mm in from the edge on both the collar and wristbands, because I like a 1 cm collar overlap, and I find it's also a good amount for the size of my sleeve links.
 I'm sewing buttonhole stitches over them with the same DMC cotton pearl I used for the bar tacks and buttons.


Sometimes I add the bar tacks to the ends of my shirt buttons, and sometimes I don't. I did them on the teal one, but didn't on this one.

 I sewed these ones on with polyester thread because I didn't have any fine linen thread that was close enough to the teal, and my silk thread isn't strong enough to hold buttons on and stand up to washing. I use black, white, or grey linen a lot of the time though, and it's ok and doesn't show, so I could have used white here.

And it seems I forgot to take photos of the process of sewing the buttons on, so here are some more bad video screenshots.
(I will hopefully get better photos and come back and update this post at some point, but right now I'm really tired and I want to finish this dang post because I finished the video 2 days ago and I just want to publish it and be done. I can't publish it until i finish the written tutorial because I say in the video that there is one linked in the description, and I procrastinated on working it for far too long. Why are blog posts so time consuming to make. I've been working on this one all day and now it's after midnight. Almost done though, almost done, and tomorrow I can do the ruffle section for part 3.)
I overlap the collar ends and mark the buttons through the holes so I can be sure they're at the right height. I put them 5 mm from the edge, just like the buttonholes, since I want a 1 cm overlap.

Fasten the thread onto either the button or the shirt and take little stitches on the button and through the collar, until you have a nice sturdy little bunch of threads going between them.
 Make sure to leave about a 3 mm gap so you can wrap the thread around those threads to form a shank.

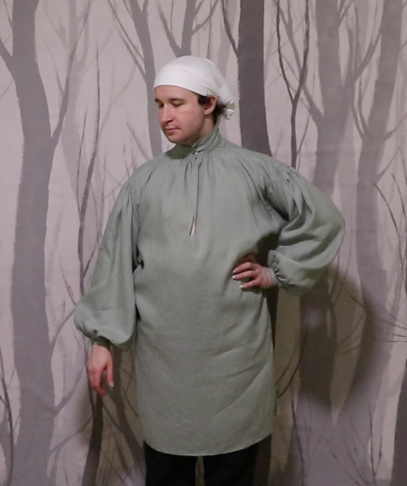
 And the finished shirt!


Here's a better photo of the finished ones on my sage shirt, which I did use the white linen for.


I should probably get some better pictures of this shirt sometime too, but hopefully this post is sufficient for now.
Intro, Video, & Hand Sewing Links
Tutorial part 1 - Pattern & Cutting
Tutorial part 2 - Construction - You are here!
I just finished making a version of this in some cotton for a cosplay!! your video inspired me to try, and the written instructions are super helpful. I'm much less meticulous in almost all of my other sewing projects, but it was fun to slow down and try to do things "right" knowing it would be reflected in the final result.
ReplyDeleteHooray! I'm so glad it was helpful!
DeleteThanks for the detailed write-up, and especially for including lots of photos of the fiddly bits! I gave up on my first shirt attempt a few months ago because I just could not work out the gathering around the neck/collar and I couldn't find any photos of how to do it online, and this part of the tutorial demystifies the exact part I had trouble with.
ReplyDeleteI agree - I'm cobbling my shirt together from multiple tutorials, and I'm so glad to have a thorough written one - I really don't like following along with videos (so cumbersome), and your steps make so much sense to me and the pictures really help. Unfortunately, my estimates for the armhole size were likely a little bit off (currently on the finishing steps, but I've tried it on), as it's a little tight on the shoulder seams, but since this was a wearable mock-up, I'm still quite happy and really appreciate your tutorial. Thanks so much!
ReplyDeleteI've been following along with both this tutorial and your video and really appreciate the effort you've put into both formats. I've only got the buttons and some decorative hand-sewing to finish off and I'll be done wheeee
ReplyDeleteLove this tutorial. In the instructions for attaching the sleeves and armhole binding, you say “lay the body wrong side up on the table,” which makes me think I should pin the sleeve to that side. When I do that, the binding ends up on the outside. I watched the video again and I notice that when you pin the arm you lift the body and pin to the outside.
ReplyDeleteMaybe add a note to the otherwise fantastic tutorial please.
Whoops, you're right! I have added a couple more sentences clarifying which side to sew the sleeve to.
Delete